Patch
187
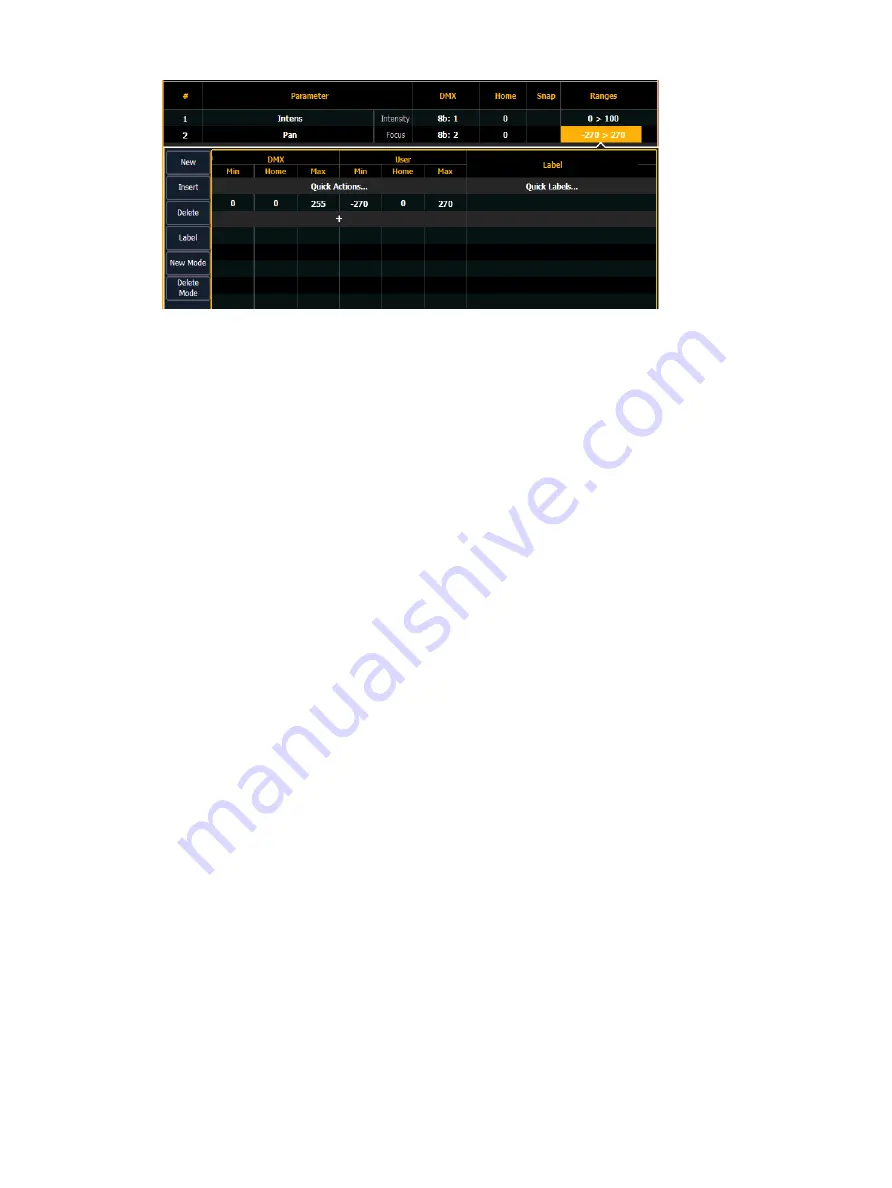
If a parameter has only one range, the values for that range will display in the range column. If
that parameter has multiple ranges, the number of ranges will be displayed. If a range is used
in a
, the range will not be in bold.
For example, if the parameter were “Gobo Wheel”, and the fixture included a four-slot gobo
wheel, you can use ranges to determine the minimum/ maximum values for each of those
slots. You can also label the slots and define the minimum/ maximum values that will appear in
the channel display for that parameter.
To define the range values individually for any parameter:
1. Use the [Page] keys to navigate to the parameter that you want to add ranges to.
2. Click on the range. The range window will open.
3. Determine the total number of slots required by the parameter. Be sure to include
“open” slots when needed.
4. Press {New} or {+}to add ranges. Repeat this step until you have as many slots as are
required by the number determined in step 3.
5. Use the [Page] keys to select the range and field you wish to edit. Fields are:
•
DMX Min - enter the minimum value (0 through 255) for the range slot you are
defining.
•
DMX Home - enter the default value (0 through 255) for the range slot you are
defining.
•
DMX Max - enter the maximum value (0 through 255) for the range slot.
•
User Min- enter the value that will be displayed to users (for example, what will be
displayed in the live summary view) when the slot is at its minimum value. Value can
range from -32767 to 65535.
•
User Home- enter the value that will be displayed to users (for example, what will
be displayed in the live summary view) when the slot is at its default value. Value
can range from -32767 to 65535.
•
User Max- enter the value that will be displayed to users when the slot is at its
maximum value. Value can range from -32767 to 65535.
6. Press {Label} to add a label to any range slots. These will appear in the encoder display
and ML controls when the related parameter is displayed for the new fixture.
7. Press {Patch} when you have finished editing the ranges.
To delete a range value, select it and press {Delete}.
Quick Actions
Quick Actions provides tools that allow for the creation of multiple ranges at once according
to predefined actions.
Summary of Contents for Element Classic
Page 1: ...Ion Classic User Manual Version 3 1 1 4310M1210 3 1 1 RevA 2022 03...
Page 92: ...78 Ion Classic User Manual...
Page 212: ...198 Ion Classic User Manual...
Page 274: ...260 Ion Classic User Manual...
Page 275: ...Mark 261 Chapter 9 Mark About Mark 262 AutoMark 262 Referenced Marks 263...
Page 308: ...294 Ion Classic User Manual...
Page 346: ...332 Ion Classic User Manual...
Page 364: ...350 Ion Classic User Manual...
Page 378: ...364 Ion Classic User Manual...
Page 384: ...370 Ion Classic User Manual...
Page 426: ...412 Ion Classic User Manual...
Page 438: ...424 Ion Classic User Manual...
Page 444: ...430 Ion Classic User Manual...
Page 450: ...436 Ion Classic User Manual...
Page 458: ...444 Ion Classic User Manual...
Page 479: ...Magic Sheets 465...
Page 480: ...466 Ion Classic User Manual...
Page 530: ...516 Ion Classic User Manual...
Page 558: ...544 Ion Classic User Manual...
Page 578: ...564 Ion Classic User Manual...


