Getting Started
3
Chapter 1
Getting Started
The User Interface
This section explains the physical features of the hardware interface and their general functionality
with the software.
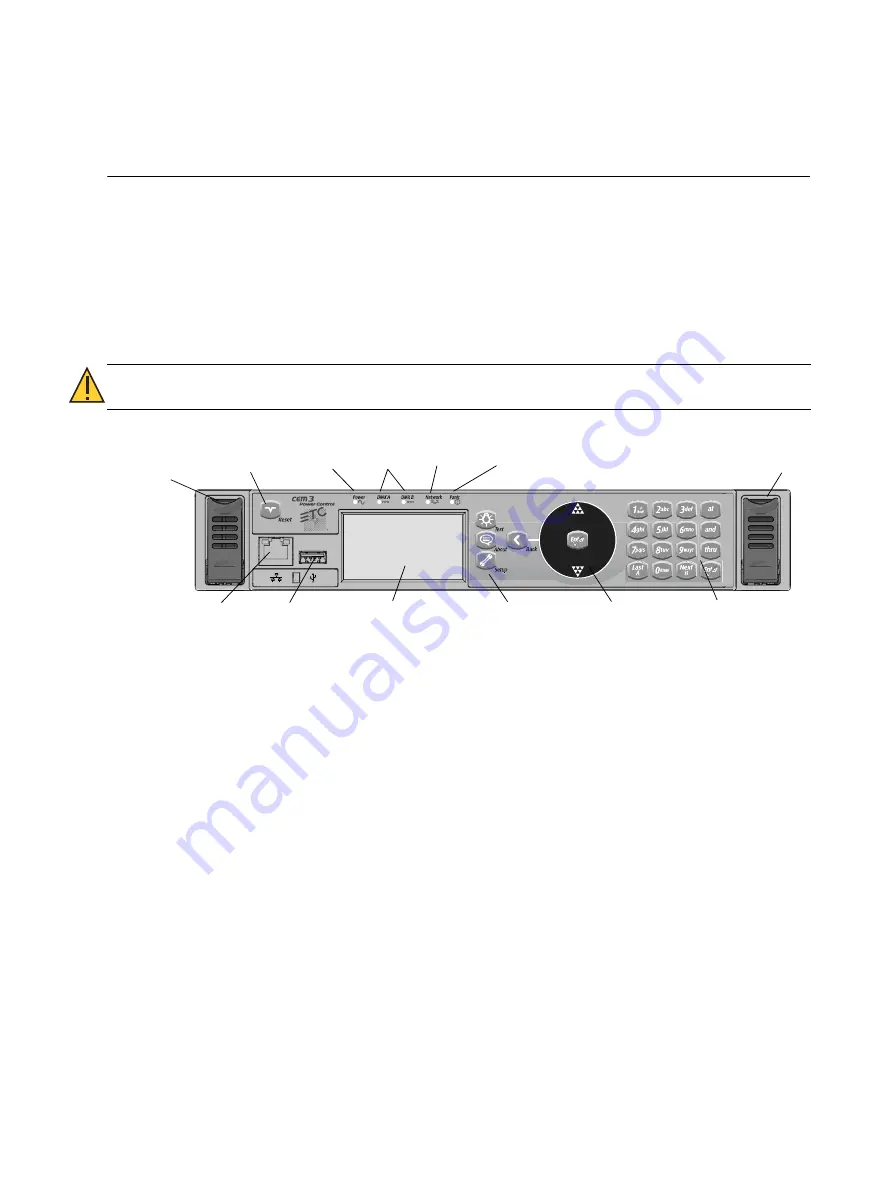
CEM3 Face Panel
The diagram below shows the components of the hardware interface. These terms are used
throughout this manual.
Navigation
Scroll Wheel
Use the scroll wheel and up/down arrows to move the selection cursor on any menu screen until the
desired item is highlighted. Menus that do not fit on one screen will have a scroll bar on the right side
of the display window, and additional menu options can be accessed with the scroll wheel. You can
also tap the top or bottom of the scroll wheel to move the display cursor up or down.
The scroll wheel also lets you scroll through number fields (such as circuit number) or through the
available options for a selected item (such as Module Type).
The center button of the scroll wheel functions as [Enter]. Press [Enter] to select the highlighted item on
the display window or to commit entered data.
Keypad
Use keypad to enter values for any value fields in the display window. When setting levels you can
select individual dimmers or ranges of dimmers using the [and] and [thru] buttons.
Both the center button of the scroll wheel and the bottom right keypad button function as [Enter].
Press [Enter] to select the highlighted item on the display window or to commit entered data.
CAUTION:
Power down the rack before removing the CEM3.
Eject: Pull
both levers
forward from
the top edge.
Grasp and pull
to remove
face panel.
Eject
LEDs identify current states of:
Power
DMX Ports
Network Panic
Reset
Net3
Ethernet
USB
Load Software and
configurations
Display
window
Navigation
Buttons
Scroll
wheel
Keypad


