background image


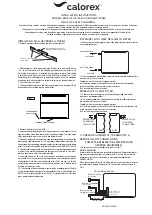
HOW YOUR HUMIDIFIER WORKS 


CAUTION: Do NOT position the unit directly in 
front of a hot air duct or radiator. Do NOT place 
on soft carpet. 

ASSEMBLY, CONTROLS & OPERATION 

1.  Unpack humidifier from carton.


2.  Remove all packaging materials. Check to see that you have all of the 

following items removed from the boxes accessory kit and cabinet before 
discarding the packaging:   

♦ Evaporative wick  &  Wick Retainer


♦  Caster kit 

♦ 

Lift rod assembly with Styrofoam float        

♦   Manual


CASTERS 

3.  Turn the emptied cabinet upside down.  Insert each caster stem into one of


the four caster holes on the corner of the humidifier bottom.  The casters 
should fit snugly and be inserted until the stem shoulder reaches the cabinet 
surface.   

4.  Turn the cabinet right side up. 

EVAPORATIVE WICK 

5.  Replace the float assembly and attached lift  

rod into the boxed area on the bottom of the 
inside of the cabinet. Slip lift rod into retainer 
ring and twist to secure. The lift rod should 
be able to freely move up and down about 
3/8”. The retainer ring should be located 
between the two ribs on the lift rod. 

6.  Place the wick assembly back into the 

guides provided in the bottom of the 
cabinet and the ribs along the sides. 

7.  Place the chassis unit onto the cabinet 

ensuring that the chassis seats correctly 
into the front and back grooved edges. 

Dry air is drawn into the humidifier though 
the back and moisturized as it passes 
through the evaporative wick. It is then 
fanned out into the room. 


 LEGEND: 

1. Water reservoir  

3. Evaporative wick 

2. Chassis/power pack 

4. Dry air intake 

  (motor/fan assembly) 

5. Moist air output 


Summary of Contents for 821 000

Page 1: ...Setting for Nighttime Use Easy to clean removable power pack SAVE THE ENVIRONMENT RECYCLE APPROPRIATE MATERIALS To order parts and accessories call 1 800 547 3888 French and Spanish Instructions incl...

Page 2: ...azard or damage to humidifier do not tilt jolt or tip humidifier while unit is running 9 To reduce the risk of damage to humidifier unplug when not in use 10 To reduce the risk of accidental electrica...

Page 3: ...he cabinet surface 4 Turn the cabinet right side up EVAPORATIVE WICK 5 Replace the float assembly and attached lift rod into the boxed area on the bottom of the inside of the cabinet Slip lift rod int...

Page 4: ...unit on again NOTE We recommend using Essick Air Bacteriostat Treatment when you refill the water reservoir to eliminate bacterial growth Add bacteriostat according to the instructions on the bottle...

Page 5: ...owth Add bacteriostat according to the instructions on the bottle Please call 1 800 547 3888 to order Bacteriostat Treatment reference part number 1970 1 Turn off unit completely and unplug from outle...

Page 6: ...MAXIMUM EXTENT PERMITTED BY LAW IS IN LIEU OF AND EXCLUDES ALL OTHER WARRANTIES AND CONDITIONS EXPRESS OR IMPLIED ARISING BY OPERATION OF LAW OR OTHERWISE INCLUDING WITHOUT LIMITATION MERCHANTABILITY...

Page 7: ...on funcionamiento silencioso para uso nocturno Ruedas giratorias EZ F cil de limpiar unidad de fuerza removible CUIDE EL MEDIOAMBIENTE RECICLE LOS MATERIALES APROPIADOS Para solicitar piezas y accesor...

Page 8: ...del humidificador 6 No permita que la unidad se utilice como un juguete Se debe prestar atenci n cuando lo utilizan ni os o cuando se lo utiliza cerca de ni os 7 Nunca utilice su humidificador cuando...

Page 9: ...tes de deshacerse de los embalajes RUEDAS 3 Poner el gabinete vac o de cabeza para abajo Inserte una de las ruedas en cada uno de los agujeros de las ruedas en las cuatro esquinas del gabinete Las rue...

Page 10: ...nto OBSERVACI N Cuando el dep sito est vac o el ventilador del humidificador se apagar autom ticamente pero volver a encenderse de manera autom tica cuando el dep sito se llene nuevamente 9 Apague la...

Page 11: ...e acuerdo con las instrucciones del embalaje Para solicitar el Tratamiento bacteriostat referencia N 1970 llame al 1 800 547 3888 1 Apagar la unidad completamente y desenchufarla del tomacorriente 2 L...

Page 12: ...cluido el tratamiento de bacterias y mechas ESTE PRODUCTO NO FUE DISE ADO PARA USO COMERCIAL LA PRESENTE ES LA NICA GARANT A QUE OFRECE EL FABRICANTE CON RESPECTO A LOS PRODUCTOS Y HASTA EL GRADO M XI...

Page 13: ...nol comprises 1B72115 4 2011 Imprim en China MOD LES 821 000 BLANC Commande num rique Hygrostat automatique Indicateur lumineux de remplissage avec arr t automatique Ventilateur 2 vitesses avec mode s...

Page 14: ...is par ou pr s d un enfant 7 Ne vous servez en aucun cas de votre humidificateur en cas de pi ce manquante ou endommag e 8 Pour r duire le risque d lectrocution ou d endommagement de l humidificateur...

Page 15: ...m che d vaporation et de retenue m che Manuel LES ROULETTES 3 Retournez le bo tier de l humidificateur vide l envers Ins rez une tige de roulette dans chacun des quatre orifices situ s aux quatre coin...

Page 16: ...imentation de remplissage et de mettre l appareil sous tension REMARQUE Nous recommandons l utilisation du traitement contre les bact ries Essick Air Bacteriostat Treatment chaque remplissage du r ser...

Page 17: ...SOINS ET ENTRETIEN Le fait de nettoyer r guli rement votre humidificateur aide liminer les odeurs et la croissance de bact rie et de fongus Normalement l eau de javel est un bon d sinfectant et peut...

Page 18: ...o tier Laissez agir la solution pendant 20 minutes puis rincez avec de l eau jusqu ce que l odeur de l eau de javel ait disparue S chez avec un chiffon doux Vous pouvez essuyer les parois ext rieures...

Page 19: ...TIE DONN E PAR LE FABRICANT EN CE QUI CONCERNE LES PRODUITS ET DANS TOUTE LA MESURE AUTORIS E PAR LA LOI REMPLACE ET EXCLUT TOUTES AUTRES GARANTIES ET CONDITIONS EXPRESSES OU IMPLICITES QU ELLES D COU...

Page 20: ...20 5800 Murray St Little Rock AR 72209 1 800 547 3888...

Reviews: