4
5
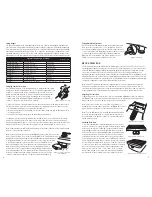
String Gauges
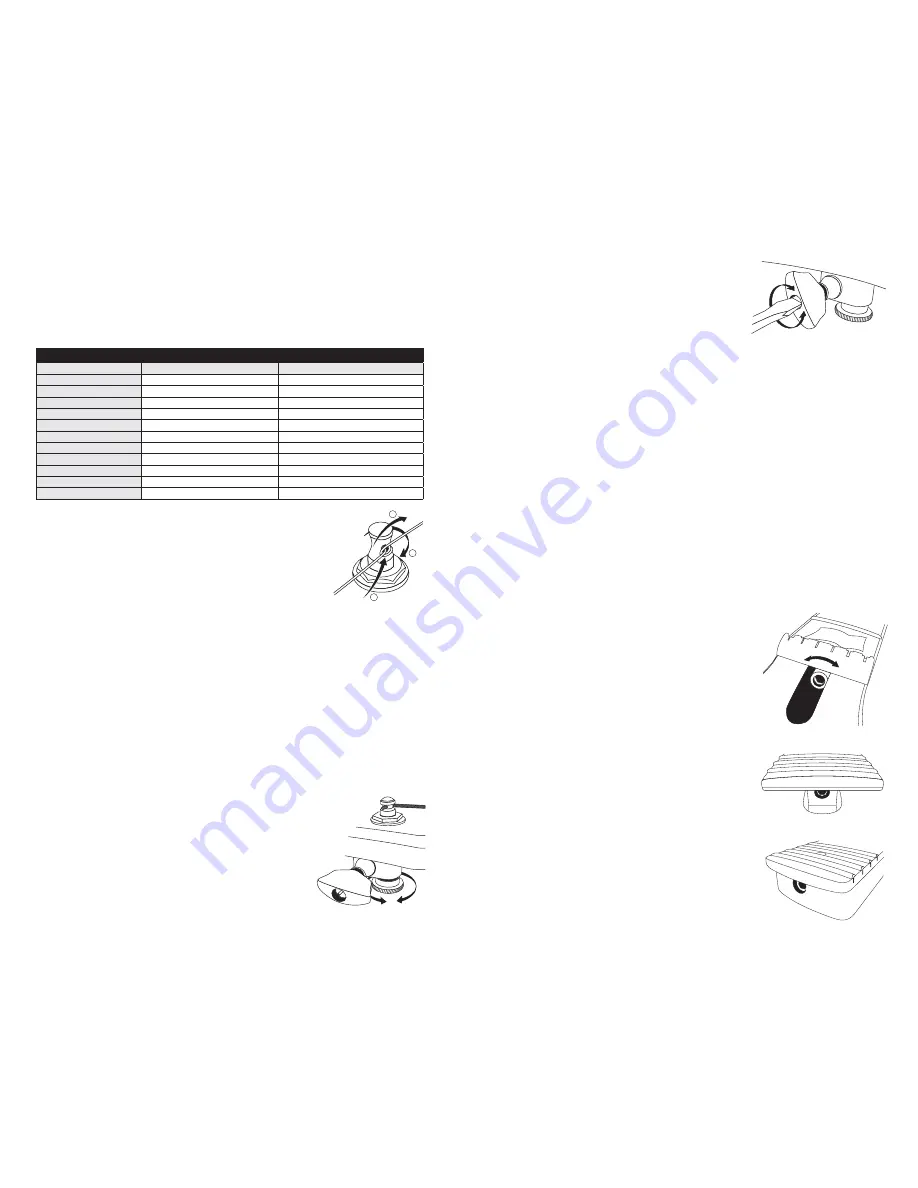
ESP guitars are strung with the following gauges at our factory. Using the same gauge will probably save
you some time in setting up and re-tuning your instrument after you change the strings.
Note:
String gauge
is a matter of preference, and some players will be more comfortable using a different gauge than provided,
especially when using alternate tunings. If you wish to change to a heavier gauge of strings, please consult
a qualified repair technician to do this for you - using a heavier string gauge will require re-slotting the nut,
adjusting the truss rod and changing other settings and should only be done by a qualified repair technician.
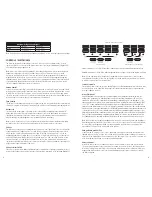
Factory String Gauges & Tunings
String Gauge (Low to High)
Tuning (Low to High)
6-str guitar w/trem
42/32/24/16/11/9
E/A/D/G/B/E
6-str guitar non-trem
46/36/26/17/13/10
E/A/D/G/B/E
7-str guitar & baritone
56/46/36/26/17/13/10
B/E/A/D/G/B/E
8-str guitar & baritone
68/56/46/36/26/17/13/10
F#/B/E/A/D/G/B/E
6-str baritone
56/46/36/26W/17/13
B/E/A/D/F#/B
6-str acoustic
52/42/32/24W/15/11
E/A/D/G/B/E
4-str bass
105/85/65/45
E/A/D/G
4-str bass (Detuned)
130/110/90/70
B/E/A/D
5-str bass
125/105/85/65/45
B/E/A/D/G
6-str bass
125/105/85/65/45/30
B/E/A/D/G/C
8-str bass
90/40, 70/35, 55/25, 40/20P
E/A/D/G w/doubled octave strings
Stringing Your Guitar or Bass
When winding strings on to the tuning machine post, always wind them tightly
and evenly to avoid any slipping than can occur if there are any gaps. Always use
at least 2 or 3 winds around the post starting from top to bottom. As a rule of
thumb, use about and extra 5cm (2 inches) of slack when restringing a guitar
and about 8cm (3 inches) of slack when restringing a bass. For unwound,
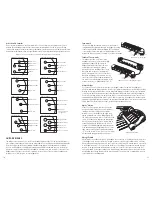
or plain strings, follow the diagram (
Figure 1
) detailing how to install these
strings on to the post to prevent them from slipping.
1. Insert end of string into tuning post (make sure to leave enough slack for a few wraps around the post).
2. Wrap end of string clockwise around post and under the string where it goes into the post (counter-
clockwise when stringing tuners on treble side of headstock).
3. Pull end of string tight over itself making a sort of knot (end of string may then be bent down and cut
off cleanly near knot).
4. Tune to pitch, making sure the wraps wind neatly down the tuning post.
For tuning machine posts where the string must be inserted into the post (most bass tuners), the strings
must be cut to length in advance. Use a pair of string cutters and make sure to cut them long enough to
give enough wraps around the posts. (If you’re not sure, then it’s better to guess longer than shorter. You can
always cut more length off of the end of the string, but you can’t add any length once you’ve cut it).
Note:
Strings are always wound clockwise around the posts on the bass side and counter-clockwise around
the posts on the treble side of headstock.
Note:
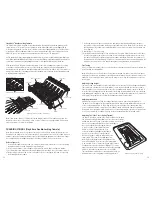
If you have locking tuners on your guitar
(Figure 2)
, then you don’t have to put any
winds on the post. Simply cut or loosen the old string and loosen locking pin by turning
thumbwheel counter-clockwise. Remove old string and feed new string through post-
hole. Tighten thumbwheel clockwise to lock the pin on to the string. Tune the string
to pitch without any wraps on the post and cut off excess string.
Note:
Do not
remove thumbwheel or use pliers to tighten/loosen locking tuning machines.
Note:
If you have Gotoh locking tuners there is no thumbwheel located on
the backside of tuner. To string the guitar, simply feed string through and tune
as normal and string post will lock automatically. Tuner lock may be loosened
at the top of string post by using a straight screwdriver or small coin (counter-
clockwise on bass side of headstock / clockwise on treble side of headstock).
Tuning Machine Adjustment
Most ESP guitars have adjustable tuning machine heads. Many times,
these parts can loosen after time, so it is a good idea to check the
tension when changing strings. If you ever need to change the tension
or feel of a tuning machine head, simply tighten (clockwise) or loosen
(counter-clockwise) with a small Phillips or flathead screwdriver
(Figure 3)
. This screw should be snug, but be careful not to over-
tighten, as it is easy to strip the threading on the screw.
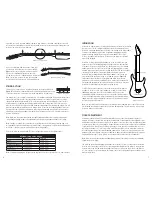
NECK & TRUSS ROD
All ESP instruments have an adjustable truss rod located inside of the neck. The function of a truss rod is to
provide adjustment against the string tension on the neck. The following are the most common reasons why
a truss rod adjustment might be needed: changing string gauge, changing tuning, environmental changes
such as heat or humidity. Your guitar will operate poorly if the truss rod is not adjusted properly, so it is
important to be able to recognize when your neck needs a truss rod adjustment. Truss rod adjustment should
be performed periodically in order to keep your guitar playing properly. Adjusting the truss rod is the first step
when setting up an instrument to play properly. You should always do the truss rod adjustment before setting
string action, as adjusting the truss rod will affect the height of the strings.
Note:
Most all ESP guitars are built with two-way adjusting truss rods. An ordinary truss rod may be
loosened to the point where there is no more adjustment in the counter-clockwise direction. In most
cases, this means replacing the neck or using heavier string gauges to bring the neck back to where it is
not back-bowed. This will never happen with your guitar since it has a two-way adjusting truss rod.
Adjusting The Truss Rod
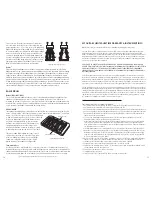
To adjust the truss rod, first locate the truss rod access at the headstock
(Figure 4)
or end of neck by body
joint
(Figure 5)
, remove the truss rod cover, and insert the correct size allen wrench (4mm) or pipe wrench
(8mm) to adjust. Turn counter-clockwise to loosen and clockwise to tighten.
Note:
If your truss rod nut access is not visible, it is possible your
instrument has it located inside of the neck pocket
(Figure 6)
– this will
require the neck to be taken off of the body to adjust the truss rod.
Note:
Truss rod adjustments should only be performed by a qualified
technician. Improperly adjusting or over adjusting the truss rod can
result in damage to the guitar neck and is not covered under the ESP
limited lifetime warranty.
Checking Neck Bow
Correct truss rod adjustment is determined by the amount of bow or
relief that is in the neck. To check neck bow, hold your guitar in playing
position and check the low E and high E strings using the following
method
(Figure 7)
. With your fretting hand, hold down the string at
the first fret. Now with your picking hand thumb, fret the same string
at the area where the neck joins the body (around 16th fret). While
holding both sections of the string in place, stretch your index finger
of your picking hand as far as possible into the middle area of the neck
(frets 7-9) and tap the string down to the frets. The amount of distance
that the string is travelling to reach the frets is the amount of bow that
is in the neck (you may also use feeler gauges to measure this distance,
but it’s not necessary). It is desirable to have a slight amount of bow,
but not too much. About .3 mm - .5 mm (.010” - .020”) is usually
plenty of bow. Having too much bow will cause excessive buzzing in
the center area of the neck and will cause the strings to be farther
1
2
3
Figure 1:
Stringing Plain Strings
Figure 5:
Truss Rod by Body Joint
Figure 6:
Truss Rod Inside Neck Pocket
Figure 2:
Stringing Locking Tuners
with Thumbwheel
Loosen
Tighten
Figure 3:
Tuner Tension
Loosen
Tighten
Figure 4:
Truss Rod at Headstock
Loosen
Tighten
W = Wound, P = Plain


