4 INSTALLATION
0464 547 001
- 8 -
© ESAB AB 2017
4
INSTALLATION
WeldCloud™ Mobile can be used with all power sources that are fitted with a W8
2
control
unit or PEK control panel.
Install the WeldCloud™ Mobile on the W8
2
1.
Clean the top of the W8
2
control unit
using alcohol before assembling the
WeldCloud™ Mobile on top of it.
2.
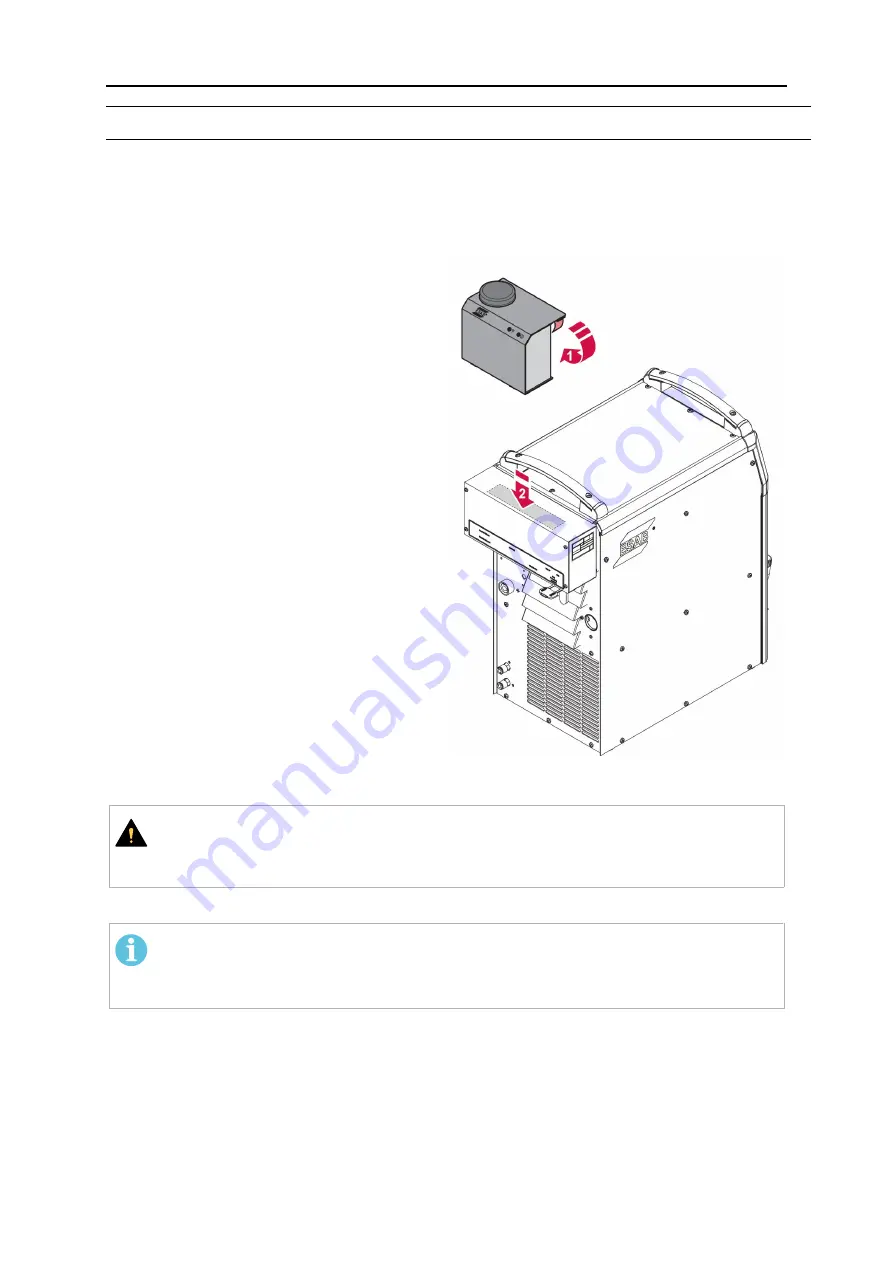
Remove the protection cover on the Dual
Lock fastener.
3.
Attach the WeldCloud™ Mobile centered
on the W8
2
control unit as indicated by
the grey area in the illustration.
Connect the WeldCloud™ Mobile
1.
Make sure that all the involved equipment
is powered down.
2.
Connect the control cable from the
Internal CAN on the W8
2
control unit to
the CAN connector on the WeldCloud™
Mobile.
3.
Connect the Ethernet cable from the W8
2
control unit to LAN port 1 on the
WeldCloud™ Mobile.
4.
Optional, if not using Wi-Fi or 3G:
Connect an Ethernet cable from the LAN
connector 2 on the WeldCloud™ Mobile
to external LAN. Make sure not to clamp
the Ethernet cable with power cables or
welding cables.
For connections on WeldCloud™ Mobile,
see section OPERATION.
CAUTION!
When using WeldCloud™ Mobile on a tractor, do not use wired LAN for data
transfer. Risk for personal injury or damaged equipment.
Make sure the antenna on the WeldCloud™ Mobile is not covered or blocked.
NOTE!
The Dual Lock adhesive bonds with the surface of the W8
2
control unit for 24
hours to gain full strength.


