QX1000 Manual II: Administrator's Guide
Administrator’s Menus
QX1000; (SW Version 5.3.x)
136
The
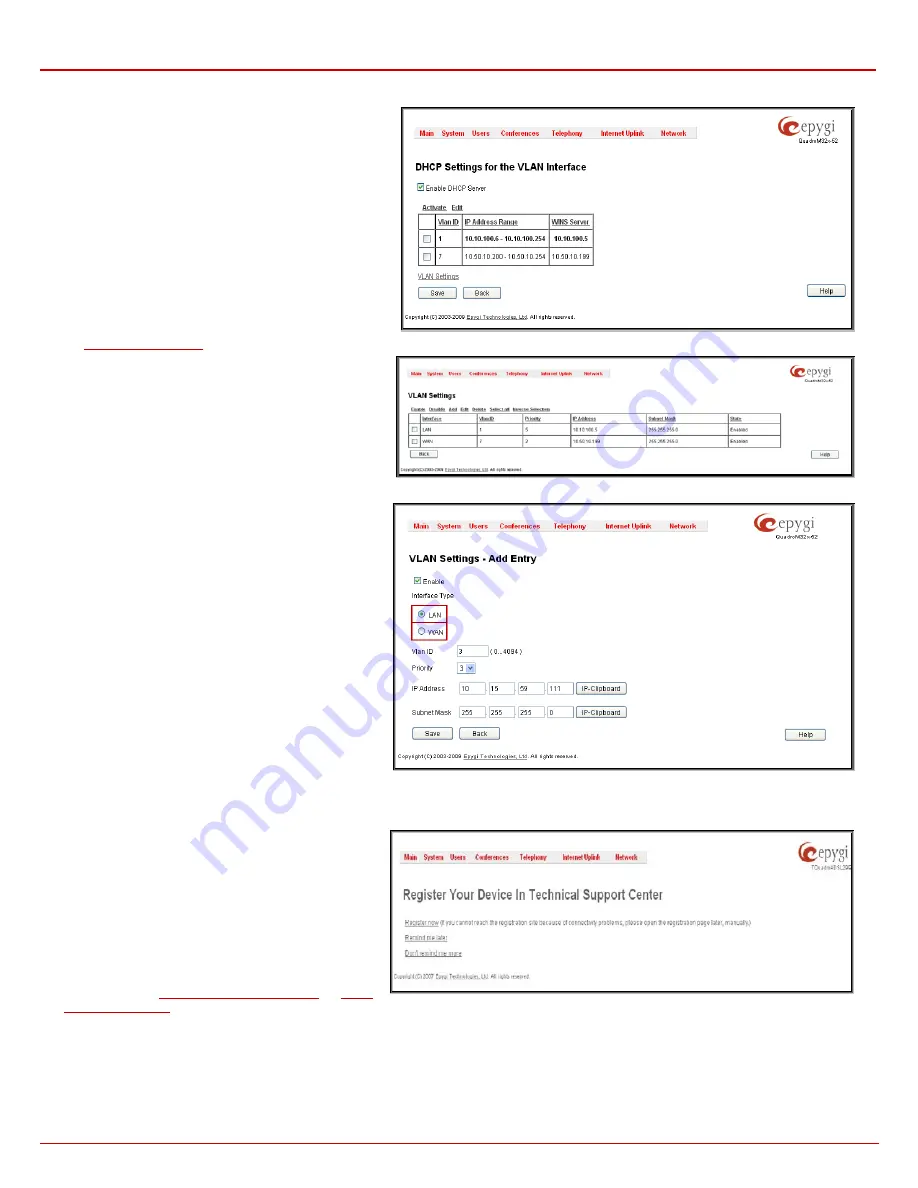
DHCP Settings for the VLAN Interface
page
contains a table with all enabled VLAN interfaces created
in VLAN Settings page (see below) and the corresponding
parameters (VLAN ID, IP Address Range and WINS
Server). This page contains the following components:
Enable DHCP Server
checkbox activates the DHCP
server on QX1000 for VLAN. With this checkbox enabled,
QX1000 will be able to assign dynamic IP addresses to
the devices in its VLAN.
Activate
functional button is used to activate DHCP
service on one of the VLAN interfaces in the list. Only one
VLAN interface can have DHCP service activated.
Edit
functional button opens a page where the
corresponding VLAN interface can be configured and
controlled. This page contains all the same components as
the
page does.
Fig. II-233: DHCP Settings page for VLAN interface
VLAN Settings
link moves to the page where virtual
LAN/WAN interfaces may be created.
VLAN Settings
page lists all existing virtual interfaced
created on the QX1000 and allows you to create new
interfaces.
Enable
and
Disable
functional buttons are used to
correspondingly enable and disable the selected virtual
interface(s).
Fig. II-234: VLAN Settings
Add
functional button opens an
Add Entry
page where a
new virtual network can be defined. The page consists of
the following components:
Enable
checkbox is used to select whether the
corresponding virtual interface will be enabled or disabled
after it is created.
Interface Type
manipulation radio buttons selection
allows to choose whether the virtual interface will be LAN
or WAN.
VLAN ID
text field requires the virtual network ID. Numeric
value in a range from 0 to 4094 is allowed in this field.
Priority
drop down list is used to select the priority of
packets in the corresponding interface. Packets with the
lower priority (0) will be delivered first.
IP Address
text field requires the IP address of the virtual
interface.
Subnet Mask
text field requires the subnet of the virtual
interface.
Fig. II-235: VLAN Settings – Add Entry page
Registration Form
The
Registration
Form
page
appears when
administrating an unregistered QX1000 and it has been
created for customer support purposes. The page
requires customer registration at the Epygi Technical
Support Center. It provides several links offering the
following registration options:
Register now
leads to the Epygi Technical Support
System Registration page and requires customer’s
information to submit the QX1000 registration form.
Remind me later
hides the registration notification in the
or
until the next administrating activities.
Fig. II-236: Device Registration page
Don’t remind me more
hides the registration notification forever.


