


Selecting Wireless Network Settings From the Control Panel
You can select or change wireless network settings using your product control panel.
To install your product on a wireless network, follow the instructions on the
Start Here
sheet and install
the necessary software from the product CD. The installer program guides you through network setup.
Note:
Breakdown or repair of this product may cause loss of fax and network data and settings. Epson is
not responsible for backing up or recovering data and settings during or after the warranty period. We
recommend that you make your own backup or print out your fax and network data and settings.
1.
Press the
Setup
button.
2.
Press the arrow buttons to select
Wi-Fi/Network Settings
and press the
OK
button.
3.
Select
Wi-Fi Setup
and press the
OK
button.
You see this screen:
4.
Select
Wi-Fi Setup Wizard
and press the
OK
button.
Note:
If you need to disable the wireless network to set up your product on an Ethernet network,
select
Disable Wi-Fi
instead. Then follow the instructions on the
Start Here
sheet to set up your
product on a wired network and install the necessary software from the product CD. The installer
program guides you through network setup.
24
Summary of Contents for WorkForce WF-7510
Page 1: ...WorkForce WF 7510 WF 7520 User s Guide ...
Page 2: ......
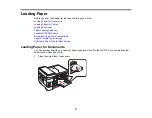
Page 29: ...4 Slide the edge guide shown below to your paper size 29 ...
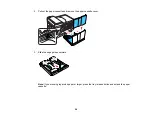
Page 34: ...3 Slide the edge guides outward 4 Slide the edge guide shown below to your paper size 34 ...
Page 39: ...3 Slide the edge guides outward 4 Slide the edge guide shown below to your envelope size 39 ...
Page 57: ...Related topics Copying Scanning 57 ...
Page 131: ...131 ...
Page 171: ...You see this window 5 Select Fax Settings for Printer You see this window 171 ...
Page 237: ...Related topics Loading Paper 237 ...
Page 256: ...256 ...
Page 261: ...261 ...
Page 287: ...Caution Do not touch the flat white cable inside the printer 4 Lower the scanner unit 287 ...
Page 289: ...7 Open the rear cover and remove any additional jammed paper 289 ...
Page 296: ...5 Remove any jammed paper 296 ...
Page 297: ...6 Lower the document cover and close the ADF cover 7 Carefully remove the jammed paper 297 ...


