331
Removing and Installing Ink Packs
Make sure you have your replacement ink packs handy before you begin. You must install new ink packs
immediately after removing the old ones.
1.
If an ink pack is low or expended, you see a message on your product's LCD screen and on your
computer screen. Note which ink packs need to be replaced.
2.
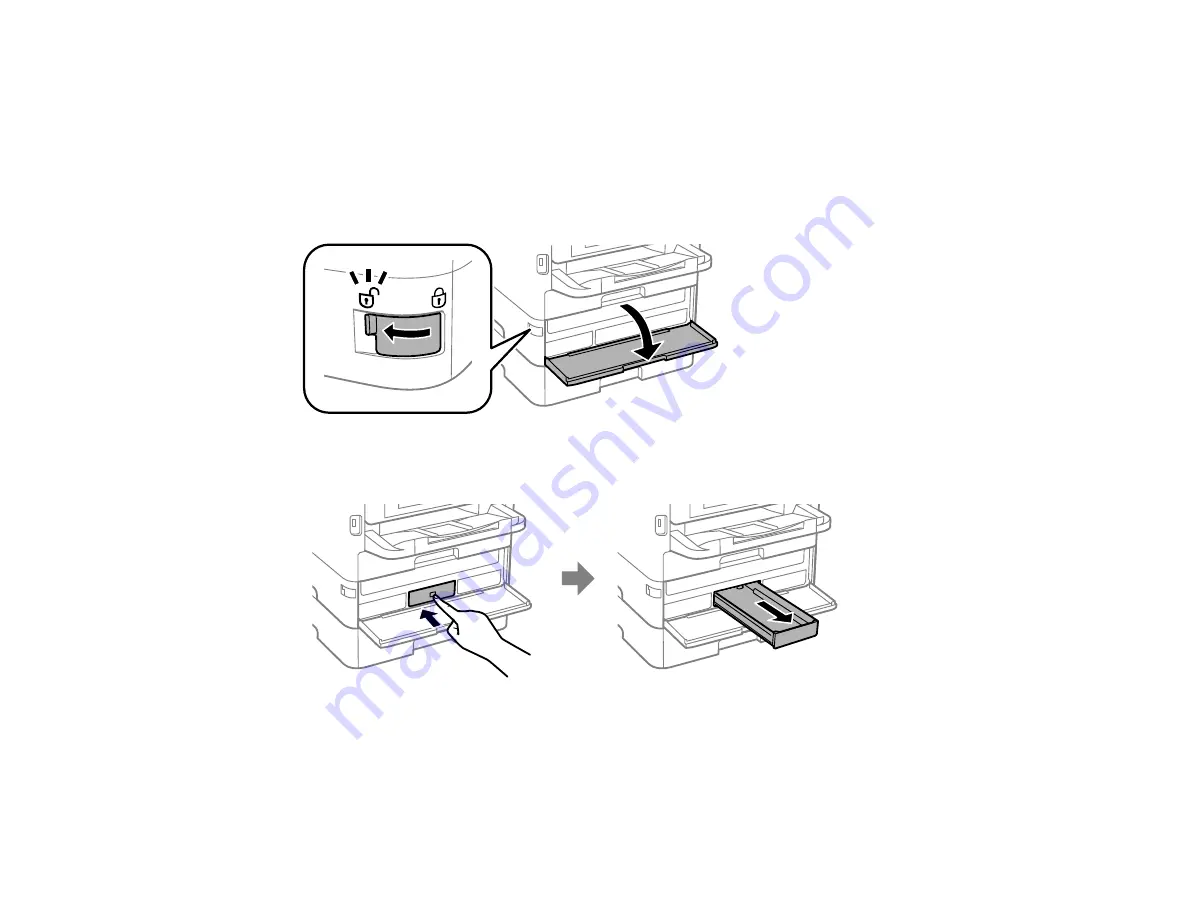
Unlock and open the front cover.
3.
Press the ink pack tray until it clicks and pull it out.
4.
Remove the used ink pack from the tray.
Note:
Dispose of used ink packs carefully. Do not take the used ink pack apart or try to refill it.
Summary of Contents for WorkForce Pro WF-C579R
Page 1: ...WF C579R User s Guide ...
Page 2: ......
Page 19: ...19 7 Lower paper cassette 2 onto the optional paper cassette unit as shown ...
Page 20: ...20 8 Lower the product onto paper cassette 2 as shown ...
Page 116: ...116 1 Open the document cover ...
Page 122: ...122 Scanning Faxing ...
Page 255: ...255 You see a window like this ...
Page 261: ...261 ...
Page 351: ...351 8 Open the ADF cover ...
Page 355: ...355 9 Uninstall the optional paper cassette if necessary ...
Page 437: ...437 Copyright Attribution 2019 Epson America Inc 4 19 CPD 56082 Parent topic Copyright Notice ...


