


4.
To print more than one copy, press the
+
or
–
buttons to select the number (up to 99).
5.
If you need to adjust the darkness of your copy, press the left or right arrow buttons to change the
Density
setting.
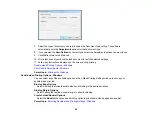
6.
To change any of the print settings displayed on the LCD screen, press the
Menu
button, select
Paper and Copy Settings
, press the
OK
button, and select the necessary settings.
Note:
For quicker access, you can also press the
2-Sided
button (WorkForce 645 Series only) to
set two-sided print settings, the
Reduce/Enlarge
button to set print size settings, or the
Quality
button to set quality settings.
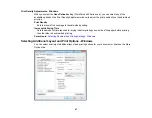
7.
When you are ready to copy, press one of the
Start
buttons in the
Copy
section of the control
panel.
Note:
To cancel printing, press the
Stop
button.
Parent topic:
Related references
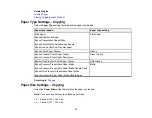
Paper Type Settings - Copying
Paper Size Settings - Copying
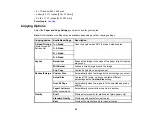
Copying Options
Related topics
Loading Paper
Placing Originals on the Product
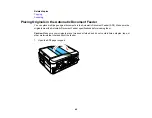
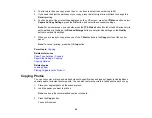
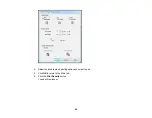
Copying Photos
You can copy color or black-and-white photos onto specific sizes and types of paper, including Epson
special papers, for instant photo reprints. You can also restore the colors in faded photos as you copy.
1.
Place your original photo on the scanner glass.
2.
Load the paper you want to print on.
Note:
Load only the recommended number of sheets.
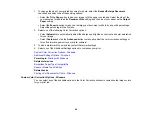
3.
Press the
Copy
button.
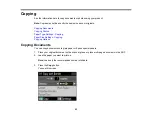
You see this screen:
54
Summary of Contents for WorkForce 545
Page 1: ...WorkForce 545 645 Series User s Guide ...
Page 2: ......
Page 13: ...WorkForce 545 645 Series User s Guide Welcome to the WorkForce 545 645 Series User s Guide 13 ...
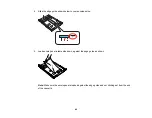
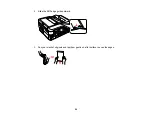
Page 29: ...4 Slide the edge guide shown below to your paper size 29 ...
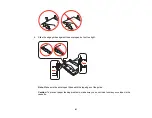
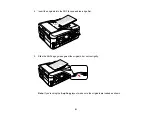
Page 34: ...2 Pull out the paper cassette 3 Slide the edge guides outward 34 ...
Page 39: ...2 Pull out the paper cassette 3 Slide the edge guides outward 39 ...
Page 52: ...Parent topic Placing Originals on the Product Related topics Copying Scanning 52 ...
Page 116: ...3 Adjust the scan area as necessary 116 ...
Page 123: ...123 ...
Page 131: ...3 Adjust the scan area as necessary 131 ...
Page 164: ...You see this window 5 Select Fax Settings for Printer You see this window 164 ...
Page 175: ...5 Select Fax Settings for Printer You see this window 175 ...
Page 249: ...249 ...
Page 254: ...254 ...
Page 290: ...6 Lower the document cover 7 Raise the ADF input tray 8 Carefully remove the jammed paper 290 ...