


240
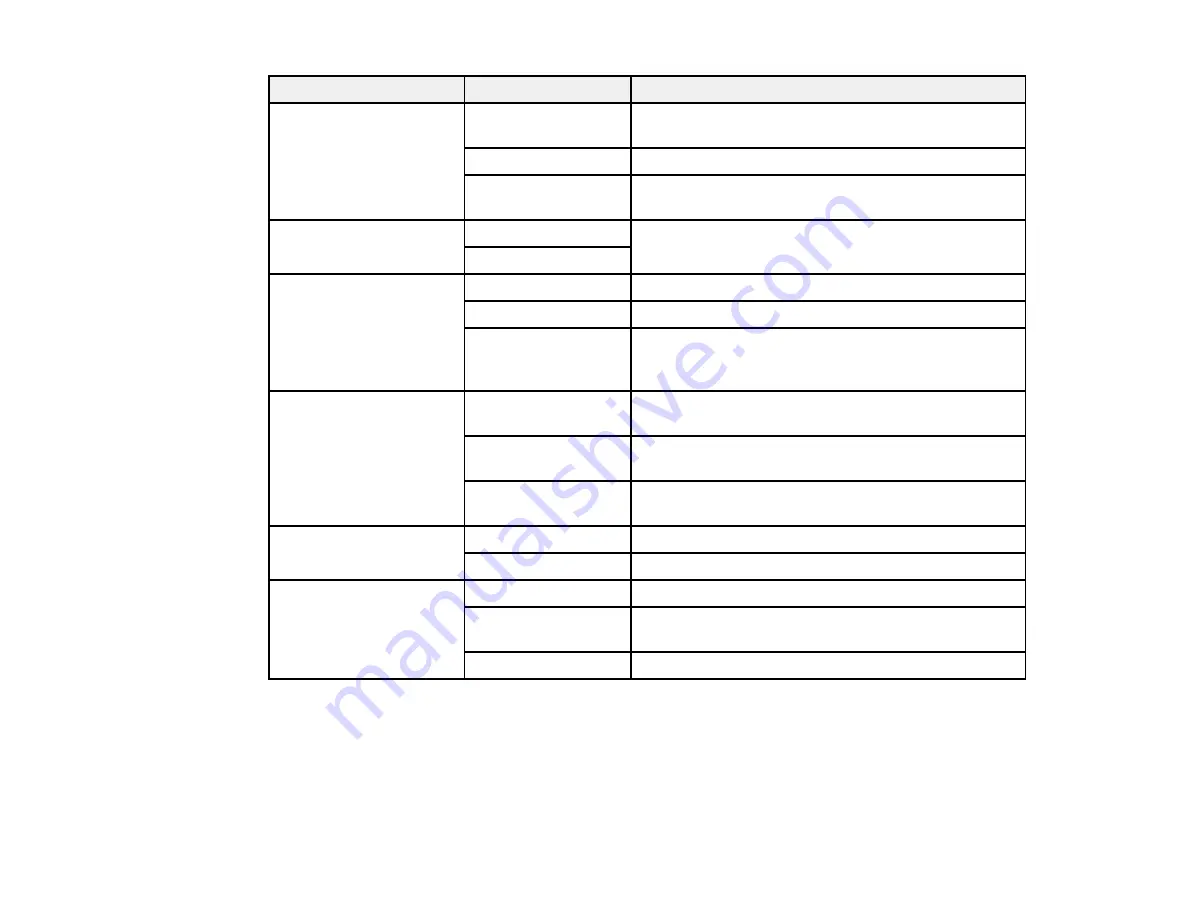
Setting
Options
Description
Forwarding Report
Print on Error
Prints a report after forwarding a received document
only if an error occurs
Prints a report after forwarding a received document
Do Not Print
Does not print a report after forwarding a received
document
Back Up Error Report
On
Select
On
to print a report when a backup error for
sending faxes occurs
Off
Fax Log Auto Print
Off
Does not print a fax log
On(Every 30)
Prints a fax log after every 30 fax jobs are completed
On(Time)
Prints a fax log at a specified time. If the number of
completed fax jobs exceeds 30, the fax log prints
before the specified time.
Attach Fax Image to
Report
Off
Does not include an image on the Transmission
Report
On(Large Image)
Prints a Transmission Report that includes the upper
part of the first page of the sent document
On(Small Image)
Prints a Transmission Report that includes a reduced
size of the entire first page of the sent document
Report Format
Simple
Prints a simple fax report
Detail
Prints a fax report that includes error codes
Output Method
Prints fax reports
Save to Memory
Device
Saves fax reports to a memory device
Forward
Forwards fax reports to a specified destination
Parent topic:
Selecting Advanced Fax Settings
Security Settings - Fax
Set the security options you want to use for faxing.
Summary of Contents for WF-C20590 Series
Page 1: ...WF C20590 User s Guide ...
Page 2: ......
Page 14: ......
Page 28: ...28 You see the Basic Settings screen 4 Select Date Time Settings ...
Page 80: ...80 You see a screen like this 5 Select PDL Print Configuration ...
Page 89: ...89 You see this screen 2 Select Load Paper under the How To options ...
Page 90: ...90 You see this screen 3 Select one of the options ...
Page 91: ...91 You see this screen 4 Select How To ...
Page 99: ...99 You see a screen like this 2 Select the paper source you want to select settings for ...
Page 110: ...110 Parent topic Placing Originals on the Product Related topics Copying Scanning Faxing ...
Page 191: ...191 You see a screen like this 4 Select Email ...
Page 200: ...200 You see an Epson Scan 2 window like this ...
Page 202: ...202 You see an Epson Scan 2 window like this ...
Page 207: ...207 You see this window ...
Page 223: ...223 DSL connection 1 Telephone wall jack 2 DSL filter 3 DSL modem ...
Page 224: ...224 ISDN connection 1 ISDN wall jack 2 Terminal adapter or ISDN router ...
Page 246: ...246 You see a screen like this 3 Select the Recipient tab ...
Page 251: ...251 You see a screen like this 3 Select the Recipient tab 4 Select Add New 5 Select Add Group ...
Page 311: ...311 You see a screen like this 6 Select Print Head Nozzle Check ...
Page 318: ...318 5 Open the interior of the document cover ...