


Windows (other versions)
: Click
or
Start
>
All Programs
or
Programs
>
EPSON
>
EPSON
Scan
>
EPSON Scan Settings
. Make sure the
Connection
setting is set to
Network
, then click the
Test
button.
• Make sure the option selected as the
Timeout Setting
in the Epson Scan Settings program is long
enough to complete scanning over a network.
• You may need to disable the firewall and any anti-virus software on your wireless router or access
point.
Parent topic:
Related topics
Printing a Network Status Sheet
You can print a network status sheet to help you determine the causes of any problems you may have
using your product on a network.
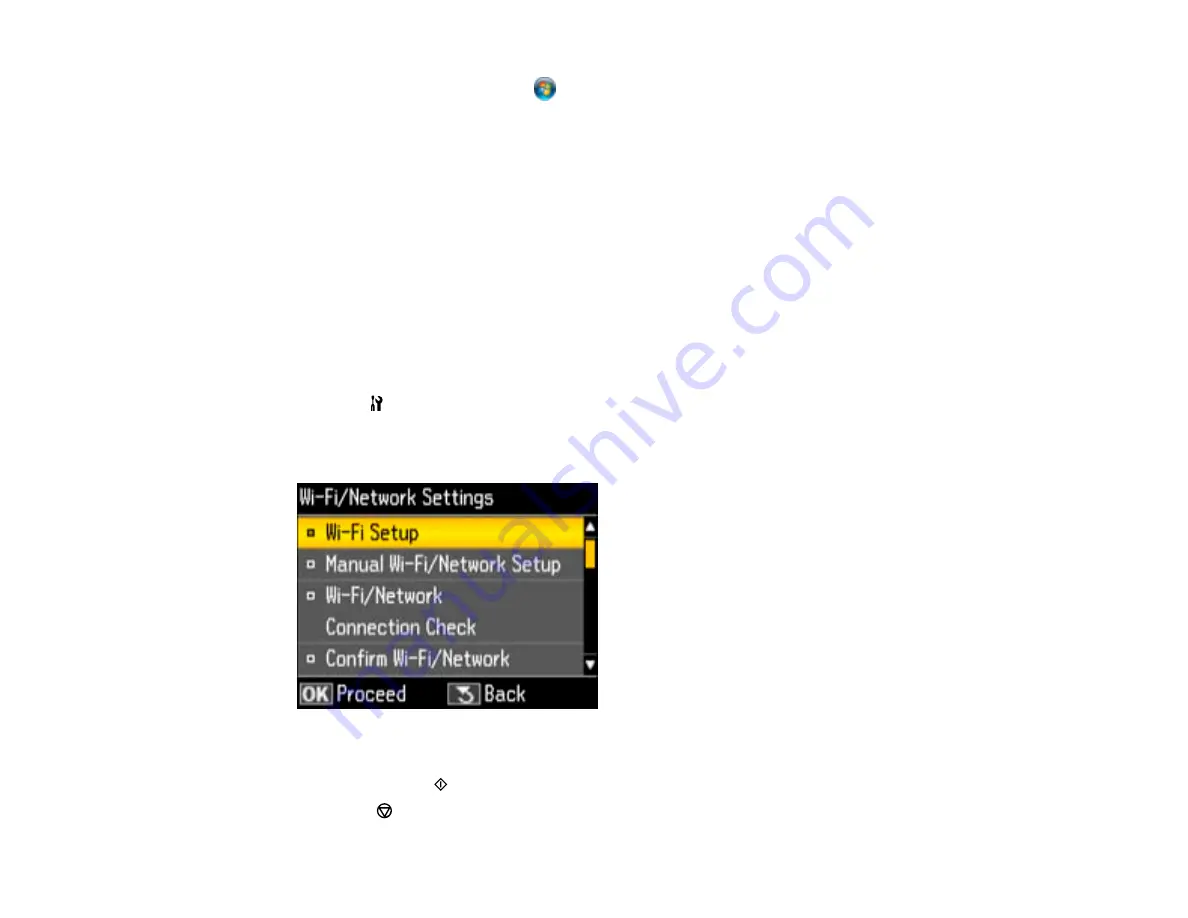
1.
Press the
Setup
button.
2.
Select
Wi-Fi/Network Settings
or
Network Settings
and press the
OK
button.
You see this screen:
3.
Select
Confirm Wi-Fi/Network Settings
or
Confirm Network Settings
and press the
OK
button.
4.
Press either of the
Start
buttons to print the network status sheet.
(Press the
Stop/Reset
button if you want to cancel the operation.)
179
Summary of Contents for WF-B4533
Page 1: ...WF B4533 User s Guide ...
Page 2: ......
Page 11: ...WF B4533 User s Guide Welcome to the WF B4533 User s Guide 11 ...
Page 27: ...4 Load a stack of paper printable side down in the cassette as shown 27 ...
Page 47: ...Parent topic Placing Originals on the Product 47 ...
Page 72: ...Parent topic Starting a Scan Related topics Selecting Epson Scan Settings 72 ...
Page 91: ...91 ...
Page 136: ...3 Select Fax Settings for Printer Select your product if prompted You see this window 136 ...
Page 137: ...4 Select Speed Dial Group Dial List You see this window 137 ...
Page 182: ...3 Remove any paper inside including torn pieces 4 Close the front cover 182 ...
Page 190: ...6 Lower the document cover 7 Raise the ADF input tray 8 Carefully remove the jammed pages 190 ...


