4-1
4.1 TROUBLESHOOTING
Use the following to troubleshoot and repair the printer:
Self-test
Use the self-test to check the operation of the control
circuitry and the printer mechanism.
Troubleshooting flowchart
When the source of the problem is not clear, use the
flowchart to find and replace a defective component.
Troubleshooting tables
Follow the steps outlined in these tables to repair a defect
whose symptoms are known.
4.1.1 Self-test
The self-test can be performed for the paper roll, slip paper,
or validation paper. Make sure the printer is turned off
before starting the self-test with any paper type.
Initiating the self-test
●
Paper roll self-test
1.Insert a paper roll in the printer, and close the printer
cover.
2.Turn on the printer while keeping the PAPER FEED
button depressed. The self-test starts, and status infor-
mation is printed.
●
Slip paper self-test
1.Insert a paper roll in the printer, and close the printer
cover. (
✽
)
2.Turn on the printer while keeping the RELEASE button
depressed. The VALIDATION/SLIP LED flashes.
3.Feed a sheet of slip paper into the printer. The self test
starts, loading the paper automatically and then printing
status information.
●
Validation paper self-test
1.Insert a paper roll in the printer, and close the printer
cover. (
✽
)
2.Turn on the printer while keeping both the RELEASE and
PAPER FEED buttons depressed. The VALIDATION/
SLIP LED flashes.
3.Feed a sheet of validation paper into the printer. The self
test starts, and status information is printed.
(
✽
) When printing on slip or validation paper, the
paper roll should also be inserted in the printer.
This prevents paper jams.
Self-test standby
●
Paper roll self-test
1.When status information printing is complete, the follow-
ing is printed:
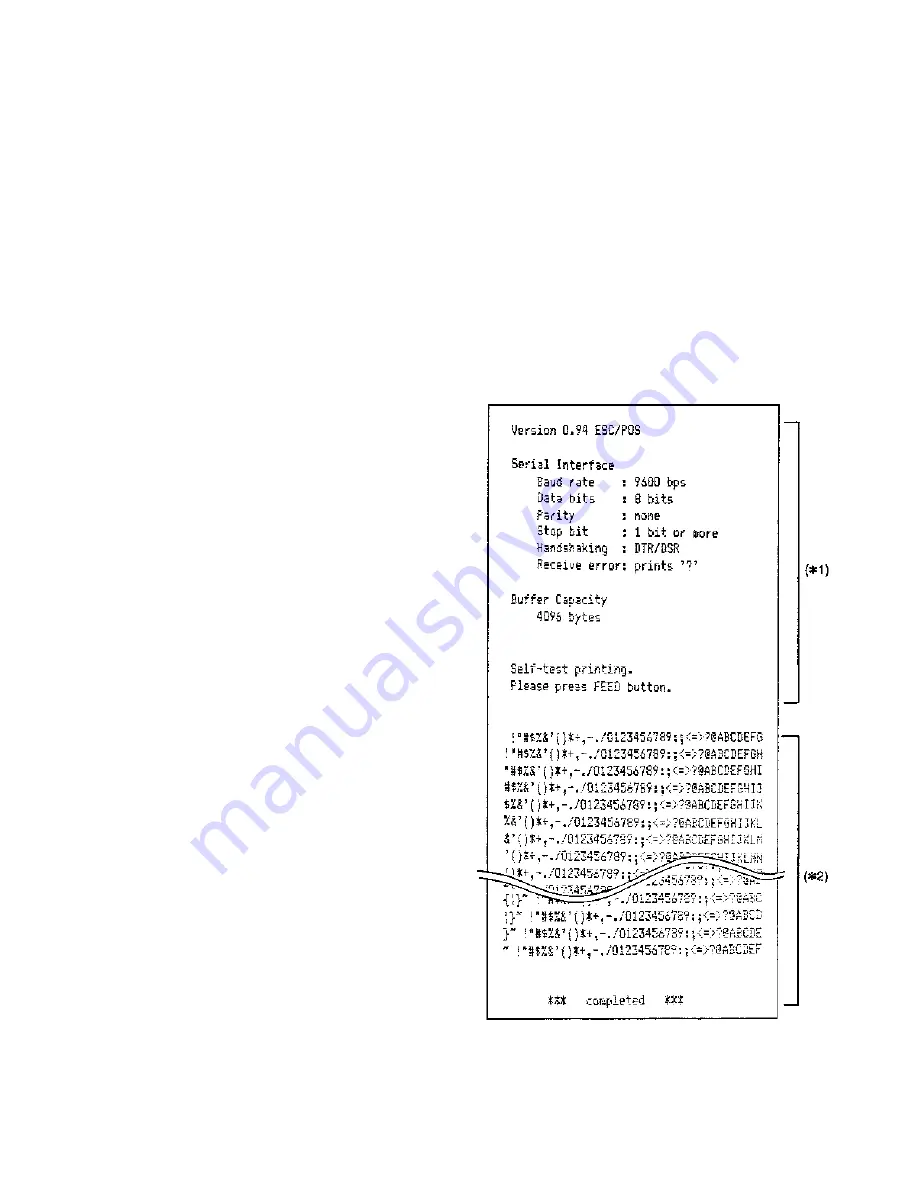
“Self-test printing. Please press PAPER FEED button.”
The JOURNAL OUT LED flashes alternately to indicate
the standby condition.
2.Press the PAPER FEED button to continue the self-test.
●
Slip paper self-test
When status information printing is complete, the slip paper
is ejected, and the printer waits for insertion of the next
sheet (the VALIDATION/SLIP LED flashes). To continue
the self-test, continue to feed slip paper into the printer.
●
Validation paper self-test
When status information printing is complete, the validation
paper is ejected, and the printer waits for insertion of the
next sheet (the VALIDATION/SLIP LED flashes). To con-
tinue the self-test, continue to feed validation paper into the
printer.
Ending the self-test
(for any paper type)
The printer prints " *** completed *** " and ends the self-
test. The printer automatically becomes ready to receive
data after the self-test.
(
✽
1) Printer status information printing
(
✽
2) Test printing
Figure 4-1. Paper Roll Self-test Printing Example
CONFIDENTIAL
Summary of Contents for U375 - TM B/W Dot-matrix Printer
Page 2: ...Technical manual TM U375 U375P English 4005791 Copied Date 199 Copied by ...
Page 54: ...2 23 Figure 2 44 Host Interface Circuit and Custor Display Interface Circuit CONFIDENTIAL ...
Page 58: ...2 27 Figure 2 49 Carriage Motor Drive Signal Timing Chart CONFIDENTIAL ...
Page 149: ...6 2 Circuit 1 CONFIDENTIAL ...
Page 150: ...6 3 Circuit 2 CONFIDENTIAL ...
Page 151: ...6 4 Circuit 3 CONFIDENTIAL ...
Page 152: ...6 5 Circuit 4 CONFIDENTIAL ...
Page 153: ...6 6 Circuit 5 CONFIDENTIAL ...
Page 154: ...6 7 Circuit 6 CONFIDENTIAL ...
Page 156: ...6 9 CONFIDENTIAL ...
Page 157: ...6 10 CONFIDENTIAL ...
Page 158: ...6 11 CONFIDENTIAL ...
Page 159: ...6 12 CONFIDENTIAL ...
Page 168: ...7 9 Table 7 5 TM U375P Gate Array Pin Assignment continued CONFIDENTIAL ...
Page 174: ...CONFIDENTIAL ...
Page 175: ...CONFIDENTIAL ...
Page 176: ...7 17 CONFIDENTIAL ...
Page 177: ...7 18 CONFIDENTIAL ...
Page 178: ...7 19 CONFIDENTIAL ...
Page 179: ...7 20 CONFIDENTIAL ...


