


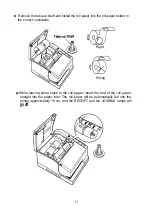
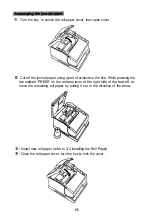


Turn off the power and open the roll-paper cover; remove the roll-paper rolls from
both sides.
Unscrew the outside screws of the roll paper holders ay both sides with a cross-
head screwdriver, and remove the side roll bracket by pulling it up and away from
you.
Install one end of the side roll bracket into the slot and tighten down the screw
on the other end.
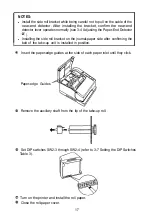
Remove the paper-edge guide from the side of each paper inlet and insert them
into the paper-edge guide holder on the left side of the roll-paper
holder.
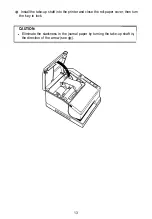
Install the auxiliary shaft on the tip of the take-up roll.
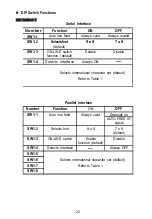
Set DIP switches SW2-3 through SW2-4 (refer to 3-7 Setting the DIP Switches
Table 3).
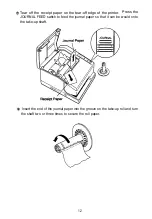
Turn on the power and install the roll paper.
Close the roll-paper cover.
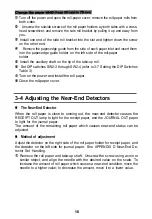
3-4 Adjusting the Near-End Detectors
n
The Near-End Detector
When the roll paper is close to running out, the near-end detector causes the
RECEIPT OUT lamp to light for the receipt paper, and the JOURNAL OUT paper
to light for the journal paper.
The amount of the remaining roll paper which causes near-end status can be
adjusted.
n
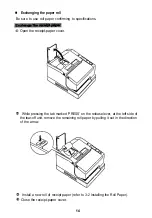
Method of adjustment
Adjust the detector on the right side of the roll paper holder for receipt paper, and
the detector on the left side for journal paper. See APPENDIX D Near-End De-
tector Set Handling.
Remove the roll paper and take-up shaft. Unscrew the screw using a coin or
similar object, and align the needle with the desired value on the scale. To
increase the amount of roll paper which causes a near-end condition, move the
needle to a higher value; to decrease the amount, move it to a lower value.
18
Summary of Contents for TM-930II Series
Page 1: ...receipt journal slip printer Operator s Manual 400208200 ...
Page 7: ...I SETTlNG UP ...
Page 33: ...II REFERENCE ...
Page 83: ......
Page 84: ......
Page 85: ...Page 2 International character set U S A is selected 79 ...
Page 86: ......


