287
Running a Power Cleaning Using the Product Control Panel
If print head nozzles are still clogged after cleaning the print head several times, run the
Power
Cleaning
utility from the product control panel. This process consumes a lot of ink to clean the clogged
nozzles.
1.
Load roll or cut sheet paper in the printer.
2.
Make sure the correct paper type is selected.
3.
Select
>
Maintenance
>
Power Cleaning
.
4.
Select the nozzle pairs you want to clean or select
All Colors
and select
OK
to begin the power
cleaning cycle.
Caution:
Never turn off the product during a cleaning cycle or you may damage it.
Note:
Depending on nozzle status and the number of pairs selected, the power cleaning cycle can
take up to 27 minutes.
5.
Select
Yes
to print a nozzle check pattern.
The nozzle pattern prints.
6.
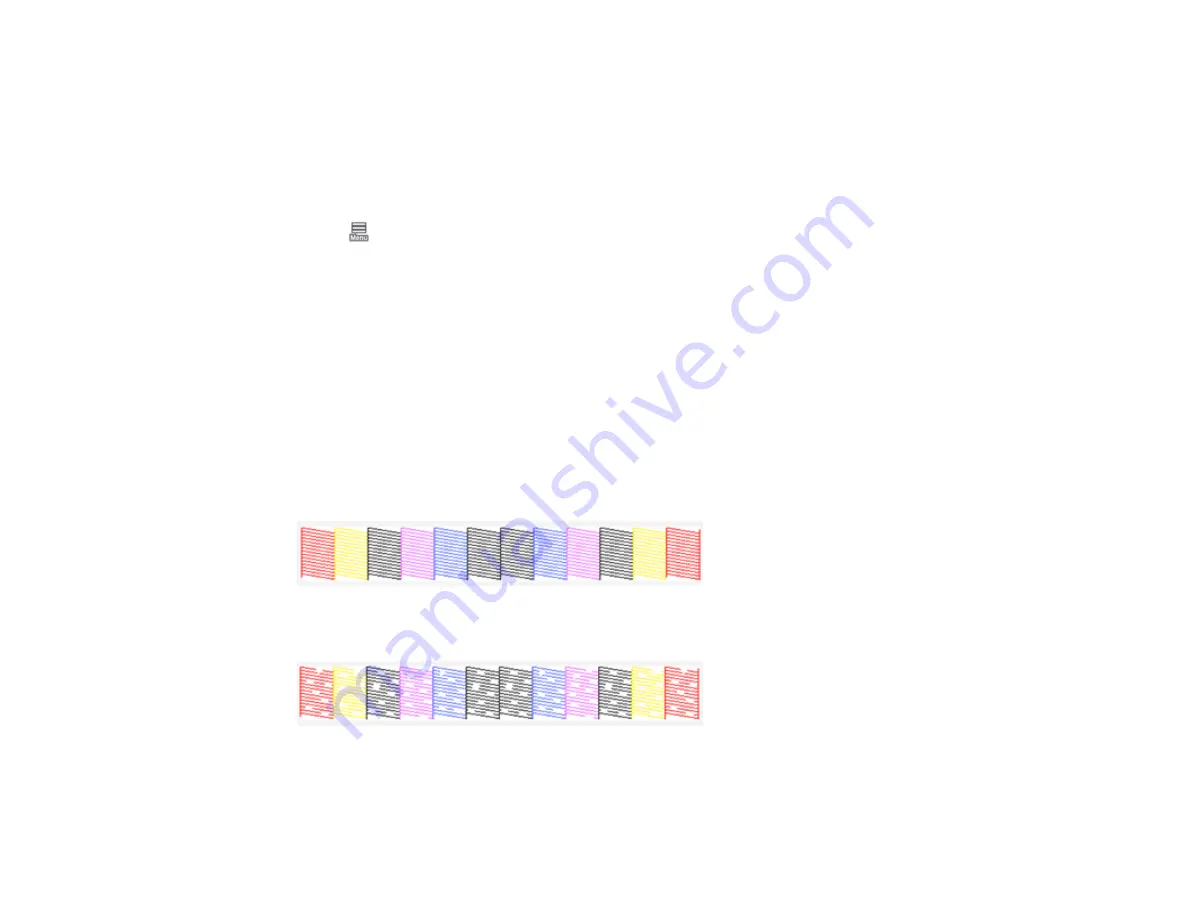
Check the printed pattern to see if there are gaps in the lines.
Print head is clean
Print head needs cleaning
If nozzles are still clogged, turn off the printer and leave it off overnight. If nozzles are still clogged,
contact Epson for support.
Summary of Contents for SureColor P8570D Series
Page 1: ...Epson SureColor P8570D T7770D Series User s Guide ...
Page 2: ......
Page 10: ...10 Default Delay Times for Power Management for Epson Products 380 Copyright Attribution 381 ...
Page 59: ...59 6 Remove the spindle 7 Remove the transparent paper stop from the spindle ...
Page 92: ...92 Note Close the paper output flap if it is open ...
Page 95: ...95 ...
Page 102: ...102 Note Close the paper output flap if it is open ...
Page 105: ...105 ...
Page 120: ...120 6 Open the paper output flap ...
Page 121: ...121 7 Move the paper output tray into position B the middle position as shown ...
Page 123: ...123 10 Remove the transparent paper stop from the spindle ...
Page 124: ...124 11 Remove the rim of the paper stop from the end of the spindle ...
Page 129: ...129 21 Cut the leading edge of the paper as shown ...
Page 155: ...155 SureColor P8570D ...
Page 164: ...164 You can also place the same print data multiple times as shown here ...
Page 281: ...281 You see a window like this 5 Click Print The nozzle pattern prints ...
Page 294: ...294 4 Open the cutter cover ...
Page 304: ...304 4 Close the maintenance cover 5 Open the port cover at the back of the printer ...
Page 306: ...306 8 Close the rear maintenance cover ...
Page 313: ...313 8 Hold the cleaning stick in a vertical position and wipe the guides as shown ...
Page 315: ...315 10 Use a new cleaning stick to wipe any dirt off of the wiper ...
Page 319: ...319 17 Hold the cleaning stick in a vertical position and wipe the guides shown here ...
Page 344: ...344 5 Close the printer covers ...
Page 358: ...358 Parent topic Solving Problems ...


