EPSON Stylus Pro 4400/4450/4800/4880/4880C
Revision C
Adjustment
Basic Adjustment
416
ADJUSTMENT PROCEDURE (ENTIRE PROCESS WORKFLOW)
1.
Turn the printer power on.
2.
Start the adjustment program, and select [Colorimetric Calibration Tool].
3.
Click [Run] to start the “Colorimetric Calibration Tool”.
4.
Click the [Perform entire process] button.
5.
Make sure that the "READY" message is displayed on the printer LCD,
and click [Next].
6.
Select the connected printer from the printer list, and check if the LCD
panel backlight of the printer flashes by clicking [Confirming flashing of the
backlight].
7.
Click [Next], then the message that prompt you to agitate the ink inside the
cartridges will be displayed.
8.
Click [OK] to start the cleaning.
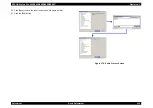
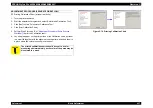
Figure 5-61. Colorimetric Calibration ID Startup Screen
C H E C K
P O I N T
If the printer has not been used for more than two weeks, it
is recommended to agitate the ink inside the cartridges to
get an accurate result. Remove all the ink cartridges from the
printer, and shake them gently for four or five times.
Summary of Contents for Stylus Pro 4800 Portrait Edition
Page 9: ...C H A P T E R 1 PRODUCTDESCRIPTION ...
Page 113: ...C H A P T E R 2 OPERATINGPRINCIPLES ...
Page 156: ...C H A P T E R 3 TROUBLESHOOTING ...
Page 200: ...C H A P T E R 4 DISASSEMBLY ASSEMBLY ...
Page 366: ...C H A P T E R 5 ADJUSTMENT ...
Page 448: ...C H A P T E R 6 MAINTENANCE ...
Page 457: ...C H A P T E R 7 APPENDIX ...


