EPSON Stylus Pro 4400/4450/4800/4880/4880C
Revision C
Adjustment
Basic Adjustment
389
5.3.3 Multi Sensor Level Adjustment
Paper is fed into the printer, the Multi Sensor emits light onto the paper and
platen, the reflected light is received by the Multi Sensor, and detection level is
corrected automatically. Then the detection result is printed.
Paper Used
Size: 17"
Type: Enhanced Matte Roll Paper
Procedure
1.
Start the adjustment program and select [Multi Sensor Level
Adjustment].
2.
Click the [Run] button to print the adjustment values.
3.
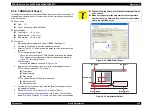
Each numerical value is described below. Confirm standard values for
B~E.
A:
Shows results of light received from either PW1 or PW2 light
receiver when PG=1.2.
B:
Automatically switches to 1 or 0 according to amount of
reflected light acquired. LED light quantity control is switched
according to the numerical value.
C:
Shows the LED light emission level. The standard value differs
according to the light quantity control set at B.
z
At "I/O: 1" = 80 or higher
z
At "I/O: 0" = 104 or lower
D:
Shows level of reflected light received from the paper. Value is
within range of 230~236.
E:
Shows level of reflected light received from the platen. Value is
within range of 0~3.
4.
Click the [Finish] button.
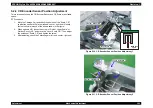
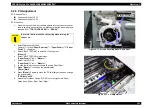
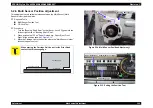
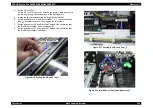
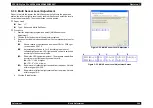
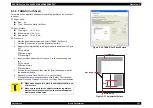
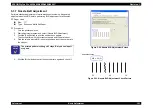
Figure 5-22. Multi Sensor Level Adjustment
Figure 5-23. Multi Sensor Level Adjustment Values
[PW1 (PG=1.2)] I/O: 1,
[PW2 (PG=1.2)] I/O: 1,
D/A: 119,
A/D: 233, A/D (2): 1,
A/D: 233,
D/A: 93,
A
B
C
D
E
Summary of Contents for Stylus Pro 4800 Portrait Edition
Page 9: ...C H A P T E R 1 PRODUCTDESCRIPTION ...
Page 113: ...C H A P T E R 2 OPERATINGPRINCIPLES ...
Page 156: ...C H A P T E R 3 TROUBLESHOOTING ...
Page 200: ...C H A P T E R 4 DISASSEMBLY ASSEMBLY ...
Page 366: ...C H A P T E R 5 ADJUSTMENT ...
Page 448: ...C H A P T E R 6 MAINTENANCE ...
Page 457: ...C H A P T E R 7 APPENDIX ...


