


Handling a CD/DVD
7
En
g
lis
h
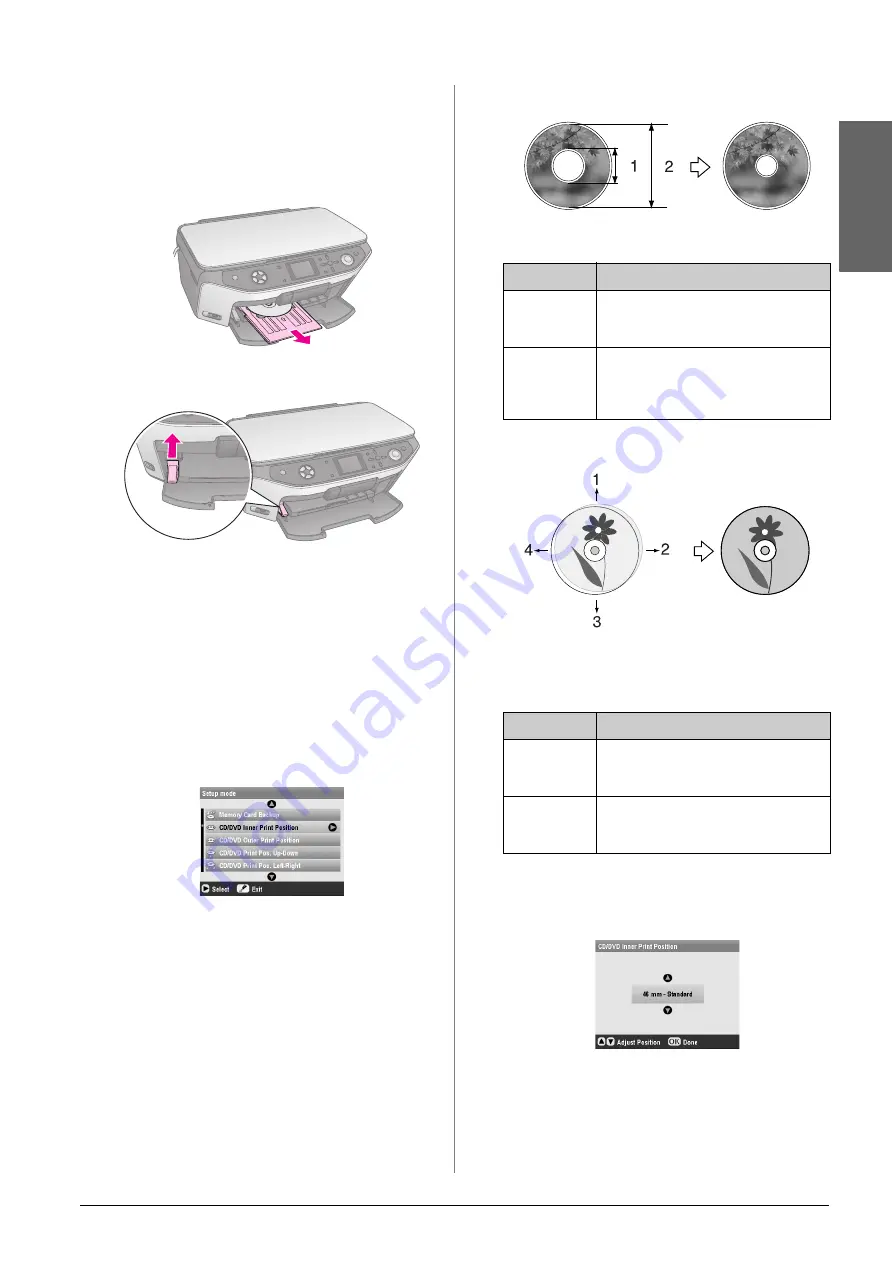
Ejecting the CD/DVD Tray
1.
Make sure that printing is finished.
2.
Eject the CD/DVD tray by pulling it straight out
of the front tray.
3.
Move the tray lever up to reposition the front tray.
Adjusting the Print Position
If your printed image is not centered on the CD/DVD,
you can adjust its printing position.
1.
If necessary, print a test sample using an extra
CD/DVD.
2.
Press the
q
Setup
button.
3.
Use the
u
or
d
button to select the print position
options.
Inner/Outer Print Position
Up-Down/Left-Right Print Position
4.
Press the
r
button and then use the
u
,
d
,
l
, or
r
buttons to select how far (in millimetres) to move
the print position.
5.
Press
OK
to apply the new setting.
Note:
The EPSON STYLUS PHOTO RX retains your settings even
after it has been turned off, so you do not need to readjust the
printing position each time you print a CD/DVD.
Options
Description
CD/DVD
Inner Print
Position
Select to resize the print position for the
inside diameter of the CD/DVD label. You
can adjust it by 1 mm from 18 to 46 mm.
CD/DVD
Outer Print
Position
Select to resize the print position for the
outside diameter of the CD/DVD label.
You can adjust it by 1 mm from 114 to
120 mm.
Options
Description
CD/DVD
Print Pos.
Up-Down
Select to finely adjust the CD/DVD print
position. You can adjust it by 0.1 mm from
-2 to +2 mm up and down.
CD/DVD
Print Pos.
Left-Right
Select to finely adjust the CD/DVD print
position. You can adjust it by 0.1 mm from
-2 to +2 mm left and right.
1. Inner
2. Outer
1. Move the CD/DVD up
2. Move the CD/DVD right
3. Move the CD/DVD down
4. Move the CD/DVD left
Summary of Contents for Stylus Photo RX640 series
Page 51: ...51 English Memo ...


