6
Handling a CD/DVD
Handling a CD/DVD
Your EPSON STYLUS PHOTO RX includes a special
tray that lets you print directly on any ink-jet printable
CD/DVD.
c
Caution:
You cannot print on thermal-printable CD/DVDs.
To print on 8-cm mini CDs, use the EPSON Print CD
software included with your EPSON STYLUS PHOTO
RX. See the instructions in your on-screen
User's Guide
.
Loading a CD/DVD
Make sure the data, music, or video is burned on your
ink-jet printable CD/DVDs before you print.
Otherwise, dirt or scratches on the surface may cause
errors when you burn the data. If you plan to print
large numbers of CD/DVDs, it is a good idea to print
a small sample, then wait a day and check the quality
to make sure it is satisfactory.
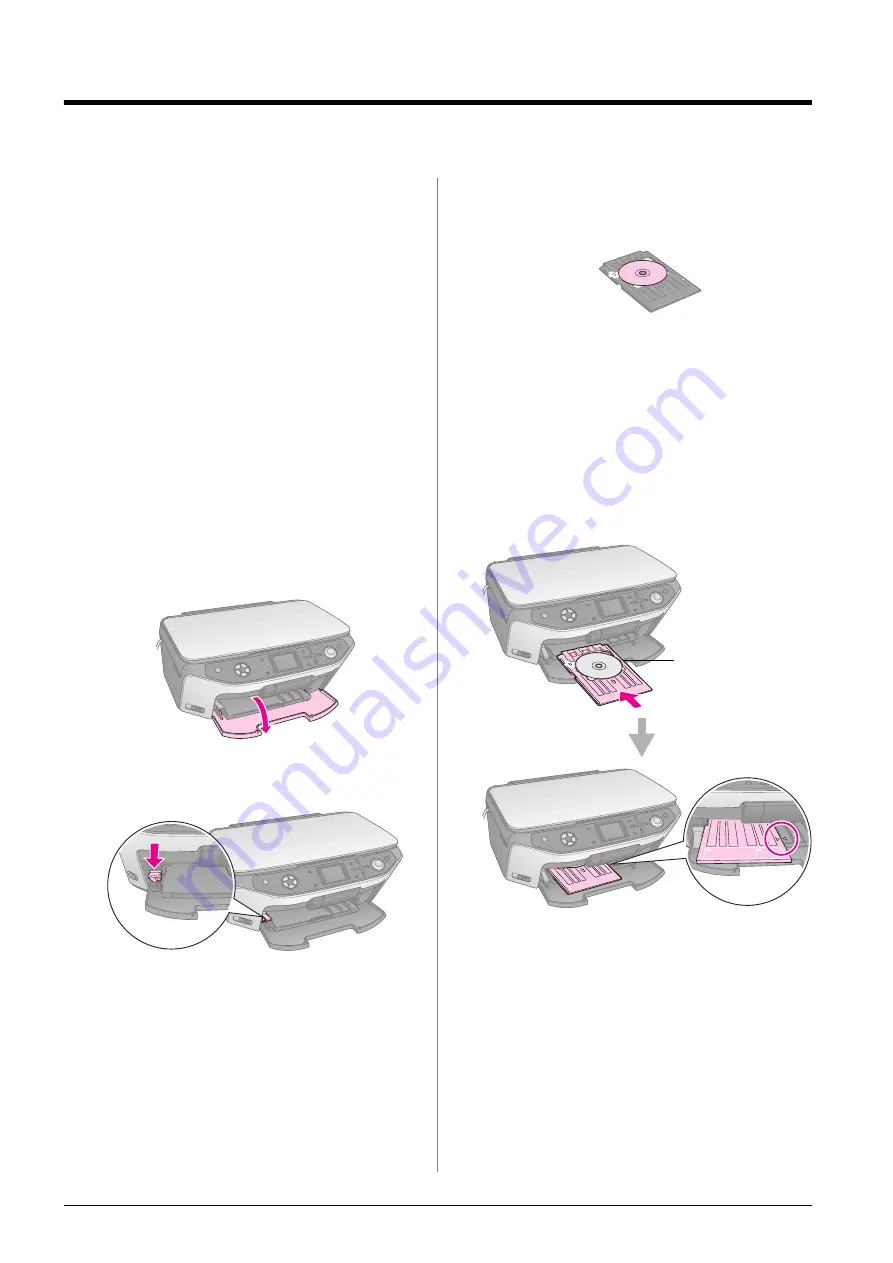
1.
Turn on the EPSON STYLUS PHOTO RX and
open the front cover.
2.
Move the tray lever down until the front tray is
lifted to the CD/DVD position.
c
Caution
❏
Do not touch the front tray when operating the tray lever.
❏
Do not move the tray lever while the EPSON STYLUS
PHOTO RX is operating.
Note:
Before you move the tray lever, make sure no paper or other
objects are on the front tray and the front tray is not extended.
3.
Place your CD/DVD on the CD/DVD tray with
the label surface up. (Make sure the surface is
clean.)
Note:
Use the CD/DVD tray that comes with the EPSON STYLUS
PHOTO RX. The tray cannot be used with other products.
4.
Insert the tray into the EPSON STYLUS PHOTO
RX until the arrow mark on the CD/DVD tray is
aligned with the arrow mark on the front tray.
c
Caution:
Do not insert the CD/DVD tray while the EPSON STYLUS
PHOTO RX is operating. Otherwise, your EPSON STYLUS
PHOTO RX may be damaged or the surface of the CD/DVD
may become dirty or scratched.
Now you are ready to copy or print on a CD/DVD.
■
To copy on a CD/DVD, see “Copying on a
CD/DVD” on page 11
■
To print on a CD/DVD, see “Printing a CD/DVD”
on page 22
Insert the CD/DVD
tray along the edge
guide
Summary of Contents for Stylus Photo RX640 series
Page 51: ...51 English Memo ...


