54
Printing on Paper Cut From a Roll
If you’ll be printing on paper cut from a roll without using the roll paper holder,
follow the steps below.
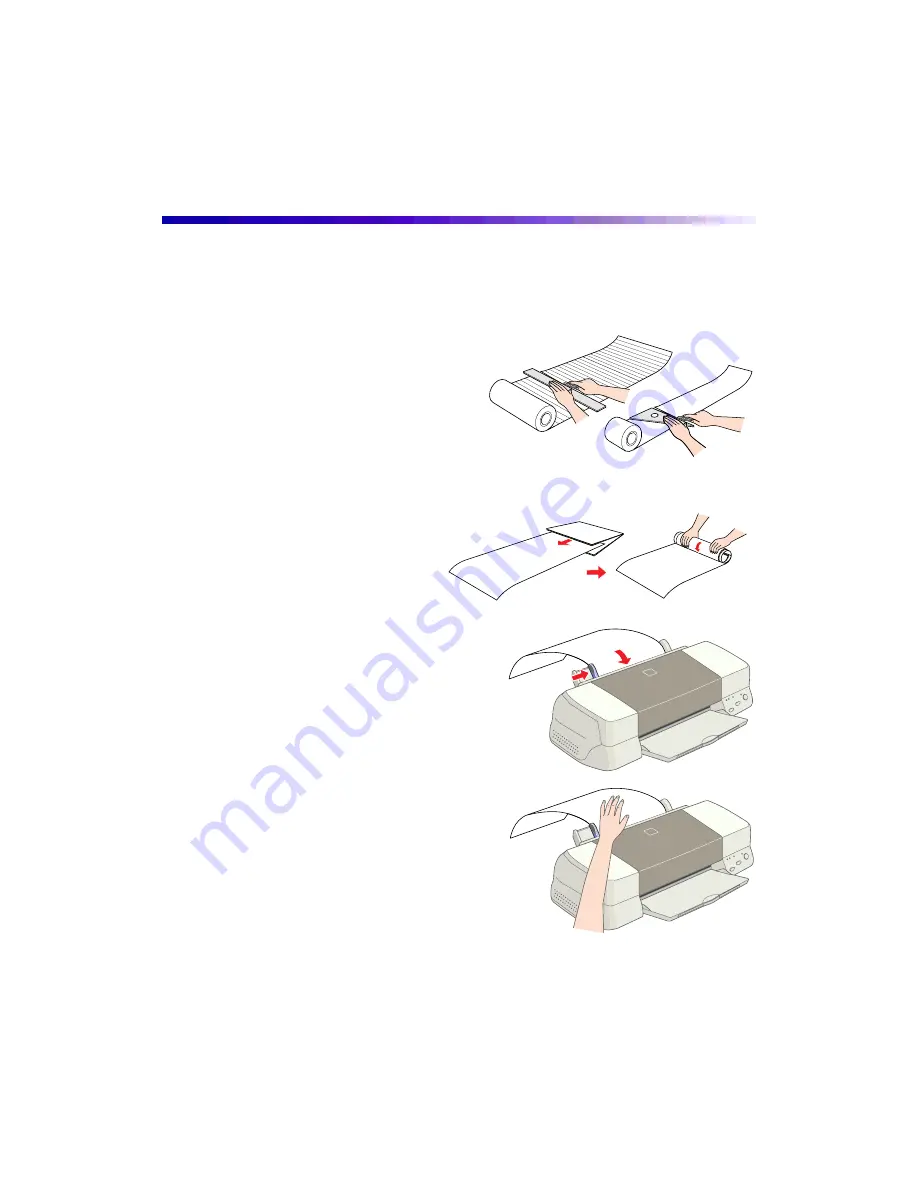
1. Before loading the paper, cut it to the
desired length of your image plus two
inches for the necessary margins. Cut
the edge cleanly, at a 90 degree angle
in each corner, to ensure proper loading.
(13-inch wide Photo Paper on a roll
includes cutting lines on the back to
guide you.)
2. Roll the edge of the paper
backward to uncurl it using a
folded sheet of paper to prevent
your hands from marring the
printable surface.
3. Then remove the printer’s paper support
and load the sheet, printable side up, as far
as it will go. Slide the left edge guide
against the paper.
4. Gently hold the paper in place on the top
as you press and release the
E
load/eject
button to feed the paper into the printer.
(If the paper feeds incorrectly, pull it out
backward and reload it. If it won’t come
out, hold down the
E
load/eject button for
three seconds to feed the paper backward
to where you can pull it out. Then reload
the paper.)
5. Open your document in your application
software and access the printer settings
dialog box (see page 17 [Windows] or
page 22 [Macintosh] for instructions).


