Installing Software and Configuring the Print Server
29
Setting Up a Network Port
To finish setting up the printer on the wireless network, you need to set up a network
port on each computer that will use the printer. Follow the instructions for your
operating system.
Setting Up a Network Port on Windows XP
Before you begin, run WP-Admin and note the IP address of your print server. Then
follow these steps to set up a network port on a computer running Windows XP:
1. From the Start menu, click
Control Panel
.
2. Click
Printers and Other Hardware
.
3. Click
Printers and Faxes
.
4. Right-click the
EPSON Stylus C80 Series
printer icon, then click
Properties
.
5. On the Ports tab, select the
EPSON
Stylus C80 Series
printer, and click
Add
Port
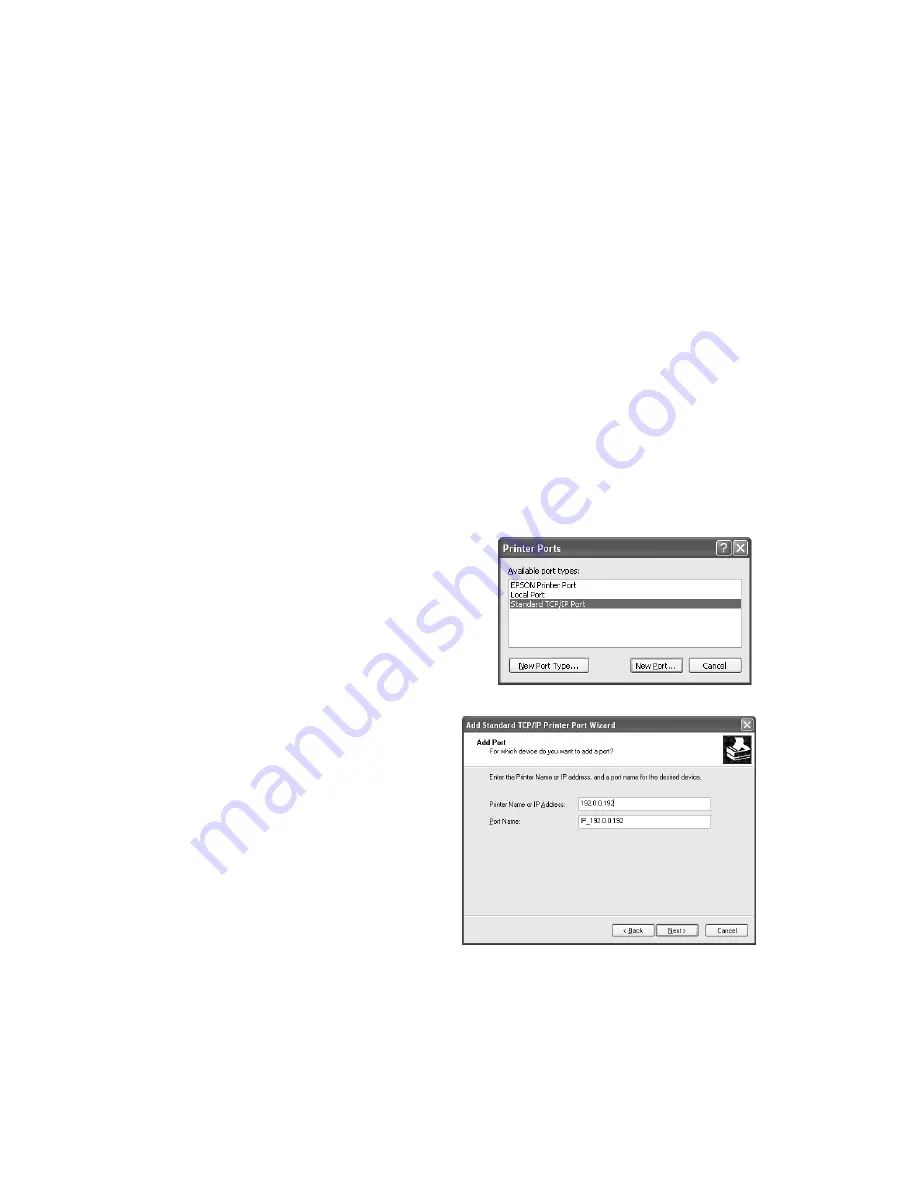
. You see this window:
6. Select
Standard TCP/IP Port
and click
New Port
. You see the Add Standard
TCP/IP Printer Port wizard.
7. Click
Next
.
8. In the
Printer Name or IP Address
box, enter the print server’s IP
address and click
Next
.
9. Follow the instructions on the
screen to complete the wizard.
10. Click
Close
to close the Printer
Ports window.
11. On the Properties window, click
Apply
.
12. To test the connection, select the
General
tab and click
Print Test
Page
.


