


4106754 Rev.0
1-F
C
4106754 Rev.0
1-F
M
4106754 Rev.0
1-F
Y
4106754 Rev.0
1-F
K
3
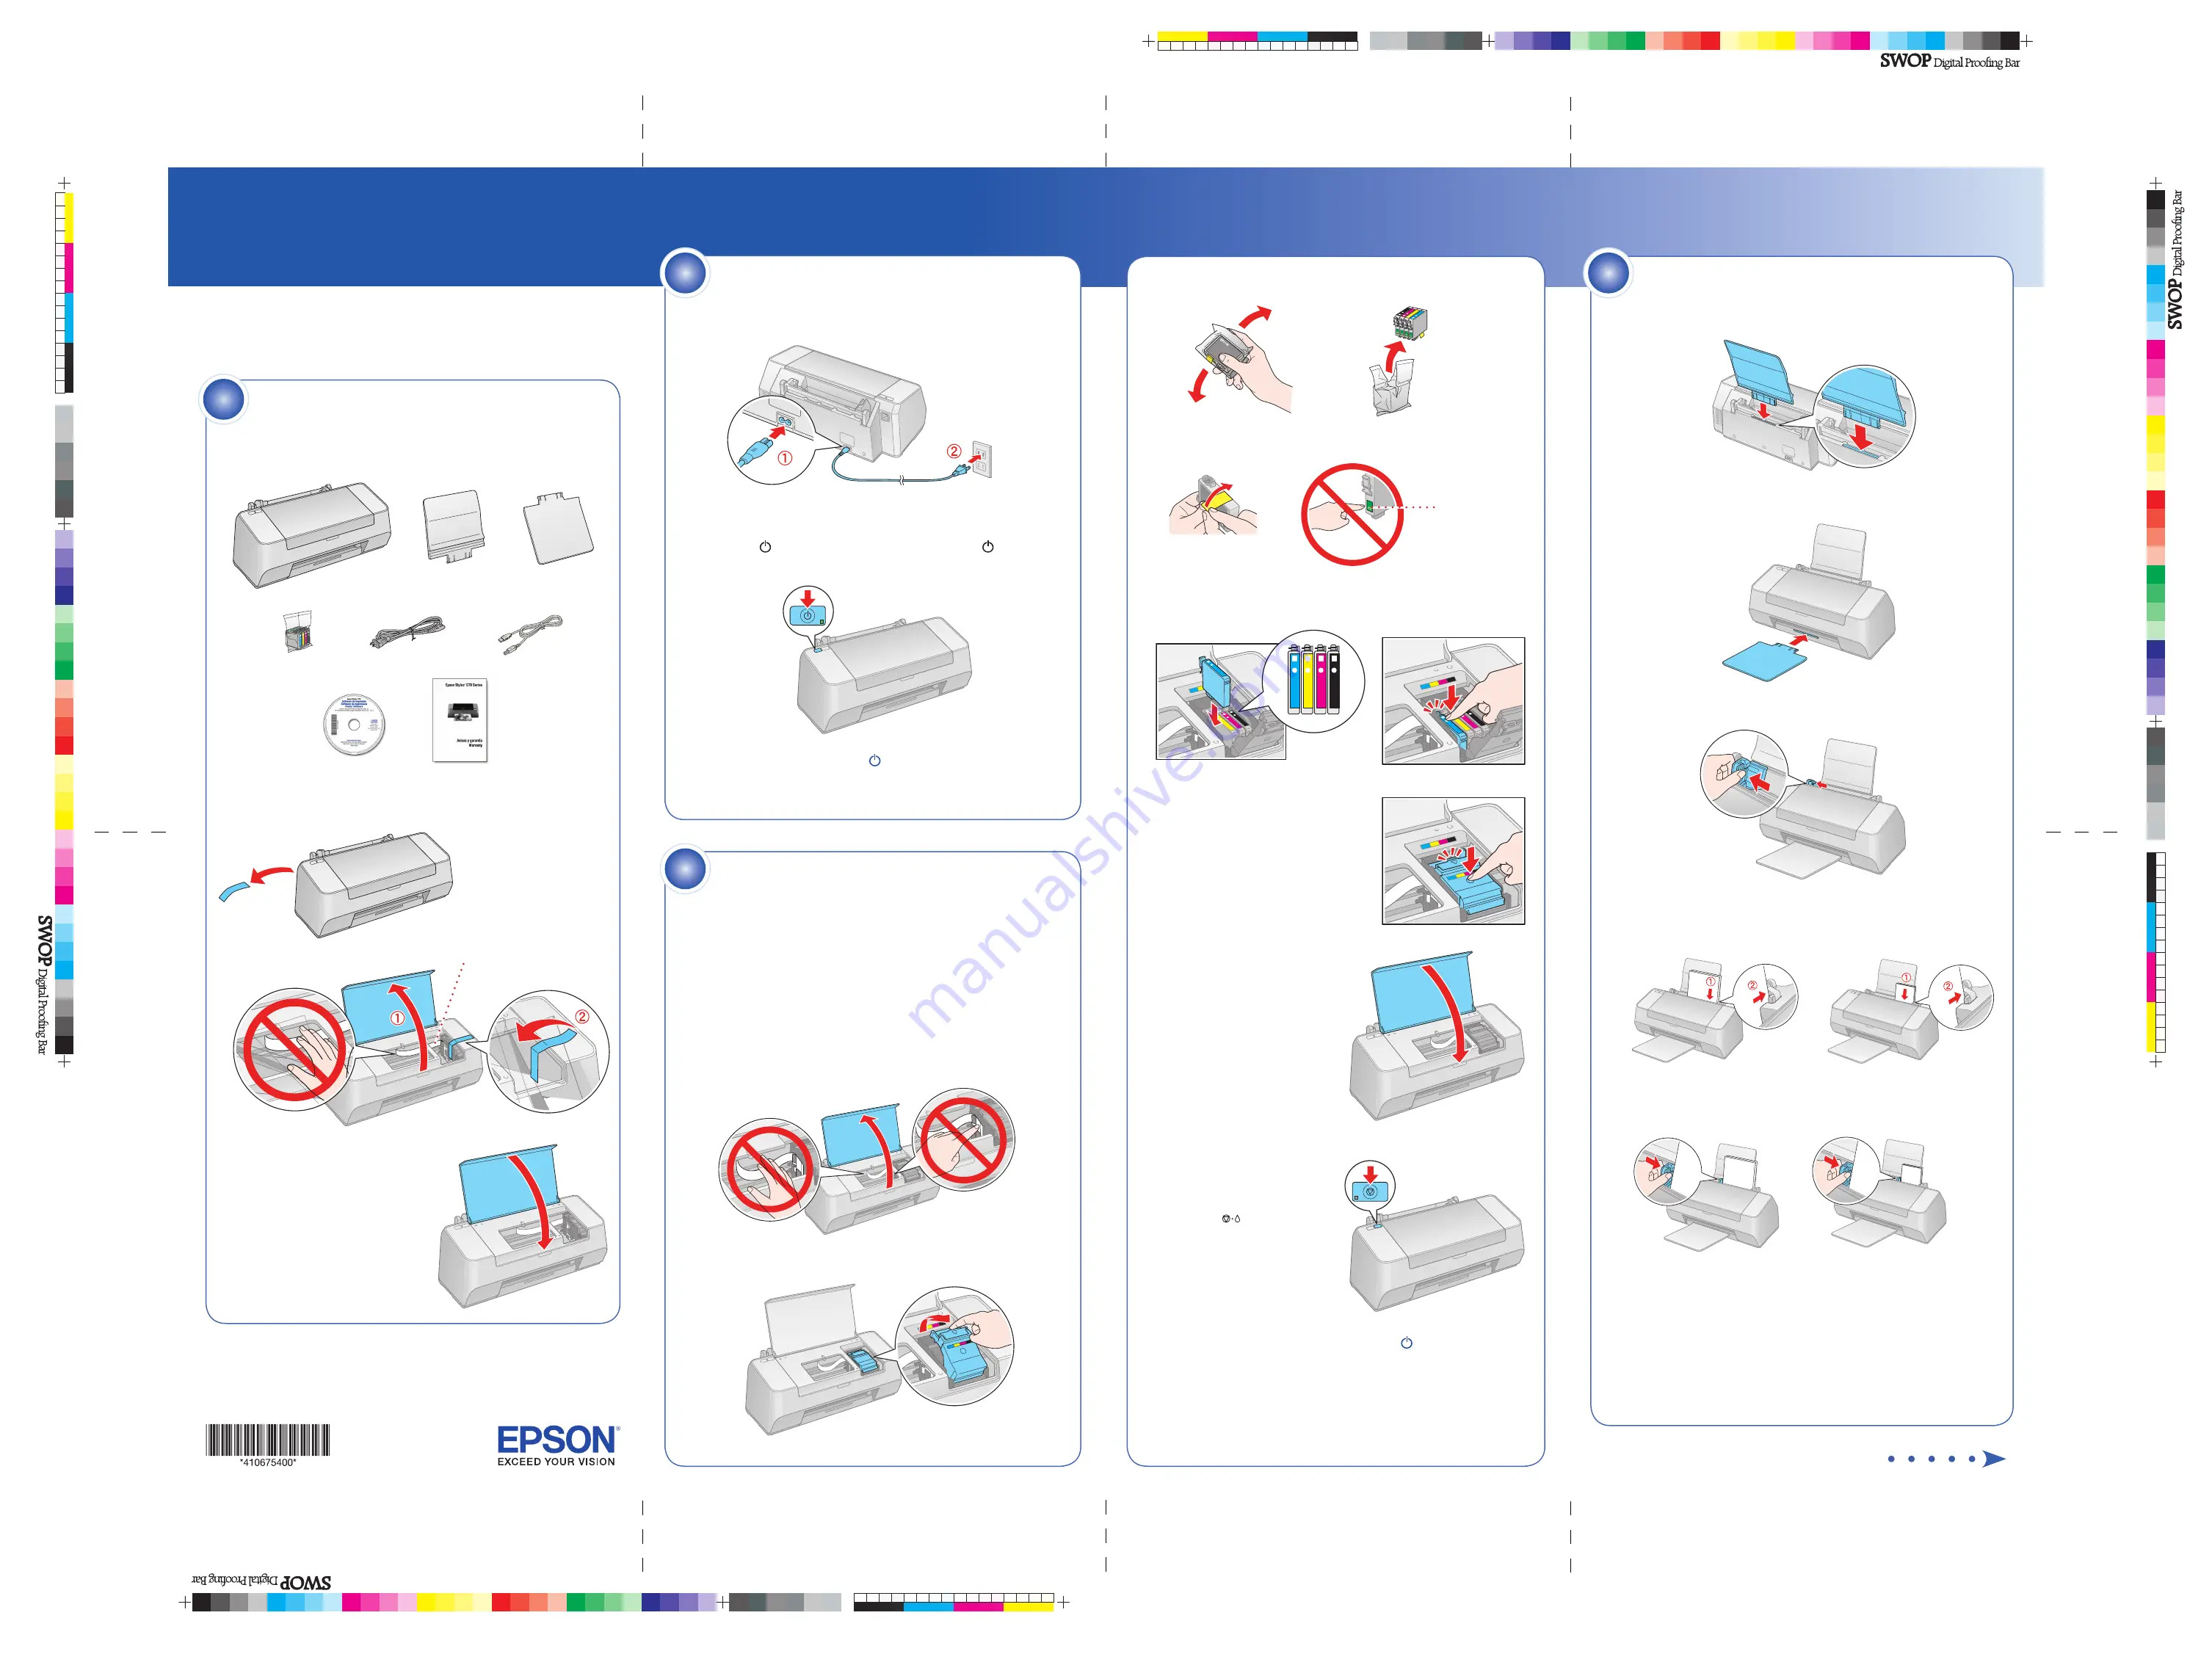
Gently shake the ink cartridges, then unpack them.
4
Remove just the yellow tape from each cartridge.
5
Insert each cartridge into the correct slot for its color. Push them
down to make sure they click into place.
6
Close the ink cartridge cover and
press it down.
7
Close the printer cover.
8
Press the
maintenance
button to charge the ink.
Charging takes 1 or 2 minutes.
Caution:
Never turn off the printer while the green
power light is
flashing or you’ll waste ink.
1
Make sure you have all these items. If anything is missing, contact
Epson
®
as described on the back of this sheet.
2
Remove all the tape outside and inside the printer.
Unpack
1
4
Load Paper
Install Ink Cartridges
3
1
Connect the power cord.
Note:
Do NOT connect the printer to your computer yet.
2
Press
the
power button to turn on the printer. The
power
light flashes and then stays green.
Caution:
Use only the printer’s
power button to turn the printer
on and off.
Turn On the Printer
2
Epson Stylus
®
C79 Series
Read these instructions before using the printer.
Caution:
Keep ink cartridges out of the reach of children and do not drink
the ink.
Do not open ink packages until you are ready to install the ink. Cartridges
are vacuum packed to maintain reliability.
Note:
The first ink cartridges you install in your printer will have lower ink
yields than subsequent cartridges because of the ink required for the initial
charging process.
Don’t load paper before installing ink cartridges.
1
Open the printer cover.
2
Lift open the ink cartridge cover.
Start Here
Paper support
Ink cartridges
Power cord
USB cable
Printer
Printer software
CD
Output tray
Don’t touch
or remove the
white cable
1
Slide the paper support into the slot at the back of the printer.
2
Insert the output tray into the front of the printer.
3
Squeeze the left edge guide and slide it to the left.
4
Fan a few sheets of paper and place them against the right edge
guide. Load the printable side face-up and the short edge first
(even when printing landscape-oriented documents).
5
Squeeze the left edge guide and slide it against the paper.
Letter or A4
4 x 6 or 5 x 7
Do not touch
the green
circuit board
Warranty


