Shaking and Replacing
Ink Supply Units
Shaking
Timing and frequency of shaking
c
Important:
Due to ink characteristics, the ink supply units of
this printer are prone to sedimentation
(components settling to the bottom of the liquid).
If ink settles, tint unevenness and nozzle clogs occur.
Shake a new ink supply unit before installing it.
After installing it in the ink unit, remove and
shake it periodically.
❏
When replacing
Approx. 10 times in 10 seconds
You do not need to shake the OP, ML, or cleaning
ink supply units.
❏
Once every week
Remove any tray whose LED light is flashing blue,
and then shake the ink supply unit tray. To
maintain print quality, do not continue using
them when they are flashing blue.
Approx. 5 times in 5 seconds
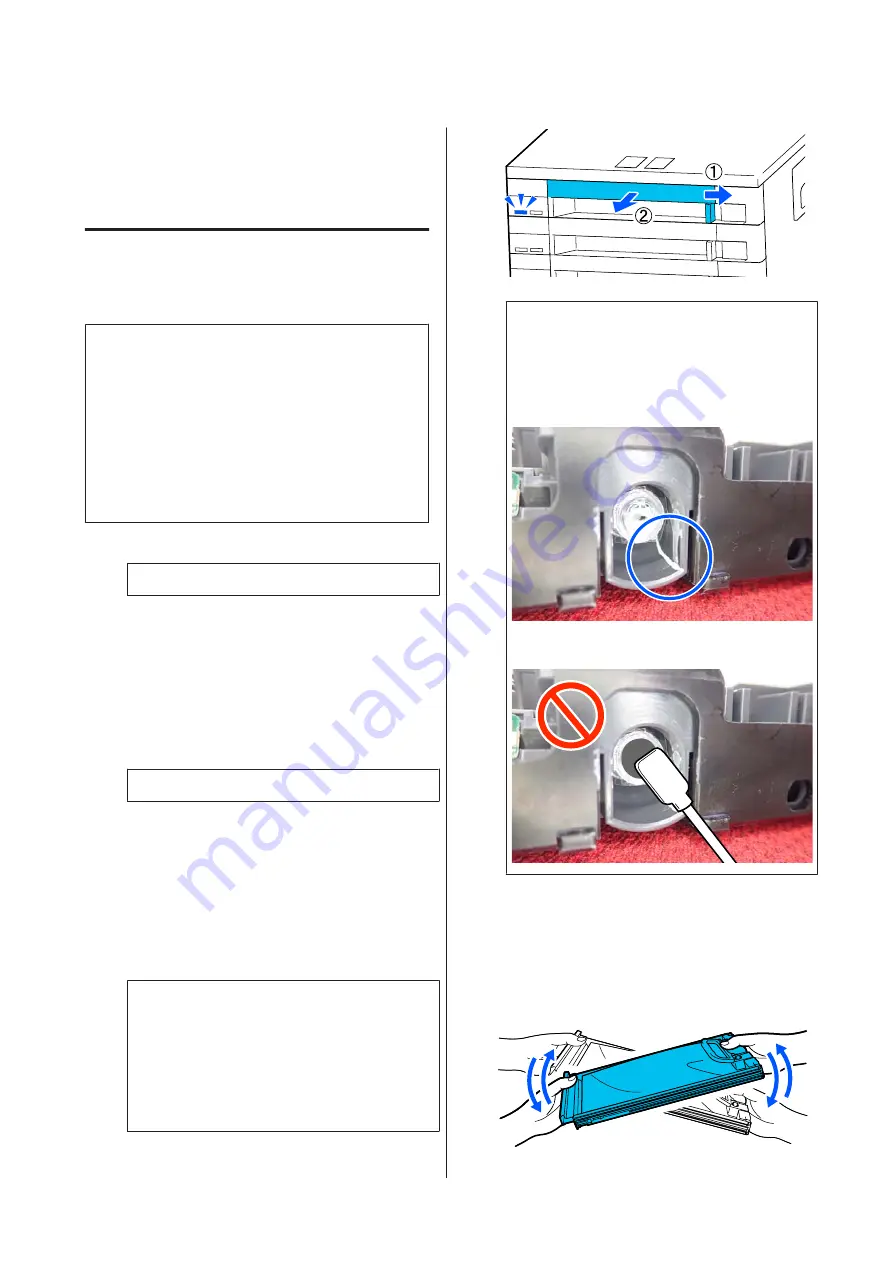
Shaking method
A
Make sure the printer is on, and then pull the
ink supply unit tray that needs to be shaken out
of the ink unit.
Any ink supply unit whose LED light is flashing
blue needs to be shaken.
c
Important:
Place your hand on the bottom of the ink
supply unit tray while removing it. If you use
only one hand, the weight of the ink supply
unit tray may cause it to fall, and be
damaged, as you remove it.
Note:
While the ink supply unit tray is pulled out, check
the ink supply ports of the ink supply units. If ink
has dripped from the port or accumulated at the
bottom as shown in the photo, wipe it off using a
cleaning stick.
Do not touch the ink supply ports while wiping.
B
While the ink supply unit is in the ink supply
unit tray, as shown in the illustration below,
shake it thoroughly by tilting it up and down at
about a 60 degree angle 5 times in 5 seconds.
You do not need to shake the OP, ML, or
cleaning ink supply units.
SC-R5000 Series/SC-R5000L Series User's Guide
Maintenance
87


