Loading and Removing
Roll Paper
Loading Roll Paper
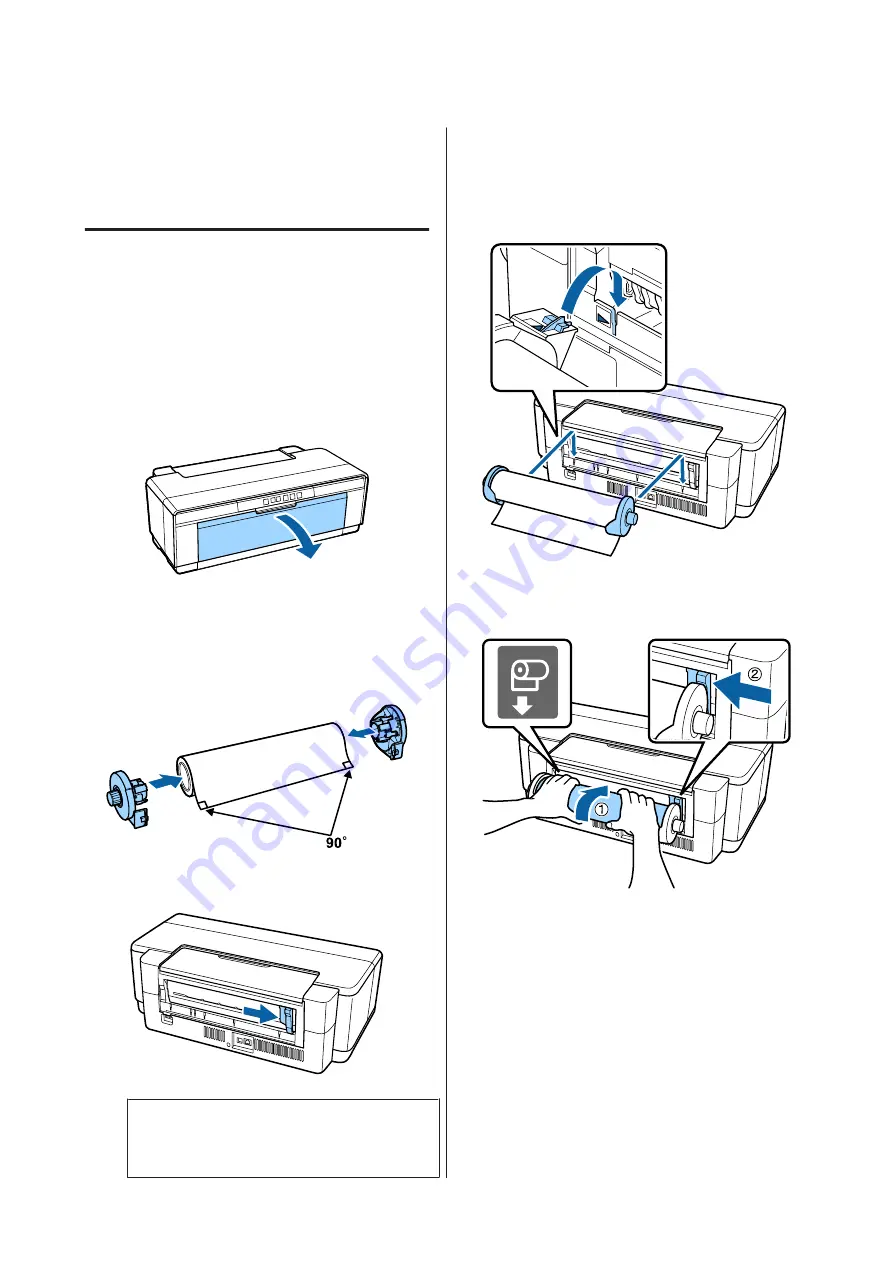
Using the supplied roll paper holder, position the paper
at the rear of the printer.
A
Turn on the printer.
B
Open the output tray.
Do not pull out the tray extension.
C
After confirming that the end of the roll paper is
cut straight across, insert the supplied roll paper
holder into the ends of the roll.
If the end of the roll paper is not cut straight
across, trim it straight before proceeding.
D
Move the roll paper edge guide at the back of the
printer all the way to the right.
Note:
Remove the rear manual feed guide if it is currently
in place at the rear of the printer.
E
Attach the roll paper holder to the rear of the
printer.
Align the triangles on the roll paper holder with
the triangles on the printer and insert the tabs
into the matching slots.
F
Lightly insert the roll paper into the rear roll
paper feeder and match the edge guide to the
width of the paper.
G
Slide the roll paper in until it stops and keep it
lightly held in this position for about three
seconds.
The paper will be fed into the printer
automatically.
H
Open the printer cover and look down into the
printer to check that the paper is not being fed at a
slant.
If the roll paper is fed at a slant, remove the roll
paper and then load it again.
SC-P400 Series User's Guide
Basic Operations
23


