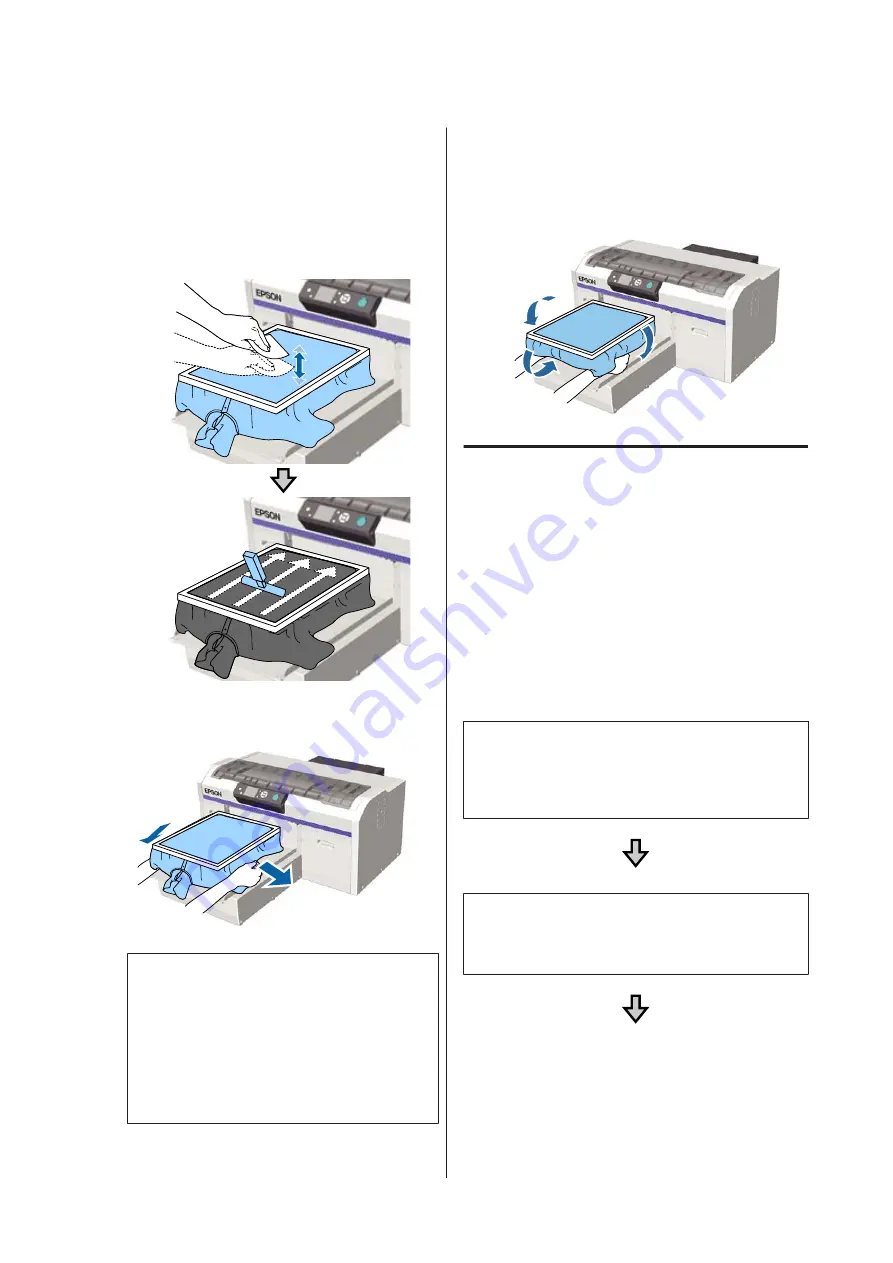
G
Remove any lint from the printing surface, and
press the fibers flat.
There may be lint on the media if you have not
applied pre-treatment liquid. Remove the lint
using the sticky tape or roller and press the fibers
flat using the hard roller. Lint and fibers may stick
to the print head and stain other areas.
H
Pull the T-shirt outside of the frame to remove
any creases and slack.
c
Important:
Stretch the media so that there are no creases
or slack. However, if the T-shirts is stretched
too much, the print quality may decline due to
deformation of the image, and the white
under-base print may extend outside the
image.
I
Press down the frame of the platen so that it does
not become loose.
J
Tuck in the T-shirt around the frame so that it
does not drape over the movable base.
Adjusting the Platen Gap
The platen gap is the distance between the print head
and the T-shirt (media).
Failure to use platen gap adjustment to adjust to the
correct distance may cause print quality to decline or
stain the inside of the printer with ink.
The larger the value on the scale indicated by the platen
gap adjustment lever, the lower the platen is and the
wider the distance from the print head. The following
workflow explains how to perform adjustments.
Adjust the gap to the narrowest point
The platen gap is gradually narrowed by slowly changing
from the guided scale to the smaller scale one step at a
time.
Check the Platen Height Error
If the platen gap is narrowed beyond the limit, this error is
displayed.
SC-F2100 Series User's Guide
Basic Printing
53


