


28
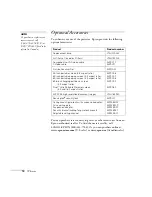
Setting Up the Projector
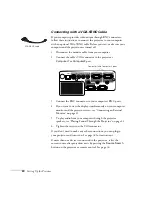
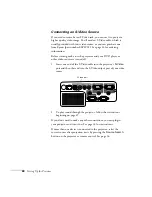
Connecting a Component Video Source
If your video source has component video connectors, you can use
them to project a higher quality video image. You’ll need a
component-to-VGA video cable, which can be purchased from Epson
(part number ELPKC19). See page 14 for ordering information.
Before starting, make sure the projector and your DVD player or
other video device are turned off.
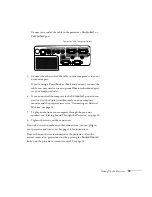
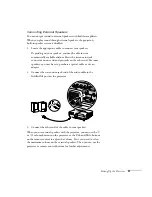
1. Connect the 15-pin VGA connector end of the
component-to-VGA video cable to the projector’s
Computer1
or
Computer2
port.
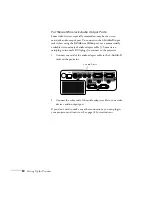
2. Insert the three component ends of the component-to-VGA video
cable into the color-coded video output ports on your video
source, usually labelled
Y
,
Pb
,
Pr
or
Y
,
Cb
,
Cr
.
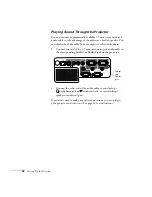
3. To play sound through the projector, follow the instructions
If you don’t need to make any other connections, you can plug in
your projector and turn it on. See page 34 for instructions.
If more than one device is connected to your projector, select
Computer1 or Computer2
as the source by pressing the
Source
Search
button on the projector or the remote control. See page 36.
Computer1 and Computer2 ports
Summary of Contents for PowerLite 822+
Page 1: ...PowerLite 822 83 Multimedia Projector User sGuide ...
Page 32: ...32 Setting Up the Projector ...
Page 70: ...70 Fine tuning the Projector ...
Page 102: ...102 Monitoring the Projector Over a Network ...
Page 110: ...110 Technical Specifications ...
Page 114: ...114 Notices ...
Page 120: ......


