


15
4
Select
1 Per Page
or
Proof Sheet
(20 per page)
and press
OK
.
If you selected 1 Per Page, you can press
l
or
r
to
review your photos.
5
If you selected 1 Per Page and you want to print
with a white border or include the date, select
Borderless/Date Stamp: Off
and press
OK
. Then
select the option you want and press
OK
again.
Note: If you want to change the layout or edit your
photos, press
Menu
. See page 18 for instructions.
6
Make sure you have enough paper loaded, then
press
to start printing.
Note: If you are printing more than 20 pages, you will
need to reload paper while printing. Load a maximum of
20 sheets at a time. When you see a message that paper
is out, load more paper and press
OK
to continue
printing. If you need to cancel printing, press
Stop/
Clear
.
After printing, you see a message asking if you
want to save the printed photos to the print
history.
7
Follow the instructions on the screen to save the
photos. See page 14 for more information.
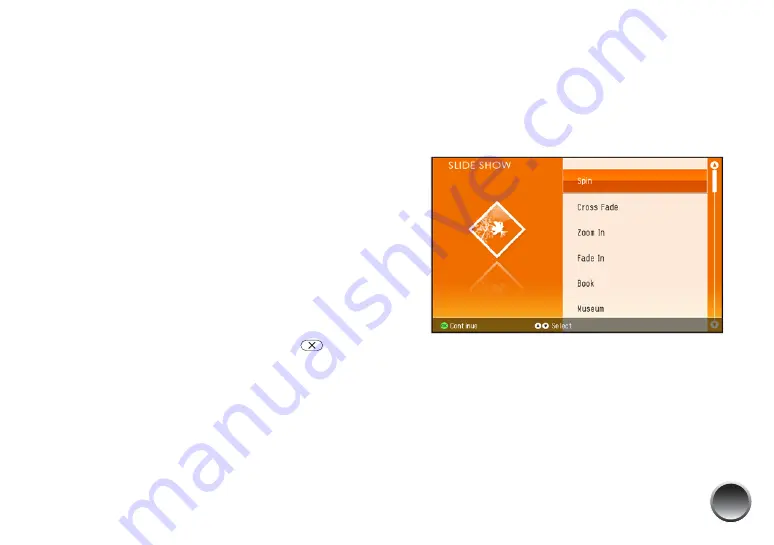
Printing From a Slideshow
You can select from 12 slideshows with 3D animation,
and choose photos for printing right from the show.
1
From the Home menu, select
SLIDE SHOW
and
press
OK
on the remote control.
2
Select the slideshow you want, then press
OK
.
PictureMate displays your photos as a slideshow
with a variety of animation effects.
When you see the “countdown” in the upper right
corner of the screen, you can select a photo for
printing.
Summary of Contents for PictureMate Dash PM 260
Page 1: ...User s Guide ...
Page 3: ...3 Specifications 82 Notices 87 Index 65 ...
Page 106: ...106 ...


