4-2
Getting Photos Into Your Computer
◗
When you connect the camera, make sure your system is
not exposed to sources of electromagnetic interference,
such as stereo speakers or the base units of cordless
telephones.
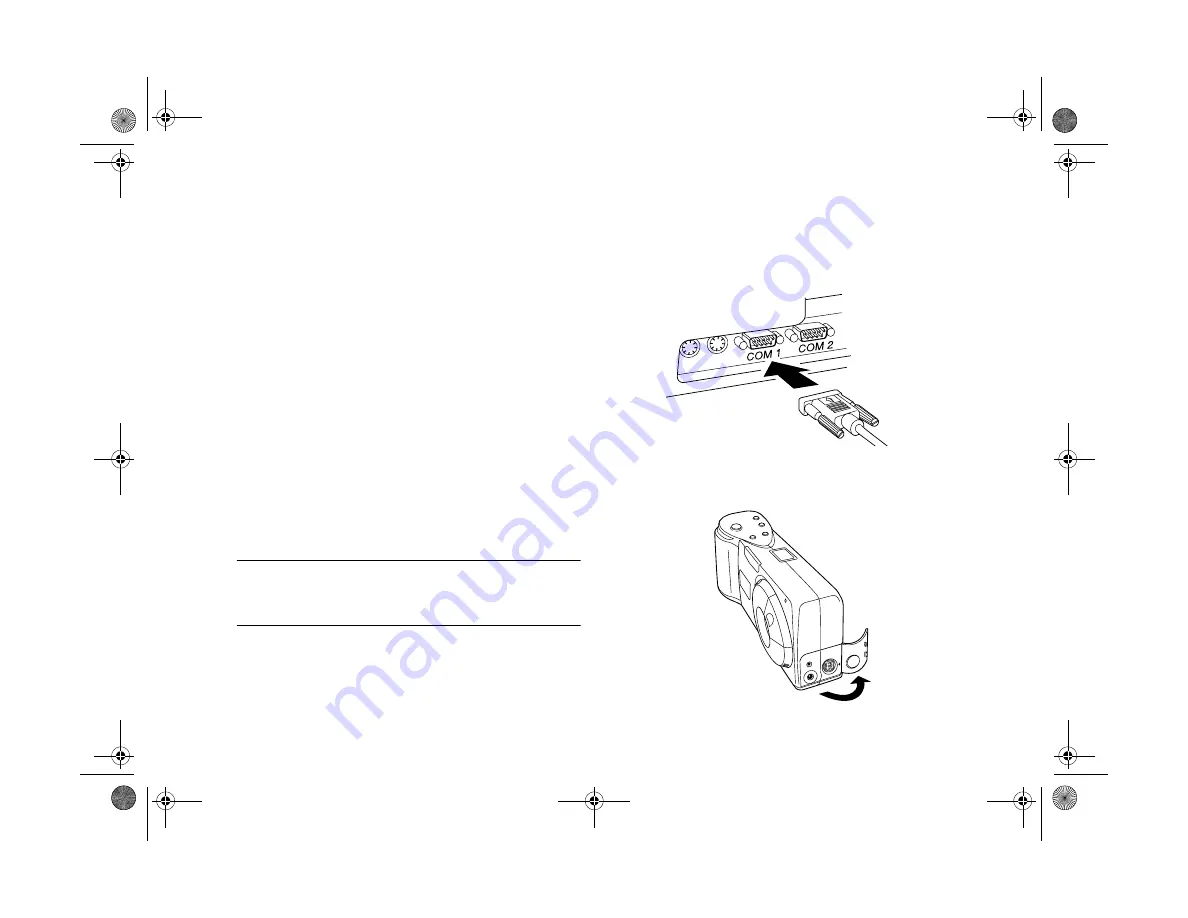
Connecting to a Windows PC
Make sure you have the serial cable that came with your
camera. Before you start, turn off the camera, LCD screen,
and your computer. Then follow these steps:
1
Locate a serial port on the back of your computer. You
may have two serial ports labeled COM1 and COM2, or
the ports may be labeled with icons. If you have two
serial ports available, use COM1 (port 1) to connect
your camera.
NOTE
If you have a 25-pin serial port, you can use a 9- to 25-pin
adapter.
2
Line up the serial connector on the cable with one of the
serial ports on your computer, and insert the connector.
Then tighten the screws.
3
Open the connector cover on the side of the camera.
.
Popch4.fm5 Page 2 Friday, May 15, 1998 2:54 PM
Summary of Contents for PhotoPC 700
Page 1: ......
Page 2: ...A B Popfm fm5 Page i Friday May 15 1998 2 28 PM ...
Page 66: ...3 14 Playing Back Photos Popch3 fm5 Page 14 Friday May 15 1998 2 48 PM ...
Page 104: ...6 16 Working With Photos and Albums Popch6 fm5 Page 16 Friday May 15 1998 3 02 PM ...
Page 136: ...9 12 Using Your Camera for Presentations Popch9 fm5 Page 12 Friday May 15 1998 3 15 PM ...
Page 164: ...11 20 Printing Directly From the Camera DirectPt fm Page 20 Friday May 15 1998 3 23 PM ...
Page 176: ...12 12 Maintenance and Troubleshooting trouble fm Page 12 Friday May 15 1998 3 28 PM ...
Page 184: ...A 8 Optional Accessories Popapa fm5 Page 8 Friday May 15 1998 3 31 PM ...


