background image

T

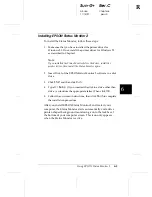
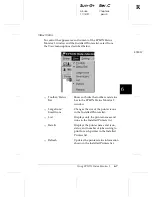
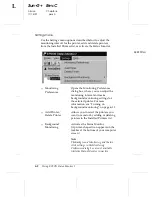
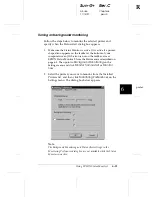
Select
background
monitoring icon 

Changes the appearance of the icon
that is displayed on the taskbar when
background monitoring is active.

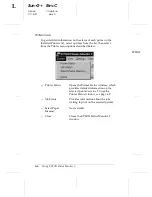
Help menu

Click 

Help

 in the EPSON Status Monitor 2 window to view

online help. Click 

About 

to view the Status Monitor’s version

number and copyright information.

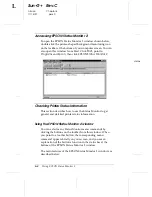
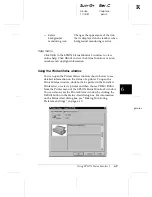
Using the Printer Status window

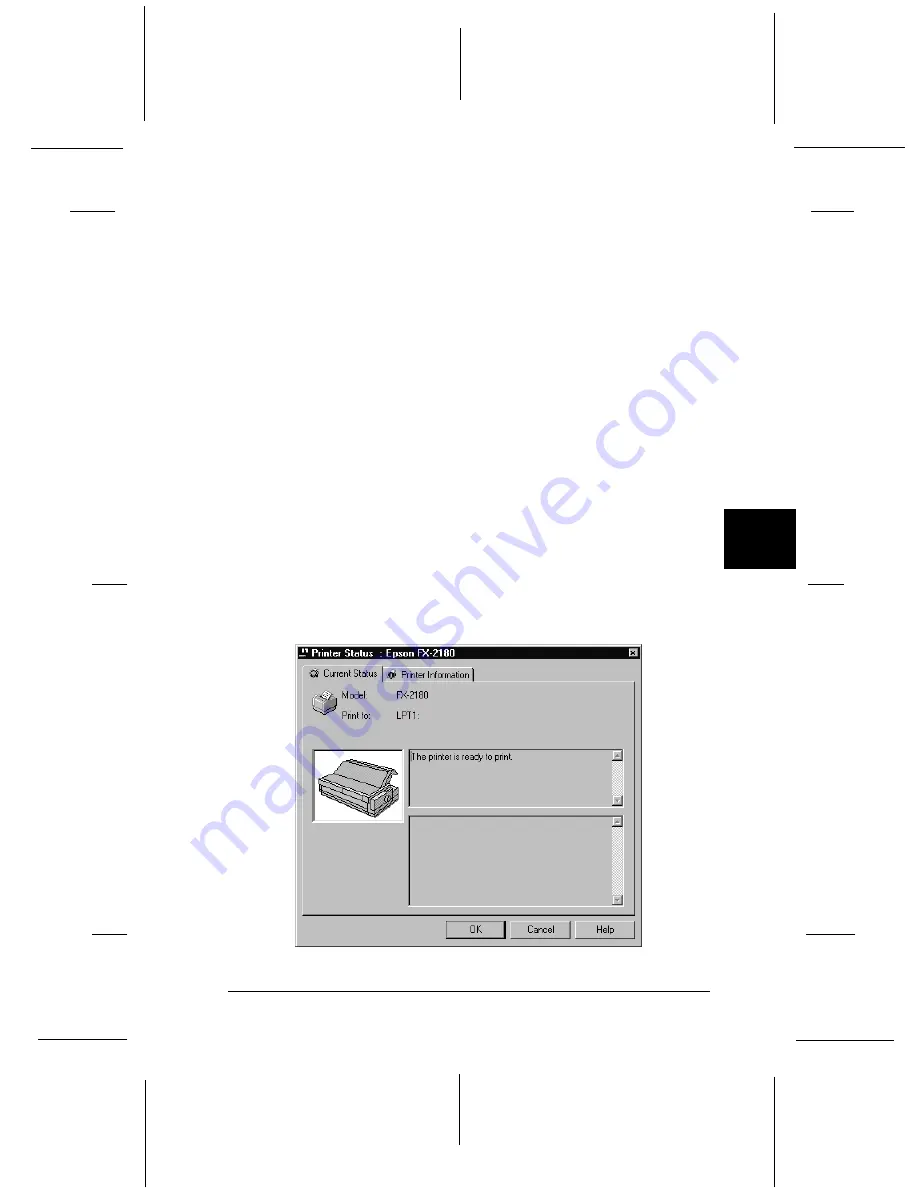
You can open the Printer Status window shown below to see
detailed information on the status of a printer. To open the
Printer Status window, double-click a printer in the Installed
Printers list, or select a printer and then choose 

Printer Status

from the Printer menu of the EPSON Status Monitor 2 window.
You can also access the Printer Status window by clicking the

Details

 button in the Status Alert dialog box. For information

on the Status Alert dialog box, see “Making Monitoring
Preference Settings” on page 6-10.

              printer

6

R

Sun-G+

Rev.C

A5 size

Chapter 6

11/14/97

pass 0

Using EPSON Status Monitor 2      

6-9

Summary of Contents for FX-2180 - Impact Printer

Page 1: ...ions to this product or excluding the U S failure to strictly comply with SEIKO EPSON CORPORATION s operating and maintenance instructions SEIKO EPSON CORPORATION shall not be liable for any damages or problems arising from the use of any options or any consumable products other than those designated as Original EPSON Products or EPSON Approved Products by SEIKO EPSON CORPORATION EPSON and EPSON E...

Page 2: ... equipment will invalidate the FCC Certification of this device and may cause interference levels which exceed the limits established by the FCC for this equipment It is the responsibility of the user to obtain and use a shielded equipment interface cable with this device If this equipment has more than one interface connector do not leave cables connected to unused interfaces Changes or modificat...

Page 3: ...er printer cover paper guide front paper guide closed control panel knob paper separator cover_1 parallel interface shield plate ribbon cartridge paper thickness lever tractor paper tension unit cover 2 front edge guides front paper guide open cover 3 L Sun G Rev C A5 size Inside front cover 11 14 97 DR pass 0 ...

Page 4: ...uttons to adjust the top of form or tear off position See Chapter 2 Paper Out light On when no paper is loaded in the selected paper source or paper is not loaded correctly Flashes when paper has not been fully ejected or a paper jam has occurred Operate button Turns the printer on and off The printer is off when the top of this button is even with the button protectors Pause button Stops printing...

Page 5: ...4 How To Use Your Manuals 0 15 Warnings Cautions and Notes 0 15 Chapter 1 Setting Up the Printer Unpacking the Printer 1 2 Choosing a Place for the Printer 1 4 Positioning the continuous paper supply 1 5 Installing or Replacing the Ribbon Cartridge 1 6 Attaching the Paper Guide and Paper Separator 1 11 Plugging In the Printer 1 13 Connecting the Printer to Your Computer 1 14 Installing the Printer...

Page 6: ...or 2 17 Removing the printed document from the rear push tractor 2 21 Using the Tractor in the Pull Position 2 22 Installing the tractor in the pull position 2 23 Loading paper onto the pull tractor 2 24 Removing paper from the pull tractor 2 30 Using two tractors in a push and pull combination 2 30 Removing the pull tractor 2 33 Switching Between Printing on Continuous Paper and Printing on Singl...

Page 7: ...r driver settings overview 4 5 Using the Printer Driver With Windows 3 1 4 8 Accessing the printer driver from Windows applications 4 8 Accessing the printer driver from the Control Panel 4 10 Printer driver settings overview 4 10 Using the Printer Driver With Windows NT 4 0 4 12 Accessing the printer driver from Windows applications 4 12 Accessing the printer driver from the Start menu 4 14 Print...

Page 8: ...he Printer Status window 6 9 Making Monitoring Preference Settings 6 10 Turning on background monitoring 6 11 Using the background monitoring icon 6 12 Chapter 7 Troubleshooting Using the Error Indicators 7 2 Problems and Solutions 7 4 Power supply problems 7 5 Single sheet paper loading or feeding problems 7 6 Continuous paper loading or feeding problems 7 8 Wrong top of form position 7 9 Wrong t...

Page 9: ... bin 1 or bin 2 A 10 Switching between continuous paper and single sheet paper in the cut sheet feeder A 11 Using the Roll Paper Holder A 12 Assembling the roll paper holder A 12 Installing the roll paper holder A 13 Loading roll paper A 14 Removing roll paper A 16 Installing an Interface Card A 17 Using the C82305 or C82306 serial interface card A 18 Appendix B Cleaning and Transporting the Print...

Page 10: ...he Italic table C 25 Appendix D Customer Support Information Contacting Customer Support D 2 For North American Users D 2 For United Kingdom and the Republic of Ireland Users D 4 Enquiry Desk D 4 Customer Support D 4 Faxon EPSON D 5 EPtec Bulletin Board Service for latest drivers and utilities D 5 World Wide Web D 5 For Australian Users D 6 EPSON FAXBACK D 6 EPSON Bulletin Board System D 6 Interne...

Page 11: ...For Hong Kong Users D 7 Internet home page D 8 Electronic bulletin board system D 8 Technical support hotline D 8 For Philippines Users D 8 Glossary Index R Sun G Rev C A5 size Front 97 11 14 pass 1 ix ...

Page 12: ... six copies labels single sheets envelopes and postcards q high speed printing of up to 500 characters per second at 10 characters per inch Your printer also comes with printer driver software the EPSON Status Monitor 2 utility for Microsoft Windows 95 that lets you check the status of your printer quickly and easily and other software In addition several options are available to help suit your in...

Page 13: ...printed sheets and save the paper normally lost between documents For more information see Chapter 2 q Use the paper release lever to change the paper path without removing the paper Using the paper release lever you can easily switch to printing on single sheets without removing the continuous paper loaded on the front or rear push tractor You can also easily switch to printing on continuous pape...

Page 14: ...recise adjustments to the top of form and tear off positions For more information see Chapter 2 Available Paper Paths Your printer provides a variety of paper paths for printing on continuous and single sheet paper As described below paper can be fed into the printer from the top front bottom or rear You select the paper path that best suits your current printing needs paper release lever 2 1n R S...

Page 15: ...u to use the printer s tear off edge to easily tear off printed sheets of continuous paper at the perforation Also when continuous paper is loaded on a push tractor you can load single sheets of paper from the paper guide without removing the continuous paper There are two push tractor positions front and rear The tractors are installed in the front push and rear push positions when the printer is...

Page 16: ...n the rear slot If you load continuous paper with labels in the rear slot the labels may come off their backing sheet inside the printer and cause a paper jam Using a pull tractor If you often print on thick or heavy continuous paper such as multi part forms or continuous paper with labels use a tractor in the pull position The pull tractor provides the best paper jam prevention and allows you to ...

Page 17: ...o use a printer stand with an opening large enough so that the paper can feed through it without obstruction rear You can also load continuous paper onto the pull tractor using the rear slot When you print on multi part forms that are bound on only one side by point glueing load it in the rear slot the printer cannot feed this type of form from the front or bottom slot Note Because thick multi par...

Page 18: ...dard tractor that comes in the front push position and install it in the pull position Note Because thick multi part forms require a straight paper path load them in the front slot Caution Do not load continuous paper with labels onto the rear push tractor even when it is used in combination with the pull tractor If you load continuous paper with labels onto the rear push pull tractor the labels m...

Page 19: ...t without removing the continuous paper This section helps you determine which paper slot best suits your single sheet printing needs See Chapter 3 for paper loading instructions Loading paper in the top slot You can load ordinary single sheets single sheet multi part forms envelopes or postcards in the top slot Note Load envelopes only in the top slot 2 9n L Sun G Rev c A5 size Introduction 97 11...

Page 20: ...single sheet multi part forms or postcards in the front slot Note Always use the front paper slot to load single sheet multi part forms that are bound by line glueing only at the side 2 12 R Sun G Rev c A5 size Introduction 97 11 14 pass 0 Getting to Know Your Printer 9 ...

Page 21: ...see Appendix A Enhancing Your Printer With Options Ribbon Cartridges Your printer uses the following ribbon cartridge EPSON black Ribbon cartridge S015086 When printing becomes faint you need to replace the ribbon cartridge Genuine EPSON ribbon cartridges are designed and manufactured to work properly with your EPSON printer They ensure proper operation and long life of the print head and other pr...

Page 22: ...grounded power outlets Avoid using outlets on the same circuit as photocopiers or air control systems that regularly switch on and off q Do not use a damaged or frayed power cord q If you use an extension cord with the printer make sure the total ampere rating of all devices plugged into the extension cord does not exceed the cord s ampere rating Also make sure the total of all devices plugged int...

Page 23: ...rked with this symbol q If you plan to use the printer in Germany observe the following To provide adequate short circuit protection and over current protection for this printer the building installation must be protected by a 16 Amp circuit breaker Note for German speaking users Bei Anschluß des Druckers an die Stromversorgung muß sichergestellt werden daß die Gebäudeinstallation mit einem 16 A Ü...

Page 24: ...n of energy efficient personal computers monitors printers fax machines and copiers in an effort to reduce air pollution caused by power generation For United Kingdom Users Use of options Epson UK Limited shall not be liable against any damages or problems arising from the use of any options or consumable products other than those designated as Original EPSON Products or EPSON Approved Products by...

Page 25: ...ch coloured markings used to identify the terminals in a plug please proceed as follows The green and yellow wire must be connected to the terminal in the plug which is marked with the letter E or the Earth symbol G The blue wire must be connected to the terminal in the plug marked with the letter N The brown wire must be connected to the terminal in the plug marked with the letter L If damage occ...

Page 26: ...nformation on how to use the printer Warnings Cautions and Notes This guide uses the following conventions w Warnings must be followed to avoid bodily injury c Cautions must be observed to avoid damage to your equipment Notes contain important information and useful tips on the operation of your printer R Sun G Rev c A5 size Introduction 97 11 14 pass 0 Getting to Know Your Printer 15 ...

Page 27: ...L Sun G Rev c A5 size Introduction 97 11 14 pass 0 16 Getting to Know Your Printer ...

Page 28: ... 1 5 Installing or Replacing the Ribbon Cartridge 1 6 Attaching the Paper Guide and Paper Separator 1 11 Plugging In the Printer 1 13 Connecting the Printer to Your Computer 1 14 Installing the Printer Driver on Your PC 1 15 For Windows 95 or NT 4 0 1 16 For Windows 3 1 or NT 3 5x 1 19 For DOS programs 1 20 1 R Sun G Rev C A5 size Chapter 1 97 11 14 pass 0 Setting Up the Printer 1 1 ...

Page 29: ...l the power cord may be permanently attached to the printer Also the shape of the power cord plug varies depending on the country in which you bought your printer be sure the plug you have is the right one for your location printer paper guide power cord ribbon cartridge paper separator screwdriver new L Sun G Rev C A5 size Chapter 1 97 11 14 pass 0 1 2 Setting Up the Printer ...

Page 30: ...efore you set it up and turn on the power Follow the directions on the Notice Sheet packed with the printer to remove these materials A screwdriver has been provided for removing the transportation screw Save all packing and protective materials including the transportation screw and the protective locking clips on the paper tension unit in case you need to ship the printer in the future It should...

Page 31: ...ture or dust T Avoid places subject to shocks and vibrations T Place the printer near a wall outlet where you can easily unplug the power cord Note for French speaking users Placez l imprimante près d une prise de contact où la fiche peut être débranchée facilement T Avoid electrical outlets controlled by wall switches or automatic timers An interruption in power can erase information in the memor...

Page 32: ...hat tilts the printer The printer should always be kept level T Position your printer s power cord and interface cable so they do not interfere with paper feeding If possible secure the cables to a leg of the printer stand Positioning the continuous paper supply Before using continuous paper make sure you line up your paper supply with the tractor feeder so the paper feeds smoothly into the printe...

Page 33: ...d by EPSON s warranties w Warning You will need to move the print head by hand to install or replace the ribbon cartridge If you have just used the printer the print head may be hot let it cool for a few minutes before touching it 1 Make sure the printer is turned off The printer is off when the surface of the Operate button is even with the button protectors as shown c Caution Moving the print he...

Page 34: ...ouching it Then slide the print head to the ribbon installation position the indented portion of the paper tension unit by hand Note When you use the pull tractor you can replace the ribbon cartridge even though the print head is not positioned in the ribbon installation position i t 1 2 1 3 1 1 R Sun G Rev C A5 size Chapter 1 97 11 14 pass 0 Setting Up the Printer 1 7 ...

Page 35: ...ed ribbon cartridge 6 Remove the new ribbon cartridge from the package Remove the separator from the middle of the ribbon cartridge and discard the separator Then turn the ribbon tightening knob in the direction of the arrow to remove any slack in the ribbon ribbon guide new02 separator ribbon tightening knob 1 4 L Sun G Rev C A5 size Chapter 1 97 11 14 pass 0 1 8 Setting Up the Printer ...

Page 36: ...each side of the printer as shown below Then lay the cartridge flat 8 Make sure that the two rear notches of the cartridge fit over the small pegs on each side of the printer Then gently press down the cartridge until both ends click into place 1 5A 1 5B 1 R Sun G Rev C A5 size Chapter 1 97 11 14 pass 0 Setting Up the Printer 1 9 ...

Page 37: ...ace behind the print head Press down the guide until it clicks into place 10 Turn the ribbon tightening knob in the direction of the arrow to remove any slack in the ribbon as shown above Then slide the print head from side to side to make sure it moves smoothly ribbon tightening knob ribbon guide 1 6SU 1 7 L Sun G Rev C A5 size Chapter 1 97 11 14 pass 0 1 10 Setting Up the Printer ...

Page 38: ...nto place Attaching the Paper Guide and Paper Separator To install the paper guide and paper separator follow these steps 1 Turn over the paper guide and insert the paper separator s tabs into the slots on the paper guide i t 1 8 paper separator paper guide 1 9n 1 R Sun G Rev C A5 size Chapter 1 97 11 14 pass 0 Setting Up the Printer 1 11 ...

Page 39: ...the paper guide by sliding the slots on the bottom of the paper guide over the pegs behind the paper tension unit 3 Close the paper guide cover paper guide cover paper tension unit 1 9 1 11 L Sun G Rev C A5 size Chapter 1 97 11 14 pass 0 1 12 Setting Up the Printer ...

Page 40: ...our printer s power cord matches your electrical outlet c Caution It is not possible to change the printer s voltage If the rated voltage and your outlet voltage do not match contact your dealer for assistance Do not plug in the power cord 3 If the power cord is not attached to the printer plug the appropriate end into the AC inlet on the back of the printer 4 Plug the power cord into a properly g...

Page 41: ...to use one of the optional interfaces described on page A 3 Follow the steps below to connect the printer to your computer using the built in parallel interface 1 Make sure both the printer and computer are turned off The printer is off when the surface of the Operate button is even with the button protectors 2 Plug the cable connector securely into the printer s interface connector and squeeze th...

Page 42: ...rinter to your computer you need to install the printer driver on your computer The printer driver is software that allows your computer to control the printer You need to install the printer driver so your Windows software applications can take full advantage of the printer s capabilities The printer driver is included in the EPSON printer software disks that come with your printer If you are usi...

Page 43: ... off 2 Insert Disk 1 of your printer driver software in a disk drive Double click the My Computer icon and then double click the drive in which you inserted the disk 3 Double click the Setup icon then make sure your printer icon is selected in the EPSON Printer Driver Setup dialog box shown below Click OK and follow the on screen instructions After you install the printer driver for Windows 95 you...

Page 44: ...amage the printer 3 First turn on your printer and then turn on the computer Your computer starts loading Windows 95 4 If you use a password enter it at the prompt The New Hardware Found screen appears and displays your printer s model name Note If you do not see the New Hardware Found screen or if a problem occurs click Cancel and follow the instructions under For Windows 95 or NT 4 0 on page 1 1...

Page 45: ...p the default printer model name as shown If this is your only printer or you want to use this printer as the default printer for Windows 95 applications select Yes No is the default setting 10 Click the Finish button The program copies the files to your hard disk and adds an icon to the Printers folder using the printer model name or the name you selected After you install the printer driver for ...

Page 46: ...he Program Manager window is open 2 Insert Disk 1 of your printer driver software in a disk drive 3 Choose Run from the File menu The following dialog box appears 4 Type A SETUP If you inserted the disk in a drive other than drive A substitute the appropriate letter Then click OK The EPSON Printer Driver Setup dialog box appears 5 Make sure your printer is selected and click OK Follow the on scree...

Page 47: ...oes not include the FX 2180 printer choose the first available printer from this list FX 2170 FX 880 FX 1180 FX 870 1170 FX 850 1050 FX 800 1000 EX 800 1000 FX 85 105 FX 80 100 FX 80 100 If none of these printers is listed choose the first one available from the following FX LX RX MX EPSON printer Standard printer Draft printer ASCII printer Note If your application does not list a suitable altern...

Page 48: ... tractor 2 17 Removing the printed document from the rear push tractor 2 21 Using the Tractor in the Pull Position 2 22 Installing the tractor in the pull position 2 23 Loading paper onto the pull tractor 2 24 Removing paper from the pull tractor 2 30 Using two tractors in a push and pull combination 2 30 Removing the pull tractor 2 33 Switching Between Printing on Continuous Paper and Printing on...

Page 49: ...e sheet position For loading single sheet paper from the top or front slot For information on loading single sheets see Chapter 3 Rear push tractor position For loading continuous paper from the tractor installed in the rear push position Also set the lever to this position when using the rear push and pull tractors in combination Front push tractor position For loading continuous paper from the t...

Page 50: ...g the paper release lever Before moving the paper release lever always press the Load Eject button to feed the paper in the paper path backward to the standby position Setting the Paper Thickness Lever Setting the paper thickness lever allows the printer to accommodate various thicknesses of paper The paper thickness lever is located under the printer cover You can select one of eight positions id...

Page 51: ...ontinuous paper with labels 2 Envelopes 4 or 5 Postcards 3 See Appendix C for complete paper specifications Always load multi part forms with seven parts one original plus six copies from the front or bottom slot onto the pull tractor Note R If the printed image is smeared you may need to set the paper thickness lever one position lower to improve print quality R If the printed image is faint or h...

Page 52: ...ti part forms with seven parts one original plus six copies in the front or bottom slot and onto the pull tractor T You may want to turn on the double strike mode as described on page 2 6 to make sure the printout on the bottom copies appears correctly T When loading multi part forms that are bound on only one side by point glueing load them on the rear push tractor or from the rear slot using the...

Page 53: ...fore printing on multi part forms with seven parts T The double strike mode is available only when the paper thickness lever is set to a position higher than 3 and the paper release lever is set to the pull tractor position T When the printer is in the double strike mode the print speed is reduced 1 Load your multi part forms on the pull tractor as described in this chapter 2 Make sure that the pr...

Page 54: ...actor later in this chapter for more information c Caution T Do not load continuous paper with labels in the rear paper slot because the paper path from the rear slot is curved labels may come off their backing sheet inside the printer and cause a paper jam T Never use the tear off feature by pressing the Tear Off Bin button or turning on the auto tear off mode as described in About Your Printer s...

Page 55: ... printing tear off the fresh supply of continuous labels at the perforation nearest the paper entry slot 2 Hold down the LF FF button to eject the remaining labels from the printer c Caution Never press the Load Eject or Tear Off Bin button When fed backward labels can easily come off the backing sheet and cause a paper jam g3 19 L Sun G Rev C A5 size Chapter 2 97 11 17 pass 3 2 8 Printing on Cont...

Page 56: ...he front push position skip to Loading paper onto the front push tractor on the next page If a tractor is installed in the pull position you need to remove it and replace the paper tension unit as described on page 2 33 before using the front push tractor To install the tractor in the front push position follow these steps 1 Make sure the printer is turned off 2 Open the front paper guide by pulli...

Page 57: ... the tractor see page 2 16 Loading paper onto the front push tractor To load paper onto the front push tractor follow these steps 1 Open the front paper guide by pulling the tab at the center of the guide Then remove the guide by grasping both sides and pulling it straight out of the printer Check that the tractor is installed in the front push position 2 17 2 20 L Sun G Rev C A5 size Chapter 2 97...

Page 58: ...aper thickness lever located under the printer cover to the proper position for your paper s thickness 3 Release the left and right sprockets by pushing the sprocket lock levers backward 2 20a 2 21 2 R Sun G Rev C A5 size Chapter 2 97 11 17 pass 3 Printing on Continuous Paper 2 11 ...

Page 59: ...n on the left margin position 5 Slide the right sprocket to match the width of your paper but do not lock it Move the paper support midway between the two sprockets as shown above 6 Open both sprocket covers Make sure your paper has a clean straight edge and fit the first four holes of the paper printable side up over the tractor pins Then close the sprocket covers 2 22 2 23 L Sun G Rev C A5 size ...

Page 60: ...ting slots as shown below Then close the front paper guide 9 Slide the edge guides to the middle of the top paper guide Make sure that the printer cover and the paper guide cover are closed Note Always close the printer cover before printing The printer does not print when the cover is open 2 24 2 24a 2 R Sun G Rev C A5 size Chapter 2 97 11 17 pass 3 Printing on Continuous Paper 2 13 ...

Page 61: ...ou can fix this using the micro adjust feature as described in Adjusting the Top of Form Position on page 2 37 c Caution Never use the knob to adjust the top of form position this may damage the printer or cause it to lose the top of form position Removing the printed document from the front push tractor To remove the printed document follow these steps 1 Make sure the Tear Off Bin lights are flas...

Page 62: ...lose the paper guide cover When you resume printing the printer automatically feeds the paper back to the top of form position and starts printing To remove the remaining paper from the printer press the Load Eject button to feed the paper backward to the standby position See the Glossary for an explanation of the standby position Then open the sprocket covers of the tractor and remove the paper c...

Page 63: ... the tab at the center of the guide Then remove the guide by grasping both sides and pulling it straight out of the printer 4 Press the tractor s lock tabs tilt the tractor up and lift it out of the printer 5 Replace the front paper guide by sliding it along the printer s mounting slots until it locks in place Then close the front paper guide 2 17nn 2 16b L Sun G Rev C A5 size Chapter 2 97 11 17 p...

Page 64: ...e T To avoid paper jams it is best to load thick multi part forms using the front or bottom slot and pull or front push tractor T When loading multi part forms that are bound on only one side by point glueing use the rear push tractor c Caution Do not load continuous paper with labels in the rear paper slot the labels may come off their backing sheet inside the printer and cause a paper jam To loa...

Page 65: ...kness lever located under the printer cover to the proper position for your paper s thickness 3 Release the left and right sprockets by pulling the sprocket lock levers forward 2 26 front of the printer 2 27 L Sun G Rev C A5 size Chapter 2 97 11 17 pass 3 2 18 Printing on Continuous Paper ...

Page 66: ... but do not lock it Move the paper support midway between the two sprockets as shown above 6 Open both sprocket covers Make sure your paper has a clean straight edge and fit the first four holes of the paper printable side down over the tractor pins Then close the sprocket covers 7 Slide the right sprocket to remove any slack in the paper then lock it in place by pushing the sprocket lock down fro...

Page 67: ...the paper and starts printing The printed pages are fed over the paper guide toward the back of the printer 11 After you finish printing follow the steps in the next section to tear off your printed document If the first printed line on your page appears too high or low you can fix this by using the micro adjust feature as described in Adjusting the Top of Form Position on page 2 37 c Caution Neve...

Page 68: ...off edge of the printer Note If your paper s perforation is not properly aligned with the tear off edge you can adjust the tear off position using the micro adjust feature See Adjusting the tear off position on page 2 41 c Caution Never use the knob to adjust the tear off position this may damage the printer or cause it to lose the tear off position 3 Close the paper guide cover When you resume pr...

Page 69: ...er onto the pull tractor from the rear slot However doing so is not recommended because the paper path from the rear slot is curved Because thick paper requires a straight paper path to avoid paper jams it is best to load paper in the front or bottom slot when using the pull tractor c Caution Do not load continuous paper with labels in the rear paper slot the labels may come off their backing shee...

Page 70: ...page 2 16 Note The tractor in the rear push position cannot be removed To install a tractor in the pull position follow these steps 1 Make sure the printer is turned off Lift the printer cover up and off the printer 2 Push up the tabs on each side of the paper tension unit and lift the unit up and off the printer Store the paper tension unit in a safe place 2 18NN 2 R Sun G Rev C A5 size Chapter 2...

Page 71: ...er in the front or bottom slot if possible loading paper in the rear slot may increase the chance of a paper jam c Caution T Always load multi part forms with seven parts one original plus six copies using the front or bottom slot and the pull tractor Loading this type of form in the rear slot may cause a paper jam T Do not load continuous paper with labels in the rear paper slot the labels may co...

Page 72: ...tion 2 Slide the edge guides to the middle of the paper guide 3 Set the paper release lever to the pull tractor position Also set the paper thickness lever to the proper position for your paper s thickness 4 Release the left and right sprockets by pulling the sprocket lock levers forward 2 31 2 32a 2 R Sun G Rev C A5 size Chapter 2 97 11 17 pass 3 Printing on Continuous Paper 2 25 ...

Page 73: ...endix C for more information on the left margin position 6 Push back the left sprocket lever to lock it in place 7 Slide the right sprocket to match the width of your paper but do not lock it Move the paper support midway between the two sprocket units as shown above Then open both sprocket covers 8 Make sure your paper has a clean straight edge 2 33a L Sun G Rev C A5 size Chapter 2 97 11 17 pass ...

Page 74: ...kets Then close the sprocket covers 11 Slide the right sprocket to remove any slack in the paper then lock it in place by pushing the sprocket lock down Before you load paper in the front slot remove the front paper guide Then load paper printable side up 2 34a Load paper in the bottom slot printable side up forward 2 34b Before you load paper in the rear slot remove the paper guide Then load pape...

Page 75: ...t printing by pressing the LF FF button or using the micro adjust feature To use the micro adjust feature see Adjusting the Top of Form Position on page 2 37 The printer will start printing at the current position without advancing the paper c Caution T Never use the knob to remove slack in the paper or to adjust the top of form position this may damage the printer or cause it to lose the top of f...

Page 76: ...d in Chapter 4 Send a print job to the printer The printer starts printing from the current position without advancing the paper The printed pages are fed over the paper guide toward the back of the printer 17 After you finish printing open the paper guide cover then tear off the printed document at the perforation nearest the paper exit slot 2 35 new10 2 R Sun G Rev C A5 size Chapter 2 97 11 17 p...

Page 77: ...may cause it to come off the pull tractor and jam the printer Using two tractors in a push and pull combination To improve continuous paper feeding and reduce paper jams you can use two tractors at the same time When using two tractors in combination you can load paper in the front paper slot onto both the front push tractor and the pull tractor or in the rear paper slot onto both the rear push tr...

Page 78: ...sure one tractor is in the front or rear push position and one tractor is in the pull position Set the paper release lever to either the front push or rear push tractor position depending on which push tractor you are using Also set the paper thickness lever to the proper position for your paper s thickness 3 Load paper onto the front or rear push tractor as described earlier in this chapter 4 Tur...

Page 79: ...ribed in Adjusting the Top of Form Position on page 2 37 The printer will start printing at the current position without advancing the paper c Caution T Never use the knob to remove slack in the paper or to adjust the top of form position this may damage the printer or cause it to lose the top of form position T Always remove any slack from the paper otherwise print quality may be reduced 9 Attach...

Page 80: ...n tear off the printed document at the perforation nearest the paper exit slot To remove the paper from the tractors follow the steps under Removing paper from the pull tractor on page 2 30 Removing the pull tractor To remove the tractor from the pull position follow these steps 1 Remove any paper loaded on the pull tractor as described on page 2 30 2 Turn off the printer Then remove the printer c...

Page 81: ...ush position as described on page 2 9 5 To replace the paper tension unit lower it onto the printer s mounting pegs Then press down both ends of the unit until it clicks into place 6 Replace the paper guide and printer cover Then close the paper guide cover g3 17 3 g1 9 1 L Sun G Rev C A5 size Chapter 2 97 11 17 pass 3 2 34 Printing on Continuous Paper ...

Page 82: ...ous paper with labels on page 2 8 R If a tractor is in the pull position remove any continuous paper from it before switching to single sheet printing See Removing paper from the pull tractor on page 2 30 1 If any printed pages of continuous paper remain in the printer press the Tear Off Bin button to advance printed pages to the tear off position and then tear them off c Caution T Tear off your p...

Page 83: ... single sheet remains in the printer press the Load Eject button to eject it c Caution Never use the knob to eject paper while the printer is on this may damage the printer or cause it to lose the top of form position 2 Make sure that the tractor is installed in the front or rear push position which you plan to use To install the tractor in the front position see page 2 9 3 Load continuous paper o...

Page 84: ...ff the printer R The top margin setting made in some application software overrides the top of form position setting you make with the micro adjust feature If necessary adjust the top of form position using your software 1 Make sure the printer is turned on 2 If necessary load paper as described earlier in this chapter If you load paper onto a push tractor press the Load Eject button to advance th...

Page 85: ... position Note R The printer has a minimum and a maximum top of form position If you try to adjust it beyond these limits the printer beeps and stops moving the paper R When the paper reaches the default top of form position the printer also beeps and stops moving the paper briefly You can use the default setting as a reference point when adjusting the top of form position plastic ribbon cover 3 6...

Page 86: ...stic ribbon cover This gives you an 8 5 mm 0 33 inch margin on the next page meaning the printer starts printing 8 5 mm below the perforation If you mark a point 5 5 mm 0 22 inch above the perforation you get a 9 5 mm 0 37 inch margin on the next page 6 After you set the top of form position press the Pause button to exit micro adjust mode 0 26 inch 0 33 inch new14 2 R Sun G Rev C A5 size Chapter ...

Page 87: ...you can adjust the position of the perforation using the micro adjust feature See Adjusting the tear off position on page 2 41 for instructions c Caution Never use the tear off feature by pressing the Tear Off Bin button or turning on the auto tear off mode as described below to feed continuous paper with labels backward they may come off their backing sheet and jam the printer Using the Tear Off ...

Page 88: ... the tear off edge you can use the micro adjust feature to move the perforation to the tear off position Follow the steps below c Caution Never use the knob to adjust the tear off position this may damage the printer or cause it to lose the tear off position Note Your tear off position setting remains in effect until you change it even if you turn off the printer 1 Make sure the Tear Off Bin light...

Page 89: ... try to adjust the tear off position beyond these limits the printer beeps and stops moving the paper 5 After you set the tear off position press the Pause button to turn off micro adjust mode 6 Tear off the printed pages When you resume printing the printer automatically feeds the paper back to the top of form position and begins printing tear off edge 3 6BNEW L Sun G Rev C A5 size Chapter 2 97 1...

Page 90: ... 2 Available paper types and paper slots 3 2 Loading single sheet multi part forms 3 4 Loading envelopes 3 6 Loading postcards 3 7 Loading Single Sheets in the Top Paper Slot 3 8 Loading Single Sheets in the Front Paper Slot 3 10 3 Sun G Rev C A5 size Chapter 3 97 11 14 pass 1 Printing on Single Sheets 3 1 ...

Page 91: ...i part forms postcards and envelopes Your single sheet paper may be from 101 to 420 mm 4 0 to 16 5 inches wide Note T To load a stack of single sheet paper use the optional cut sheet feeder See Appendix A Enhancing Your Printer With Options T For detailed specifications on the types of single sheet paper you can use see Appendix C top paper slot 2 9N front paper slot 2 12 L Sun G Rev C A5 size Cha...

Page 92: ...rts original 2 copies 4 parts original 3 copies 5 parts original 4 copies 6 parts original 5 copies Top and front 1 3 4 5 6 Postcards Top and front 3 Envelopes Top 4 or 5 Note R If the printed image is smeared you may need to set the paper thickness lever one position lower to improve print quality R If the printed image is faint or has many gaps you may need to set the paper thickness lever one p...

Page 93: ...guidelines T Use only carbonless multi part forms bound as shown below T You can use the top or front paper slot to load single sheet multi part forms that are bound at the top Insert this type of form in the top slot with the bound edge first and the printable side down as shown below bound only at the top by line glueing bound only at the side by line glueing New04 06 printable side down new03 L...

Page 94: ... T Before printing set the paper thickness lever located under the printer cover to the proper position for your paper See the table on page 3 3 T Be sure your multi part forms do not exceed 0 46 mm 0 018 inch in thickness T Use multi part forms only under normal temperature and humidity conditions as follows Temperature 15 to 25 C 59 to 77 F Humidity 30 to 60 RH printable side up new05 printable ...

Page 95: ...Tear Off Bin lights are on After you finish printing on envelopes press the Tear Off Bin button once to exit the card mode Bin 1 is selected T Do not use envelopes that are curled or folded Also avoid using envelopes that are too thin they may curl during printing and become jammed T If you use No 6 envelopes align the left edge of the envelope with the arrow mark on the printer T Use envelopes on...

Page 96: ...chapter Also follow these guidelines T If you load postcards long edge first always load them in the top slot T Set the paper thickness lever located under the printer cover to position 3 T Before printing turn on the card mode by pressing the Tear Off Bin button until both Tear Off Bin lights are on After you finish printing on postcards press the Tear Off Bin button once to exit the card mode Bi...

Page 97: ...ft edge guide until it locks in place next to the arrow on the paper guide Next adjust the right edge guide to match the width of your paper 3 Set the paper release lever to the single sheet position Also set the paper thickness lever located under the printer cover to the proper position for your paper s thickness See the table on page 3 3 2 7n 2 6 L Sun G Rev C A5 size Chapter 3 97 11 14 pass 1 ...

Page 98: ...rintable side down between the edge guides until it meets resistance The printer feeds the paper automatically and is ready to print Note Always close the printer cover before printing The printer does not print when the cover is open 2 8n 2 9n 3 Sun G Rev C A5 size Chapter 3 97 11 14 pass 1 Printing on Single Sheets 3 9 ...

Page 99: ...h or low you can fix this using the micro adjust feature See Adjusting the Top of Form Position on page 2 37 c Caution Never use the knob to adjust the top of form position or eject a sheet when the printer is on this may damage the printer or cause it to lose the top of form position Loading Single Sheets in the Front Paper Slot To load paper in the front paper slot follow these steps 1 Make sure...

Page 100: ... match the width of your paper 4 Set the paper release lever to the single sheet position Also set the paper thickness lever located under the printer cover to the proper position for your paper s thickness See the table on page 3 3 5 Press the Operate button to turn on the printer if necessary 2 11nn 2 10a 3 Sun G Rev C A5 size Chapter 3 97 11 14 pass 1 Printing on Single Sheets 3 11 ...

Page 101: ...ts it onto the paper guide on top of the printer To continue printing your document remove the printed page and insert a new sheet of paper in the front paper guide If you need to eject a sheet press the Load Eject button If the first printed line on your page appears too high or low you can fix this using the micro adjust feature See Adjusting the Top of Form Position on page 2 37 c Caution Never...

Page 102: ...ccessing the printer driver from the Control Panel 4 10 Printer driver settings overview 4 10 Using the Printer Driver With Windows NT 4 0 4 12 Accessing the printer driver from Windows applications 4 12 Accessing the printer driver from the Start menu 4 14 Printer driver settings overview 4 14 Using the Printer Driver With Windows NT 3 5x 4 17 Accessing the printer driver from Windows application...

Page 103: ...scribed in Chapter 1 EPSON Remote is a DOS based printer setup utility that allows you to easily change the printer s default settings from the computer screen To use the EPSON Remote utility with DOS see page 4 21 The EPSON Status Monitor 2 utility program is available only for Windows 95 It monitors the status of your printer alerts you when errors occur and provides you with troubleshooting tip...

Page 104: ...essing the printer driver from Windows applications When you access the printer driver from a Windows application any settings you make apply only to the application you are using To access the printer driver from a Windows application follow the steps below Note The steps below provide general guidelines on accessing the printer driver How you access the printer driver may differ depending on you...

Page 105: ...dow appears and you see the Paper Graphics and Device Options menus These menus contain the printer driver settings 3 To view a menu click the corresponding tab at the top of the window See Printer driver settings overview on the next page for detailed information about the settings 95 L Sun G Rev C A5 size Chapter 4 11 13 97 pass 0 4 4 Using the Printer Software ...

Page 106: ...ide the printer driver settings 4 To view a menu click the corresponding tab at the top of the window See the next section for detailed information about the printer driver settings Printer driver settings overview Your printer driver has three menus the Paper Graphics and Device Options menus The printer driver settings on each of these menus are described below To open these menus see the previo...

Page 107: ... scroll through the list If your paper size is not included in the list click Custom and enter the paper size in the dialog box that appears T Orientation Select Portrait or Landscape T Paper source Click the paper source you want to use 95paper1 L Sun G Rev C A5 size Chapter 4 11 13 97 pass 0 4 6 Using the Printer Software ...

Page 108: ...Dithering You can leave this option set to Fine which is the default setting or select another dithering pattern depending on the kind of printout you want The display to the left of the dithering options shows the effect of your setting T Intensity Move the slider to make your printout lighter or darker 95GRAPHI 4 R Sun G Rev C A5 size Chapter 4 11 13 97 pass 0 Using the Printer Software 4 7 ...

Page 109: ... driver some do not so you must verify that the printer driver settings match your requirements To access the printer driver see Accessing the printer driver from Windows applications or Accessing the printer driver from the Control Panel below To check and change the printer driver settings see Printer driver settings overview on page 4 10 Accessing the printer driver from Windows applications Wh...

Page 110: ... Print Setup dialog box appears See Printer driver settings overview on the next page for detailed information about the settings in this dialog box 2 Make sure that your printer is selected and then click Printer Setup or Options You may need to click a combination of these buttons The Options dialog box appears See page 4 11 for detailed information about the settings in this dialog box PRINT OP...

Page 111: ...ter driver settings Printer driver settings overview The printer driver settings are described below To access the printer driver settings see the previous sections on accessing the printer driver When you finish making your printer driver settings click OK to apply the settings or click Cancel to cancel your changes Print or Print Setup dialog box T Resolution Click the printing resolution you wa...

Page 112: ... setting or select another dithering pattern depending on the kind of printout you want T Intensity Control Move the slider to make your printout lighter or darker T Print Quality Select a print quality option from the Print Quality list Selecting a high quality option produces more detailed printouts at a slower printing speed Once you ve checked your printer driver settings and changed them if n...

Page 113: ...Accessing the printer driver from Windows applications When you access the printer driver from a Windows application any settings you make apply only to the application you are using To access the printer driver from a Windows application follow the steps below Note The steps below provide general guidelines on accessing the printer driver How you access the printer driver may differ depending on ...

Page 114: ...es window appears and you see the Page Setup and Advanced menus These menus contain the printer driver settings 3 To view a menu click the corresponding tab at the top of the window See Printer driver settings overview on the next page for detailed information about the settings NT40PR 4 R Sun G Rev C A5 size Chapter 4 11 13 97 pass 0 Using the Printer Software 4 13 ...

Page 115: ... and Advanced menus These menus provide the printer driver settings 4 To view a menu click the corresponding tab at the top of the window See the next section for detailed information about the printer driver settings Printer driver settings overview Your printer driver has two menus Page Setup and Advanced The printer driver settings on each of these menus are described below To open these menus ...

Page 116: ... to use from the Paper Size list T Paper Source Select the paper source you want to use from the Paper Source list T Orientation Select Portrait or Landscape Advanced menu NT40PR2 NT40AD 4 R Sun G Rev C A5 size Chapter 4 11 13 97 pass 0 Using the Printer Software 4 15 ...

Page 117: ...e however increasing the resolution slows printing T Document Options Double click Halftone Color Adjustment to open the Halftone Color Adjustment dialog box Click Print Quality to select a print quality option Click Print Text as Graphics or Metafile Spooling and select On or Off in the Change Setting list box Once you ve checked your printer driver settings and changed them if necessary you are ...

Page 118: ...ccessing the printer driver from Windows applications When you access the printer driver from a Windows application any settings you make apply only to the application you are using To access the printer driver from a Windows application follow the steps below Note The steps below provide general guidelines on accessing the printer driver How you access the printer driver may differ depending on y...

Page 119: ...er driver settings See Printer driver settings overview on the next page for detailed information about these settings 3 Click Options or a similar button to view the Advanced Document Properties dialog box which includes the Graphics Resolution Color and Optimizations printer driver settings See page 4 20 for detailed information about these settings DOC35 Advan35 L Sun G Rev C A5 size Chapter 4 ...

Page 120: ...er driver settings See the next section for detailed information about these settings 4 Click Options to open the Advanced Document Properties dialog box which contains the Graphics Resolution Color and Optimization printer driver settings See the next section for detailed information about these settings Printer driver settings overview Your printer driver has two dialog boxes Document Properties...

Page 121: ...the Graphics Resolution list The higher the resolution you select the more detailed your printout will be however increasing the resolution slows printing T Color Only monochrome printing is available T Optimizations Click a check box to turn the corresponding option on or off T Print Quality To select the print quality click the More Options button The More Options dialog box appears Selecting a ...

Page 122: ...n the Printer Model window and press Enter C EPUTIL appears as the default directory 4 Press Enter again The EPSON Remote utility is copied to the C EPUTIL directory Accessing EPSON Remote To access EPSON Remote type C PRNSET at the DOS prompt and press Enter Then follow the on screen instructions to use this utility You can also access EPSON Remote by typing C PANEL at the DOS prompt and press En...

Page 123: ...roof Sign off Yamanouchi _______ Grady _______ Selecting a Built In Font and Pitch 5 2 About Your Printer s Default Settings 5 3 Changing default settings 5 8 5 R Sun G Rev C A5 size Chapter 5 97 11 13 pass 0 Changing Printer Settings From the Printer s Control Panel 5 1 ...

Page 124: ...ings you make from the printer s control panel For best results use your application to select a font and pitch Font Sample Draft Roman Sans Serif Follow these steps to select a built in font or pitch using the buttons on the printer s control panel 1 Make sure that the printer is not printing If it is press the Pause button to stop printing 2 To select a font press the Font button until the two F...

Page 125: ...ions While you can often set these functions through your software or printer driver you may sometimes need to change a default setting from the printer s control panel using the default setting mode The following table lists the default settings and the options you can select in the default setting mode The settings are explained in detail after the table For instructions on changing the default ...

Page 126: ... All other models Italic PC 437 PC 437 Greek PC 850 PC 852 PC 853 PC 855 PC 857 PC 866 PC 869 ISO Latin 1T ISO 8859 7 MAZOWIA Code MJK Bulgaria Estonia PC 774 PC 866 UKR ISO 8859 2 PC 866 LAT International character set for Italic table Italic U S A Italic France Italic Germany Italic U K Italic Denmark1 Italic Sweden Italic Italy Italic Spain1 0 slash On Off High speed draft Off On Input buffer O...

Page 127: ... your application Auto tear off When you turn on this setting and print on continuous paper with the front or rear push tractor the printer automatically advances the paper perforation to the tear off position where you can easily tear off the printed page s When the printer receives the next print job it automatically moves the unused paper back to the top of form position and starts printing so ...

Page 128: ...r is connected to only one computer select Parallel or Optional for the interface mode depending on the interface you use If your printer is connected to more than one computer select Auto automatic for the interface mode to cause the printer to automatically switch between interfaces depending on which one is receiving data Auto I F interface wait time This setting takes effect only if an optiona...

Page 129: ...O and a zero High speed draft When you choose On the printer prints up to 500 cps characters per second at 10 cpi characters per inch When you choose Off the printer prints up to 455 cps at 12 cpi Input buffer When you turn on this setting the printer s input buffer stores up to 64KB of data sent from your computer freeing up your computer for other tasks while the printer prints When you select O...

Page 130: ...00 to 1FH are used for the control codes See Appendix C for character samples Changing default settings Follow the steps below to enter the default setting mode and change the printer s default settings Note R To print the language selection and default setting mode instructions you need three sheets of A4 or letter size single sheet paper or three pages of continuous paper that is at least 279 mm...

Page 131: ...pages in the language you selected The printed instructions list the default settings you can change describe how to change them and show you how the control panel lights help you make settings Follow these instructions to change the default settings using the buttons on the printer s control panel Note The arrows on the instruction sheets indicate the printer s current settings 5 When you finish ...

Page 132: ... 6 3 Accessing EPSON Status Monitor 2 6 4 Checking Printer Status Information 6 4 Using the EPSON Status Monitor 2 window 6 4 Using the Printer Status window 6 9 Making Monitoring Preference Settings 6 10 Turning on background monitoring 6 11 Using the background monitoring icon 6 13 6 R Sun G Rev C A5 size Chapter 6 11 14 97 pass 0 Using EPSON Status Monitor 2 6 1 ...

Page 133: ...ce card C82357 in your printer and use the Status Monitor utility that comes with this card See the manual that comes with the interface card for instructions on using the Status Monitor in a network environment Before using the Status Monitor be sure to read the README file on Disk 1 of the EPSON Status Monitor 2 software You can also find this README file in the EPSON Status Monitor 2 folder loc...

Page 134: ... a disk drive 3 Click Start and then click Run 4 Type A Setup If you inserted the disk in a drive other than drive A substitute the appropriate letter Then click OK 5 Follow the on screen instructions then click Finish to complete the installation procedure After you install EPSON Status Monitor 2 and restart your computer the Status Monitor starts automatically and adds a printer shaped backgroun...

Page 135: ...tus Monitor to get general and detailed printer status information Using the EPSON Status Monitor 2 window You can select many Status Monitor menu commands by clicking the buttons on the toolbar from this window When you point to a toolbar button the corresponding menu command appears briefly on your screen and you see an explanation of the button s function in the status bar at the bottom of the ...

Page 136: ...es depending on the printer s status as described in the table below See online help for more information Icon appearance Description Green The printer is ready to print or currently printing Yellow The printer needs routine maintenance Red A printer error has occurred and your printer cannot print See Chapter 7 for troubleshooting information Dimmed There is a communication problem between the pr...

Page 137: ...Opens the Printer Status window which provides detailed information on the selected printer s status To use the Printer Status window see page 6 9 T Job Status Provides information about the jobs waiting to print on the selected printer T Select Paper Memory Not available T Close Closes the EPSON Status Monitor 2 window SPRINT L Sun G Rev C A5 size Chapter 6 11 14 97 pass 0 6 6 Using EPSON Status ...

Page 138: ...Icons Small Icons Changes the size of the printer icons in the Installed Printers list T List Displays only the printer names and icons in the Installed Printers list T Details Displays the printer name and icon status and number of jobs waiting to print for each printer in the Installed Printers list T Refresh Updates the printer status information shown in the Installed Printers list SVIEW 6 R S...

Page 139: ... information see Turning on background monitoring on page 6 11 T Add Printer Delete Printer Allows you to select the printers you want to monitor by adding or deleting printers in the Installed Printers list T Background Monitoring Activates the Status Monitor A printer shaped icon appears on the taskbar at the bottom of your computer screen Note The Background Monitoring and Status Alert settings...

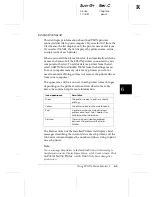
Page 140: ...dow shown below to see detailed information on the status of a printer To open the Printer Status window double click a printer in the Installed Printers list or select a printer and then choose Printer Status from the Printer menu of the EPSON Status Monitor 2 window You can also access the Printer Status window by clicking the Details button in the Status Alert dialog box For information on the ...

Page 141: ...onnections and other printer resources Making Monitoring Preference Settings The Monitoring Preferences dialog box allows you to turn on the background monitoring feature and specify the monitoring interval the length of time between status information updates for the selected printer To open the Monitoring Preferences dialog box see Turning on background monitoring on the next page When you turn ...

Page 142: ...m the Start menu as described on page 6 4 Then point to Background Monitoring on the Settings menu and click Monitor from restart or Monitor now 2 Select the printer you want to monitor from the Installed Printers list and then click Monitoring Preferences on the Settings menu The dialog box below appears Note The Background Monitoring and Status Alert settings in the Monitoring Preferences dialog...

Page 143: ...er shaped background monitoring icon appears on the taskbar on your computer screen when the Status Monitor is active To activate the Status Monitor see step 1 of Turning on background monitoring on page 6 11 Double clicking the background monitoring icon opens the EPSON Status Monitor 2 window Right clicking this icon opens a pop up menu where you can choose whether the Status Alert dialog box wi...

Page 144: ...g or feeding problems 7 6 Continuous paper loading or feeding problems 7 8 Wrong top of form position 7 9 Wrong tear off position 7 10 Printing or printout quality problems 7 11 Clearing Paper Jams 7 16 Aligning Vertical Lines in Your Printout 7 17 Printing a Self Test 7 18 Printing a Hex Dump 7 19 7 Troubleshooting R Sun G Rev C A5 size Chapter 7 97 11 14 pass 1 Troubleshooting 7 1 ...

Page 145: ...tly in the paper path Move the paper release lever back to the appropriate position and press the Load Eject button to feed the paper out of the paper path Then set the lever to the position you want to use Press the Pause button to turn off the Pause light if necessary n Paper Out n Pause No paper is loaded in the selected paper source Load paper in the printer Then press the Pause button to turn...

Page 146: ...med in the printer Clear the paper jam as described on page 7 16 f Pause The print head is overheated Wait a few minutes the printer resumes printing automatically once the print head cools f Paper Out f Pause f f Tear Off Bin f f Font An unknown printer error has occurred Turn off the printer and leave it off for several minutes then turn on the printer again If the error recurs contact your deal...

Page 147: ...tinuous paper loading or feeding problems 7 8 Wrong top of form position 7 9 Wrong tear off position 7 10 Printing or printout quality problems 7 11 You can also use the self test to determine whether the printer or the computer is causing the problem See page 7 18 for instructions on printing a self test To pinpoint communication problems experienced users may want to use the printer s hex dump m...

Page 148: ...hat has the wrong voltage for your printer The printer does not work and the control panel lights are off even though you turned on the printer Cause What to do The power cord is not properly plugged into the electrical outlet or your printer Press the Operate button to turn off the printer and make sure the power cord is firmly plugged into the electrical outlet and the printer if necessary Then ...

Page 149: ... release lever to the single sheet position See Chapter 2 for more information on switching to printing on single sheets The paper on the paper guide is positioned too far to the right for the printer to detect that it is there Move the paper a little to the left Single sheet paper is not loaded properly See Chapter 3 for instructions on loading single sheet paper The paper thickness lever is not ...

Page 150: ... cut sheet feeder is not installed properly Reinstall it as described in Appendix A Too many sheets are loaded in the cut sheet feeder Load no more than 150 single sheets in the high capacity cut sheet feeder See Using the Optional Cut Sheet Feeders in Appendix A for more information The edge guides of the cut sheet feeder are not positioned correctly Align the left edge guide with the arrow mark ...

Page 151: ...ctor position See Chapter 2 for more information on switching to printing on continuous paper Continuous paper is not loaded properly See Chapter 2 for instructions on loading continuous paper on the tractor you want to use The paper thickness lever is not set correctly Set the paper thickness lever to match the thickness of your paper See Setting the Paper Thickness Lever in Chapter 2 The printer...

Page 152: ...incorrect Check the margin or top of form position setting in your application software See the printable area specifications in Appendix C Adjust the top of form position in micro adjust mode However settings made in Windows applications override settings made in micro adjust mode See Adjusting the Top of Form Position in Chapter 2 The printer you want to use is not selected in your software Choo...

Page 153: ...f position The printer you want to use is not selected in your software Choose the correct printer from the Windows desktop or in your application before printing The paper size setting in your application or printer driver does not match the size of the paper you are using Check the paper size setting in your application or printer driver The printer s page length settings for the front or rear t...

Page 154: ...ly If the cable is connected correctly run a self test as described later in this chapter Your interface cable does not meet the printer and or computer specifications Use an interface cable that meets the requirements of both the printer and computer See page A 3 and your computer documentation Your software is not properly set up for your printer Select your printer from the Windows desktop or i...

Page 155: ... to do The paper thickness lever is set incorrectly for your paper Move the paper thickness lever to a lower setting The ribbon is worn out Replace the ribbon cartridge as described in Chapter 1 You printed on continuous multi part forms with seven parts one original plus six copies in ordinary printing mode Turn on the double strike mode when you print on continuous multi part forms with seven pa...

Page 156: ...and contact your dealer to have the print head replaced c Caution Never replace the print head yourself you may damage the printer Also other parts of the printer must be checked when the print head is replaced All the text is printed on the same line Cause What to do No line feed command is sent at the end of each line of text Turn on the auto line feed setting using the printer s default setting...

Page 157: ...bout Your Printer s Default Settings in Chapter 5 or Using the EPSON Remote Utility in Chapter 4 The printer prints strange symbols incorrect fonts or other inappropriate characters Cause What to do Your printer and computer are not communicating correctly Make sure that you are using the correct interface cable and that the communications protocol is correct See page A 3 and your computer documen...

Page 158: ...r driver software as described in Chapter 1 Software settings override settings you make using the default setting mode EPSON Remote or the control panel buttons Use your application software to select the font Vertical printed lines are not aligned Cause What to do Bidirectional printing which is the printer s standard printing mode is out of alignment Use the printer s bidirectional adjustment m...

Page 159: ...entry slot 5 Turn the knob on the right side of the printer away from you to eject the paper in the printer Remove any remaining pieces of paper c Caution Use the knob on the right side of the printer only to clear paper jams when the printer is off Otherwise you may damage the printer or lose the top of form or tear off position 6 Replace the paper guide if necessary and replace the printer cover...

Page 160: ...aded and the printer is turned off c Caution Whenever you turn off the printer wait at least five seconds before turning it back on otherwise you may damage the printer 2 While holding down the Pause button press the Operate button to turn on the printer The printer enters the bidirectional adjustment mode and then prints instructions and the first set of alignment patterns 3 As described in the i...

Page 161: ...er or Chapter 3 for instructions on loading single sheets Note Use paper that is at least 376 mm 14 8 inches wide such as A3 size paper To perform a self test follow these steps 1 Make sure paper is loaded and the printer is turned off c Caution Whenever you turn off the printer wait at least five seconds before turning it back on otherwise you may damage the printer 2 To run the test using the Dr...

Page 162: ...u are an experienced user or a programmer you can print a hexadecimal dump to isolate communication problems between the printer and your software program In hex dump mode the printer prints all data received from the computer as hexadecimal values You can print a hex dump using either single sheets or continuous paper See Chapter 2 for instructions on loading continuous paper or Chapter 3 for ins...

Page 163: ... print job to the printer Your printer prints all the codes it receives in hexadecimal format If characters are printable they appear in the right column as ASCII characters Nonprintable codes such as control codes are represented by dots By comparing the characters printed in the right column with the printout of the hexadecimal codes you can check the codes the printer is receiving 4 To exit hex...

Page 164: ...acity cut sheet feeder A 6 Selecting the paper source bin 1 or bin 2 A 10 Switching between continuous paper and single sheet paper in the cut sheet feeder A 11 Using the Roll Paper Holder A 12 Assembling the roll paper holder A 12 Installing the roll paper holder A 13 Loading roll paper A 14 Removing roll paper A 16 Installing an Interface Card A 17 Using the C82305 ýor C82306 serial interface ca...

Page 165: ...page A 4 Second bin cut sheet feeder C80674 Connects to the high capacity cut sheet feeder to create a double bin cut sheet feeder You can load up to 50 sheets of ordinary single sheet paper in the second bin cut sheet feeder For instructions on using this option see page A 4 Pull tractor C80032 Improves continuous paper handling and reduces the chance of paper jams Using a pull tractor in conbina...

Page 166: ...terfaces are available in all countries For instructions on installing an interface card see page A 17 Model number Name C82305 C82306 Serial interface card C82307 C82308 32KB serial interface card C82310 C82311 32KB parallel interface card C82312 LocalTalk interface card C82313 32KB IEEE 488 interface card C82314 Coax interface card C82315 Twinax interface card C82345 IEEE 1284 parallel interface...

Page 167: ...manual For instructions on selecting bin 1 or bin 2 of the double bin cut sheet feeder see page A 10 Note The second bin cut sheet feeder can be used only in combination with the high capacity cut sheet feeder you cannot use it alone Installing the high capacity or double bin cut sheet feeder You install the high capacity cut sheet feeder and double bin cut sheet feeder in the same way Follow the ...

Page 168: ...fit the feeder s notches over the mounting posts on the printer as shown below Then release the latch levers and lower the cut sheet feeder until it rests on the printer 4 Insert the cable into the connector as shown above 5 Replace the printer cover You are now ready to load paper in the cut sheet feeder To load paper in the high capacity cut sheet feeder see the next section To load paper in the...

Page 169: ... to load paper in the high capacity cut sheet feeder c Caution Do not load carbon paper or labels in the high capacity cut sheet feeder 1 Open the paper guide cover and set the paper release lever to the single sheet position Also make sure the paper thickness lever located under the printer cover is set to the proper position for your paper s thickness 2 Pull down the center support 4 4A center s...

Page 170: ...ark on the back of the center support Then push the left lock lever backward to lock it in place Holding the lower portion of the right paper guide slide it to match the width of your paper but do not lock it 5 Slide the paper stacker midway between the paper guides as shown above 4 2 2A paper stacker 4 2 3 A R Sun G Rev C A5 size Appendix A 97 11 14 pass 1 Enhancing Your Printer With Options A 7 ...

Page 171: ... the paper guides retract and lock open to allow paper loading 8 Take a stack of paper up to 150 sheets of plain paper and fan it Next tap the side and bottom edges of the paper on a flat surface to even up the stack 9 Insert the paper stack printable side down along the left paper guide single sheet paper or single sheet multi part forms envelopes or postcards 4 3 4 3aa L Sun G Rev C A5 size Appe...

Page 172: ... T When the cut sheet feeder is installed you can still load single sheets one at a time using the front paper slot The cut sheet feeder automatically loads paper when the printer receives data Printed pages are stacked on the center support If you need to eject a sheet press the Load Eject button If the first printed line on your page appears too high or low you can adjust its position using the ...

Page 173: ...ngs usually override the printer s control panel settings However if you cannot select the paper source in your application press the Tear Off Bin button until the lights indicate the bin you want as shown below When the printer receives data it automatically loads paper from the bin you select bin 2 second bin cut sheet feeder bin 1 high capacity cut sheet feeder g4 17 o n Bin 1 the high capacity...

Page 174: ...e printer press the Tear Off Bin button to advance the paper to the tear off position Then tear off the printed pages c Caution Tear off your printed document before you press the Load Eject button in the next step Reverse feeding several pages at a time may cause a paper jam 2 Press the Load Eject button The printer feeds the continuous paper backward to the standby position The paper is still at...

Page 175: ...iable paper lengths Before you install and use the roll paper holder you need to assemble it Assembling the roll paper holder 1 Fit the arc bearings into the stand as shown 2 Make sure you orient the stand and base plate as shown below Then place the base plate on the stand and fasten the two together with the plastic spacing clips g3 30 1 g3 30 2 L Sun G Rev C A5 size Appendix A 97 11 14 pass 1 A...

Page 176: ...low Fit the two positioning pegs on the bottom of the printer into the two holes in the base plate c Caution The roll paper holder is not fastened to the printer only the printer s weight and the two positioning pegs hold it in place If you pick up the printer be careful not to drop the roll paper holder To remove the roll paper holder carefully lift up the printer and pull out the roll paper hold...

Page 177: ... is installed 3 Set the paper thickness lever located under the printer cover to the proper position for the thickness of your roll paper 4 Set the paper release lever to the single sheet position 5 Cut the leading edge of the roll paper straight across 6 Insert the roll paper holder shaft into the center of the paper roll as shown g3 31 2 g3 32 1 L Sun G Rev C A5 size Appendix A 97 11 14 pass 1 A...

Page 178: ...ar push tractor and insert it until it meets resistance The printer loads the roll paper automatically 9 Replace the paper guide and close the paper guide cover You are now ready to print The printed roll paper is fed over the paper guide to the back of the printer as shown below g3 32 2 4 9 A R Sun G Rev C A5 size Appendix A 97 11 14 pass 1 Enhancing Your Printer With Options A 15 ...

Page 179: ...towards you for a clean cut Removing roll paper Roll paper cannot be fed backward To remove roll paper open the paper guide cover and remove the paper guide then cut the paper behind where it feeds into the printer Press the Load Eject button to eject the remaining paper g3 43 NEW08 L Sun G Rev C A5 size Appendix A 97 11 14 pass 1 A 16 Enhancing Your Printer With Options ...

Page 180: ...card along the slots on both sides of the interface compartment Firmly push in the card to make sure the connector at the back of the interface card is fully inserted into the printer s internal socket Then replace the screws and tighten them Note Store the shield plate in a safe place you will need to reattach it if you remove the interface card later To remove the interface card reverse the step...

Page 181: ...it rate selection table in your interface card manual Handshake timing When the unused area for data in the input buffer drops to 256 bytes the printer outputs an X OFF code or sets the DTR flag to 1 MARK to indicate that it cannot receive data When the unused area increases to 512 bytes the printer outputs an X ON code or sets the DTR flag to 0 SPACE to indicate that it is ready to receive data E...

Page 182: ...nd Transporting the Printer Proof Sign off Yamanouchi _______ Grady _______ Cleaning the Printer B 2 Transporting the Printer B 3 B R Sun G Rev C A5 size Appendix B 97 11 14 pass 0 Cleaning and Transporting the Printer B 1 ...

Page 183: ...th mild detergent dissolved in water Keep the printer cover in place and lower the paper guide cover until it lies flat on the top of the printer to prevent water from getting inside the printer c Caution T Never use alcohols or thinners to clean the printer these chemicals can damage the printer components as well as the case T Be careful not to get water on the printer mechanism or electronic co...

Page 184: ...cribed on page 2 33 If any options are installed remove them and pack them in their original boxes 5 Make sure that the print head is not hot Then remove the ribbon cartridge as described in Chapter 1 6 Remove the paper tension unit as described on page 2 23 Attach the protective locking clips on both sides of the printer roller Then install the paper tension unit as described on page 2 34 7 Make ...

Page 185: ...nmental C 5 Paper C 5 Paper alignment C 7 Printable area C 8 Safety approvals C 10 CE marking C 10 Command Lists C 11 EPSON ESC P control codes C 11 IBM 2381 Plus emulation control codes C 15 Character Tables C 16 International character sets for the Italic table C 25 C R Sun G Rev C A5 size Appendix c 97 11 13 pass 0 Specifications C 1 ...

Page 186: ...mns at 10 cpi Resolution Maximum 240 144 dpi near letter quality Interfaces One standard bidirectional 8 bit parallel interface with IEEE 1284 nibble mode support and one optional interface slot Paper feed methods Friction front or top paper entry Push tractor front or rear paper entry Pull tractor front bottom or rear paper entry Push and pull tractor additional tractor is required for front push...

Page 187: ... 0 20 inch Buffer 64KB or 0KB selectable in the default setting mode or the EPSON Remote utility Built in fonts Bitmap fonts EPSON Draft 10 12 15 cpi EPSON Roman 10 12 15 cpi proportional EPSON Sans Serif 10 12 15 cpi proportional Barcode fonts EAN 13 EAN 8 Interleaved 2 of 5 UPC A UPC E Code 39 Code 128 POSTNET Character tables One Italic and 10 graphical character tables 19 graphical character t...

Page 188: ...Electrical 120 V Model 220 to 240 V Model Input voltage range 99 to 132 V 198 to 264 V Rated frequency range 50 to 60 Hz Input frequency range 49 5 to 60 5 Hz Rated current 1 0 A maximum 1 8 A depending on the character type 0 5 A maximum 0 9 A depending on the character type Power consumption Approx 46W ISO IEC 10561 letter pattern This product is also designed for IT power systems with Phase to ...

Page 189: ...m 3 9 to 16 5 inches Length Front 148 to 420 mm 5 8 to 16 5 inches Top 100 to 420 mm 3 9 to 16 5 inches Thickness 0 065 to 0 14 mm 0 0025 to 0 0055 inch Weight 52 3 to 90 g m2 14 to 24 lb Single sheet multi part forms front and top entry Width 100 to 420 mm 3 9 to 16 5 inches Length Front 148 to 420 mm 5 8 to 16 5 inches Top 100 to 420 mm 3 9 to 16 5 inches Copies 1 original up to 5 copies Thickne...

Page 190: ... to 16 0 inches Length 101 to 559 mm 4 0 to 22 0 inches Copies 1 original up to 5 copies 1 original up to 6 copies front or bottom entry with the pull tractor only Thickness Printable area 0 065 to 0 46 mm 0 0025 to 0 018 inch Perforated edges up to 0 9 mm 0 035 inch Weight not multi part 52 3 to 82 g m2 14 to 22 lb Weight one sheet of multi part 40 to 58 g m2 12 to 15 lb Binding Point glue or pap...

Page 191: ...ss 0 07 to 0 09 mm 0 0028 to 0 0035 inch Total thickness 0 16 to 0 19 mm 0 0063 to 0 0075 inch Label weight 68 g m2 17 lb Roll paper rear entry with optional roll paper holder only Width 216 3 mm 8 5 0 12 inch Thickness 0 07 to 0 09 mm 0 0028 to 0 0035 inch Weight 52 to 82 g m2 14 to 22 lb Paper alignment Front entry Printing starts at the arrow mark The unprintable area is to the left of the arro...

Page 192: ... The minimum right margin is 3 0 mm 0 12 inch The maximum width is 420 mm 16 5 inches and the maximum printable width is 345 4 mm 13 6 inches For single sheets wider than 351 4 mm 13 8 inches the side margins increase proportionally to match the width of the paper C The minimum bottom margin is 4 2 mm 0 17 inch margin printable area A B C printable area A B C B a 1 L Sun G Rev C A5 size Appendix c...

Page 193: ...printable width is 345 4 mm 13 6 inches For continuous paper wider than 351 4 mm 13 8 inches the side margins increase proportionally to match the width of the paper Roll paper A The minimum top margin is 4 2 mm 0 17 inch B The minimum left margin is 3 0 mm 0 12 inch The minimum right margin is 3 0 mm 0 12 inch The maximum printable width is 203 2 mm 8 0 inches printable area B A B A a 3 printable...

Page 194: ...0950 TÜV NEMKO EMI EN 55022 CISPR pub 22 class B AS NZS 3548 class B Acoustic noise Approx 55 dB A ISO 7779 pattern CE marking 230 V model Low Voltage Directive 73 23 EEC EN 60950 EMC Directive 89 336 EEC EN 55022 Class B EN 61000 3 2 EN 61000 3 3 EN 50082 1 IEC 801 2 IEC 801 3 IEC 801 4 L Sun G Rev C A5 size Appendix c 97 11 13 pass 0 C 10 Specifications ...

Page 195: ...ding FF LF ESC 0 ESC 2 ESC 3 ESC 1 ESC A CR Page format ESC C ESC C ESC C 0 ESC Q ESC l ESC c ESC N ESC O ESC U Print position motion ESC ESC ESC D HT ESC B VT ESC J Font selection ESC k ESC x ESC P ESC M ESC g ESC p ESC 4 ESC 5 ESC E ESC F ESC Font enhancement ESC W DC4 SO DC2 SI ESC w ESC G ESC H ESC T ESC S ESC Spacing ESC Space Character handling ESC t ESC t ESC R ESC ESC ESC ESC 6 ESC 7 ESC I...

Page 196: ...nction ESC B n1 n2 k m s v1 v2 c data n n1 256 n2 k Select barcode k 0 EAN 13 1 EAN 8 2 Interleaved 2 of 5 3 UPC A 4 UPC E 5 Code 39 6 Code 128 7 POSTNET m Module width 120 dpi m 2 2 dots 3 3 dots 4 4 dots 5 5 dots s Space adjustment value 3 s 3 1 240 inch units v1 v2 Bar length v1 v2 256 1 72 inch units Note T The v1 and v2 values are ignored when POSTNET is selected T The long bar length of POST...

Page 197: ...symbology The data number of each barcode type is constant The barcode is printed only if the following valid characters are set Barcode type Number of valid characters 1 HEX Number of valid characters 2 HEX EAN 13 EAN 8 Interleaved 2 of 5 UPC A UPC E Code 39 Code 128 POSTNET 0D 8 2 to FF 0C 0C or 8 1 to FF 2 to FF 6 or 0A or 0C 0C 7 2 to FF 0B 0B or 7 1 to FF 2 to FF 5 or 9 or 0B Number of valid ...

Page 198: ... printed T A barcode is not printed when part of the barcode extends beyond the right margin T When barcode data and text data are mixed in a data sequence barcodes and text are printed in the same place T The start and stop characters of Code 39 are added to human readable characters T The initial data of Code 128 Set A B or C is identified as the first data of Code 128 and must be hexadecimal 41...

Page 199: ...ESC 2 ESC 3 CR ESC Page format ESC C ESC C0 ESC X ESC N ESC O ESC 4 Print position motion ESC d ESC R ESC D HT ESC B VT ESC J Font selection DC2 ESC P ESC ESC E ESC F ESC I ESC d ESC I Font enhancement DC4 SO ESC SO ESC W ESC SI ESC SI ESC G ESC H ESC T ESC S ESC ESC _ Spacing BS SP Character handling ESC 6 ESC 7 ESC T ESC ESC Bit image ESC K ESC L ESC Y ESC Z Barcode ESC f ESC p Download ESC draf...

Page 200: ... through FF are shown T The character tables with an asterisk after the table name are available only in some countries You can choose between the two IBM character tables shown below when you select the IBM 2381 Plus emulation in the default setting mode as described in Chapter 5 When you select Table 1 hex codes 00 to 1FH and 80 to 9FH are replaced when you select Table 2 hex codes 00 to 1FH are...

Page 201: ...PC 437 USA Standard European PC 850 Multilingual PC 860 Portuguese a 7 a 8 a 9 C R Sun G Rev C A5 size Appendix c 97 11 13 pass 0 Specifications C 17 ...

Page 202: ...PC 863 Canadian French PC 865 Norwegian PC 861 Icelandic BRASCII Brazilian Portuguese a 10 a 11 a 12 a 13 L Sun G Rev C A5 size Appendix c 97 11 13 pass 0 C 18 Specifications ...

Page 203: ...Abicomp Brazilian Portuguese ISO Latin 1 Roman 8 a 14 a 15 a 16 a 17 C R Sun G Rev C A5 size Appendix c 97 11 13 pass 0 Specifications C 19 ...

Page 204: ...PC 437 Greek Greek PC 869 Greek ISO 8859 7 Latin Greek PC 853 Turkish a 18 a 19 a 20 a 21 L Sun G Rev C A5 size Appendix c 97 11 13 pass 0 C 20 Specifications ...

Page 205: ...PC 857 Turkish ISO Latin 1T Turkish PC 855 Cyrillic PC 866 Russian a 22 a 23 a 24 a 25 C R Sun G Rev C A5 size Appendix c 97 11 13 pass 0 Specifications C 21 ...

Page 206: ...PC 852 East European MAZOWIA Polish Code MJK CSFR Bulgaria a 26 a 27 L Sun G Rev C A5 size Appendix c 97 11 13 pass 0 C 22 Specifications ...

Page 207: ...Estonia PC 774 LST 1283 1993 ISO 8859 2 C R Sun G Rev C A5 size Appendix c 97 11 13 pass 0 Specifications C 23 ...

Page 208: ...PC 866 LAT Latvian PC 866 UKR Ukranian Italic No character is available for hex code 15 in the Italic table L Sun G Rev C A5 size Appendix c 97 11 13 pass 0 C 24 Specifications ...

Page 209: ...able shown below using the default setting mode or the ESC R command For example when you select Italic France the characters in the France row are used in the Italic character table You can select one of the following seven additional sets only with the ESC R command a 31 a 32 C R Sun G Rev C A5 size Appendix c 97 11 13 pass 0 Specifications C 25 ...

Page 210: ...ies D 5 World Wide Web D 5 For Australian Users D 6 EPSON FAXBACK D 6 EPSON Bulletin Board System D 6 Internet URL http www epson com au D 6 Your dealer D 6 EPSON Helpdesk D 7 For Singapore Users D 7 For Hong Kong Users D 7 Internet home page D 8 Electronic bulletin board system D 8 Technical support hotline D 8 For Philippines Users D 8 Proof Sign off Yamanouchi _______ Grady _______ R D Sun G Re...

Page 211: ...n the United States or Canada EPSON provides customer support through the following services Electronic support services Service Access World Wide Web From the Internet you can reach EPSON s home page at http www epson com EPSON Internet FTP Site If you have Internet FTP capability use your Web browser or other software for FTP downloading to log onto ftp epson com with the user name anonymous and...

Page 212: ...e installation configuration and operation of EPSON products Dial 800 922 8911 310 782 2600 U S or 905 709 9475 Canada 6 A M to 6 P M Pacific Time Monday through Friday Before you call please have the following information ready T Product name T Product serial number T Computer configuration T Description of the problem You can purchase ink cartridges paper manuals accessories and parts from EPSON...

Page 213: ...fo epson co uk They can provide the following information T Information and literature on new EPSON products also available from Faxon EPSON T Where to purchase genuine EPSON consumables accessories and options Customer Support Our Customer Support team can provide the following services T Technical information on installing configuring and operating your EPSON products T Arranging for faulty EPSO...

Page 214: ...ies You can call the EPSON Bulletin Board Service on 01442 227479 No membership is required Make sure that your communications software is set to 8 data bits 1 stop bit no parity bit ANSI terminal mode emulation and a modem speed of up to 28 8 Kbps Downloading protocols supported include Xmodem Ymodem and Zmodem See the documentation that came with your communications software and modem for more i...

Page 215: ...lletin Board System This is where you can download the latest software and drivers Visit the BBS to check out the latest versions If you have a modem phone 02 9417 5090 Internet URL http www epson com au Access the Epson Australia World Wide Web pages Worth taking your modem here for the occasional surf You can get the same information as offered on the EPSON FAXBACK and the EPSON Bulletin Board p...

Page 216: ...o have all the relevant information on hand when you ring The more information you prepare the faster we can help solve the problem This information includes the User s Guide for your EPSON product type of computer operating system application programs and any other information you feel is required For Singapore Users Contact the telephone and fax numbers below Phone 065 337 7911 Fax 065 334 1185 ...

Page 217: ...ble to obtain printer information and the latest versions of printer drivers You can log onto the following number for the BBS service BBS 852 2827 4244 Technical support hotline You can also contact our technical staff at the telephone and fax numbers below Phone 852 2585 4399 Fax 852 2827 4383 For Philippines Users To obtain technical support as well as other after sales services users are welco...

Page 218: ... printed character table A collection of letters numbers and symbols that constitute the set of characters used in a particular language characters per inch cpi A measure of the size of text characters See also pitch continuous paper Paper that has sprocket feed holes on both sides is perforated between pages and is supplied in a folded stack Also called fanfold paper control code A special code u...

Page 219: ...r font A style of type designated by a name such as Roman or Sans Serif form feed FF A control panel button and control code that advances the paper to the next top of form position halftoning A method of using dot patterns to represent an image Halftoning makes it possible to produce varying shades of gray using only black dots or a nearly infinite array of colors using only a few colors of dots ...

Page 220: ...rinting standby tear off and top of form For single sheet printing there is only the top of form position See also standby position tear off position and top of form position For detailed information on these positions see Paper positions on page 5 of the Glossary pitch The size of the font which is measured in the number of characters per inch cpi The standard is 10 cpi See also characters per in...

Page 221: ...paper to the tear off position and when pressed again feeds the paper back to the top of form position tear off position The position of your continuous paper when you finish printing if auto tear off mode is on or if you press the Tear Off Bin button Using the micro adjust feature you can adjust the tear off position so that the paper s perforation is aligned with the printer s tear off edge See ...

Page 222: ... the printer but is not inside the printer Tear off position Tear off your printed document at the printer s tear off edge Top of form position The letters ABC above are printed at the top of form position new13 12 1 1 g e R Sun G Rev C A5 size Glossary 97 11 14 DR pass 1 Glossary 5 ...

Page 223: ...ommand lists C 11 15 Connecting the printer 1 14 15 Continuous paper multi part forms 2 5 6 printing 4 2 1 42 positioning 1 5 problems 7 8 with labels 2 7 8 Control panel inside front cover 5 2 9 Cut sheet feeder installing A 4 5 loading paper A 6 9 selecting the paper source A 10 Switching between continuous paper printing A 11 D Default setting mode 5 3 changing 5 8 9 Default settings 5 3 9 Doub...

Page 224: ...See also printer driver ribbon cartridge 1 6 11 roll paper holder A 14 tractor in the pull position 2 23 24 Interface cards A 3 installing A 17 18 International character sets C 25 L Levers Paper release 2 2 3 4 See also Paper release lever Paper selection A 9 Paper set A 8 Paper thickness 2 2 3 See also Paper thickness lever Paper type A 8 LF FF button inside front cover Lights inside front cover...

Page 225: ...side front cover selecting 5 2 3 Plastic ribbon cover 2 38 Plugging in the printer 1 13 Printer cover inside back cover installing 1 11 removing 1 7 Printer driver accessing from NT 3 5x 4 17 19 from NT 4 0 4 12 14 from Windows 3 1 4 8 10 from Windows 95 4 3 5 installing for DOS 1 20 for NT 3 5x 1 19 for NT 4 0 1 15 18 for Windows 3 1 1 19 for Windows 95 1 15 18 settings for DOS 1 20 for NT 3 5x 4...

Page 226: ...paper release lever 2 2 3 paper thickness lever 2 3 4 Shield plate A 17 inside back cover Single sheets printing 8 3 1 12 problems 7 6 Specifications C 2 25 CE marking C 10 character tables C 16 25 command lists C 11 15 electrical C 4 environmental C 5 mechanical C 2 4 paper C 5 7 paper alignment C 7 printable area C 8 9 safety approval C 10 Status Monitor 2 utility 4 2 6 2 12 Switching to continu...

Page 227: ...problems 7 6 7 tear off position problems 7 10 top of form position problems 7 9 U Unpacking the printer 1 2 Using front push tractor 2 9 16 rear push tractor 2 17 22 pull tractor 2 22 34 push and pull tractor combination 2 30 33 Utility EPSON Remote 4 21 EPSON Status Monitor 2 4 2 V Vertical line aligning 7 17 R Sun G Rev c A5 size Index 97 11 14 pass 0 IN 5 ...

Reviews: