Report Settings Menu
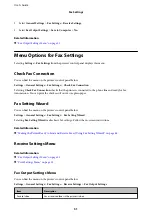
You can find the menu on the printer's control panel below:
Settings
>
General Settings
>
Fax Settings
>
Report Settings
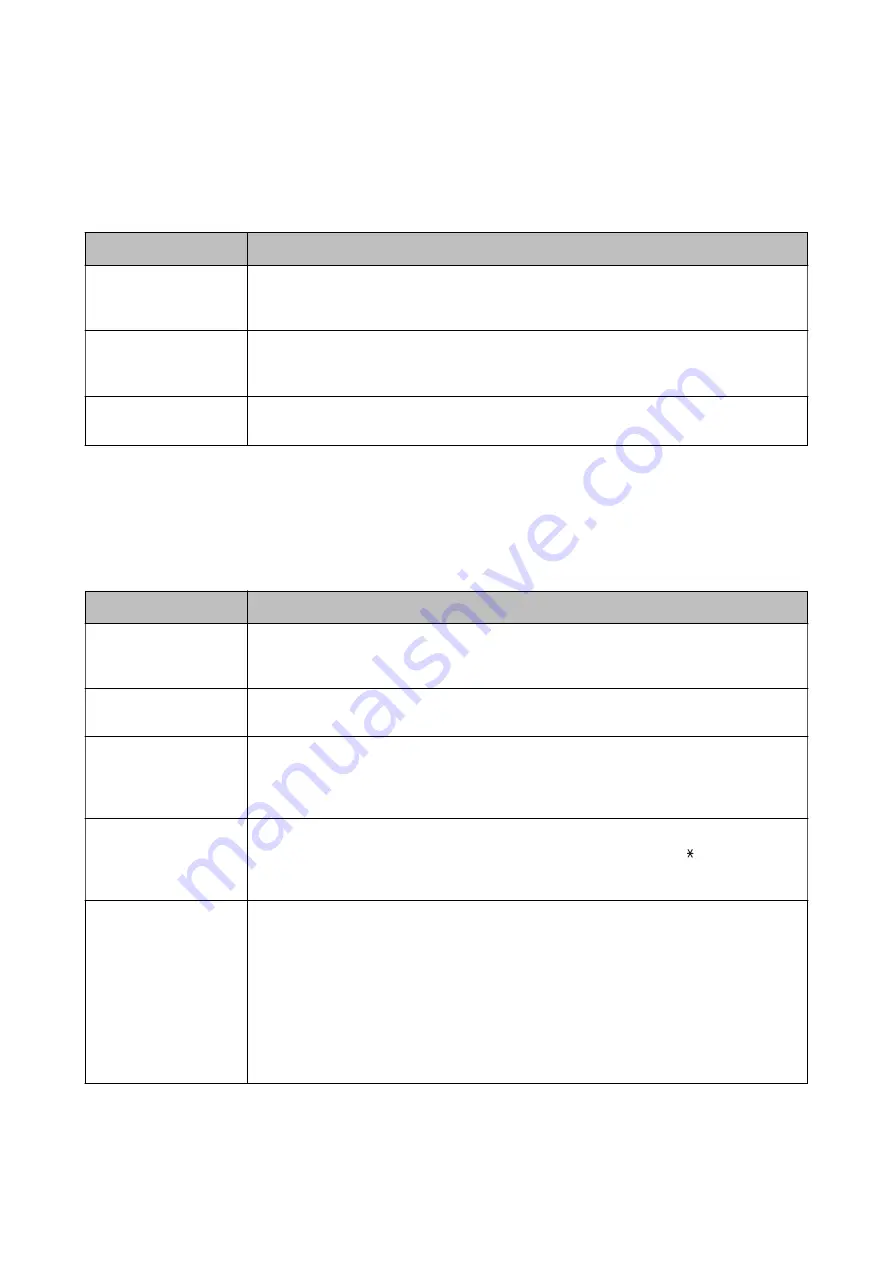
Item
Description
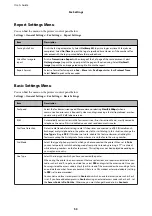
Fax Log Auto Print
Prints the fax log automatically. Select
On(Every 30)
to print a log every time 30 fax jobs are
completed. Select
On(Time)
to print the log at a specified time. However, if the number of fax
jobs exceeds 30, the log is printed before the specified time.
Attach Fax image to
report
Prints a
Transmission Report
with an image of the first page of the sent document. Select
On(Large Image)
to print the upper part of the page without reducing. Select
On(Small
Image)
to print the entire page reducing it to fit onto the report.
Report Format
Selects a format for fax reports in
Fax
>
More
tab >
Fax Report
other than
Protocol Trace
.
Select
Detail
to print with error codes.
Basic Settings Menu
You can find the menu on the printer's control panel below:
Settings
>
General Settings
>
Fax Settings
>
Basic Settings
Item
Description
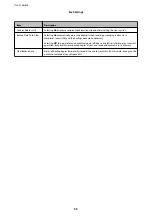
Fax Speed
Select the fax transmission speed. We recommend selecting
Slow(9,600bps)
when a
communication error occurs frequently, when sending/receiving a fax to/from abroad, or when
you are using an IP (VoIP) phone service.
ECM
Automatically corrects errors in the fax transmission (Error Correction Mode), mostly caused by
telephone line noise. If this is disabled, you cannot send documents in color.
Dial Tone Detection
Detects a dial tone before starting to dial. If the printer is connected to a PBX (Private Branch
Exchange) or digital phone line, the printer may fail to start dialing. In this situation, change the
Line Type
setting to
PBX
. If this does not work, disable this feature. However, disabling this
feature may drop the first digit of a fax number and send the fax to the wrong number.
Dial Mode
Select the type of phone system to which you have connected the printer. When set to
Pulse
,
you can temporarily switch the dialing mode from pulse to tone by pressing ("T" is entered)
while entering numbers on the fax top screen. This setting may not be displayed depending on
your region or country.
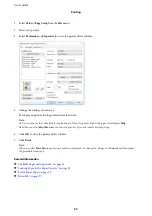
Line Type
Select the line type to which you have connected the printer.
When using the printer in an environment that uses extensions and requires an external access
code, such as 0 and 9, to get an outside line, select
PBX
and register the access code. Once you
have registered the access code, enter # (hash) instead of the access code when sending a fax to
an outside fax number. For an environment that uses a DSL modem or terminal adapter, setting
to
PBX
is also recommended.
You cannot send faxes to recipients in
Contacts
in which an external access code such as 0 or 9
is set. If you have added recipients in
Contacts
using an external access code such as 0 or 9, set
the
Access Code
to
Do Not Use
. Otherwise, you must change the code to # in
Contacts
.
User's Guide
Fax Settings
53

