Saving a User's Logo Image
89
You can save an image on the projector and display it whenever the projector
turns on. You can also display the image when the projector is not receiving
an input signal. This image is called the user's logo screen.
You can select a photo, graphic, or company logo as the user's logo, which is
useful in identifying the projector's owner to help deter theft. You can prevent
changes to the user's logo by setting up password protection.
a
• If the
User's Logo Protection
setting is set to
On
in the
Password
Protection
setting menu, set to
Off
before saving the user's logo.
• When you copy the menu settings from one projector to another
using the batch setup feature, user's logo is also copied. Do not
register the information that you do not want to share between
multiple projectors as a user's logo.
a
Display the image you want to project as the user's logo.
b
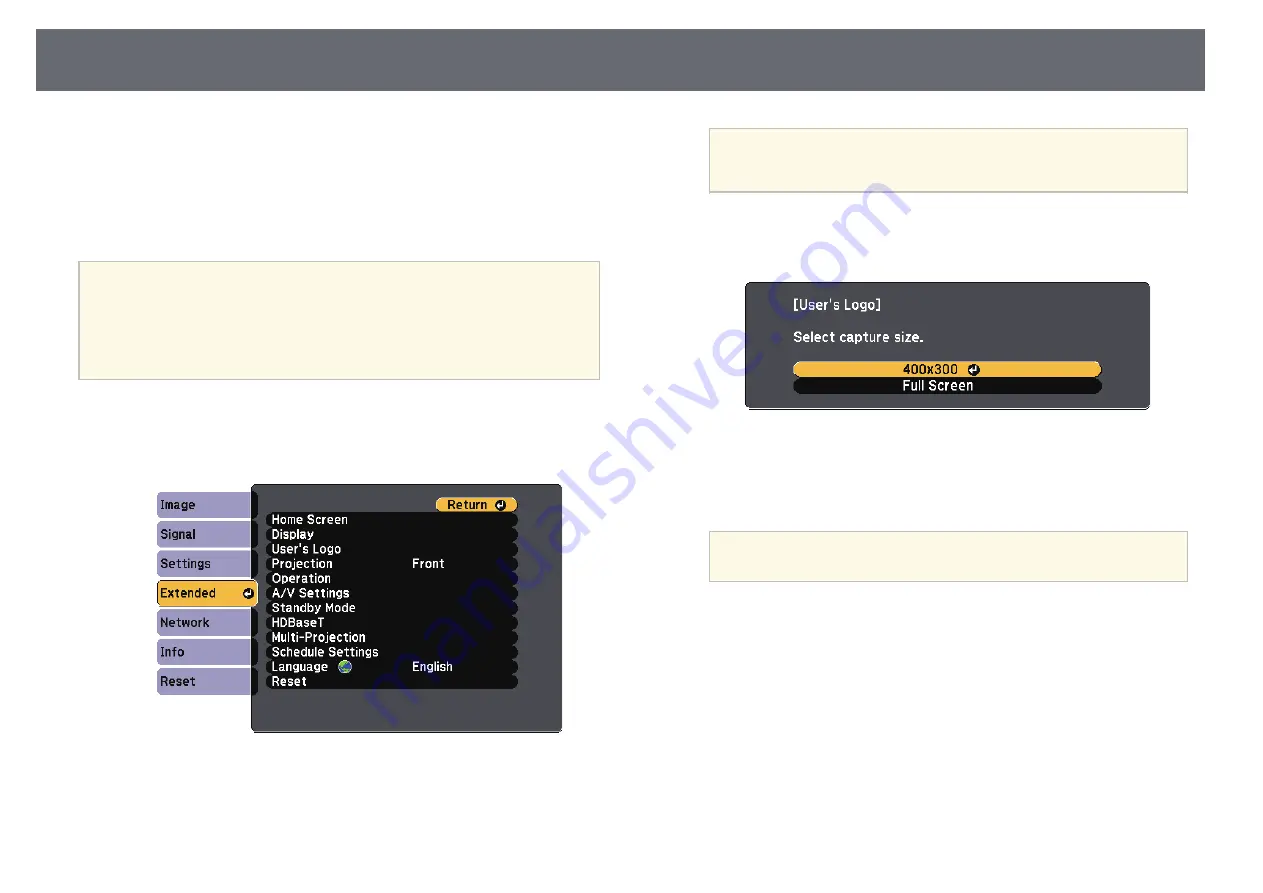
Press the [Menu] button, select the
Extended
menu, and press [Enter].
c
Select
User's Logo
>
Start Setting
and press [Enter].
You see a prompt asking if you want to use the displayed image as a
user's logo.
a
Adjustments such as Geometry Correction, E-Zoom, Aspect,
Scale, or Screen Type are temporarily canceled when you select
User's Logo
.
d
Select
Yes
and press [Enter].
The capture size selection screen is displayed.
e
To save your image as the user's logo, select
Full Screen
, press [Enter],
select
Yes
, and then press [Enter].
The user's logo is overwritten and a completion message is displayed.
a
When projecting an image protected by HDCP from the HDMI
ports, you cannot save the image using the
Full Screen
option.
f
To select the image area and zoom factor, select
400x300
, and then
press [Enter].
You see a selection box overlaying your image.
Summary of Contents for EB-L400U
Page 1: ...User s Guide ...


