Projecting a PC Free Presentation
77
• You may not be able to use the security features on certain USB storage
devices with PC Free features.
• When connecting a USB device that includes an AC adapter, connect the
AC adapter to an electrical outlet when you use the device with your
projector.
• Some commercially available USB card readers may not be compatible with
the projector.
• The projector can recognize up to 5 cards inserted into the connected card
reader at one time.
• You cannot correct keystone distortion while projecting in PC Free, so
correct the image shape before you begin your presentation.
• You can use the following functions while projecting in PC Free.
• Freeze
• A/V Mute
• E-Zoom
• Pointer
g
g
Related Links
• "Stopping Video Action Temporarily"
• "Shutting Off the Image and Sound Temporarily"
• "Using the Remote Control as a Pointer"
Starting a PC Free Slide Show
After connecting a USB device to the projector, you can switch to the USB
input source and start your slide show.
a
• You can change the PC Free operation options or add special effects
by highlighting
Option
at the bottom of the screen and pressing
[Enter].
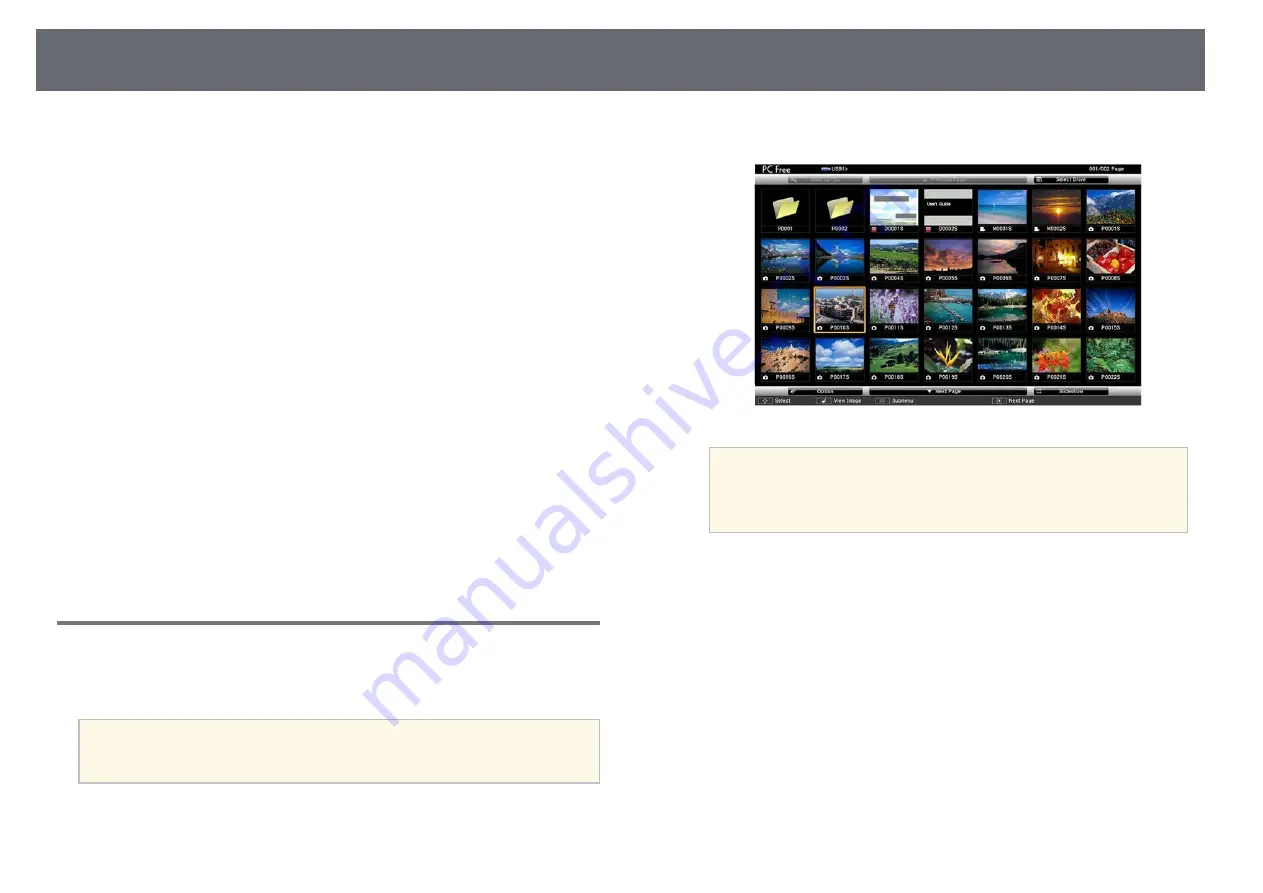
a
Press the [USB] button on the remote control.
The PC Free file list screen is displayed.
a
• If the Select Drive screen is displayed, press the arrow buttons
to select the drive and press [Enter].
• To display images on the other USB drive, highlight
Select
Drive
at the top of the file list screen and press [Enter].
b
Do one of the following to locate your files:
• If you need to display files inside a subfolder on your device, press
the arrow buttons to highlight the folder and press [Enter].
• To move back up a folder level on your device, highlight
Back to
Top
and press [Enter].
• To view additional files in a folder, highlight
Next Page
or
Previous
Page
and press [Enter], or press the [Page] up or down buttons on
the remote control.
c
Do one of the following:
• To display an individual image, press the arrow buttons to highlight
the image and press [Enter]. (Press the [Esc] button to return to the
file list screen.)
Summary of Contents for EB-L400U
Page 1: ...User s Guide ...


