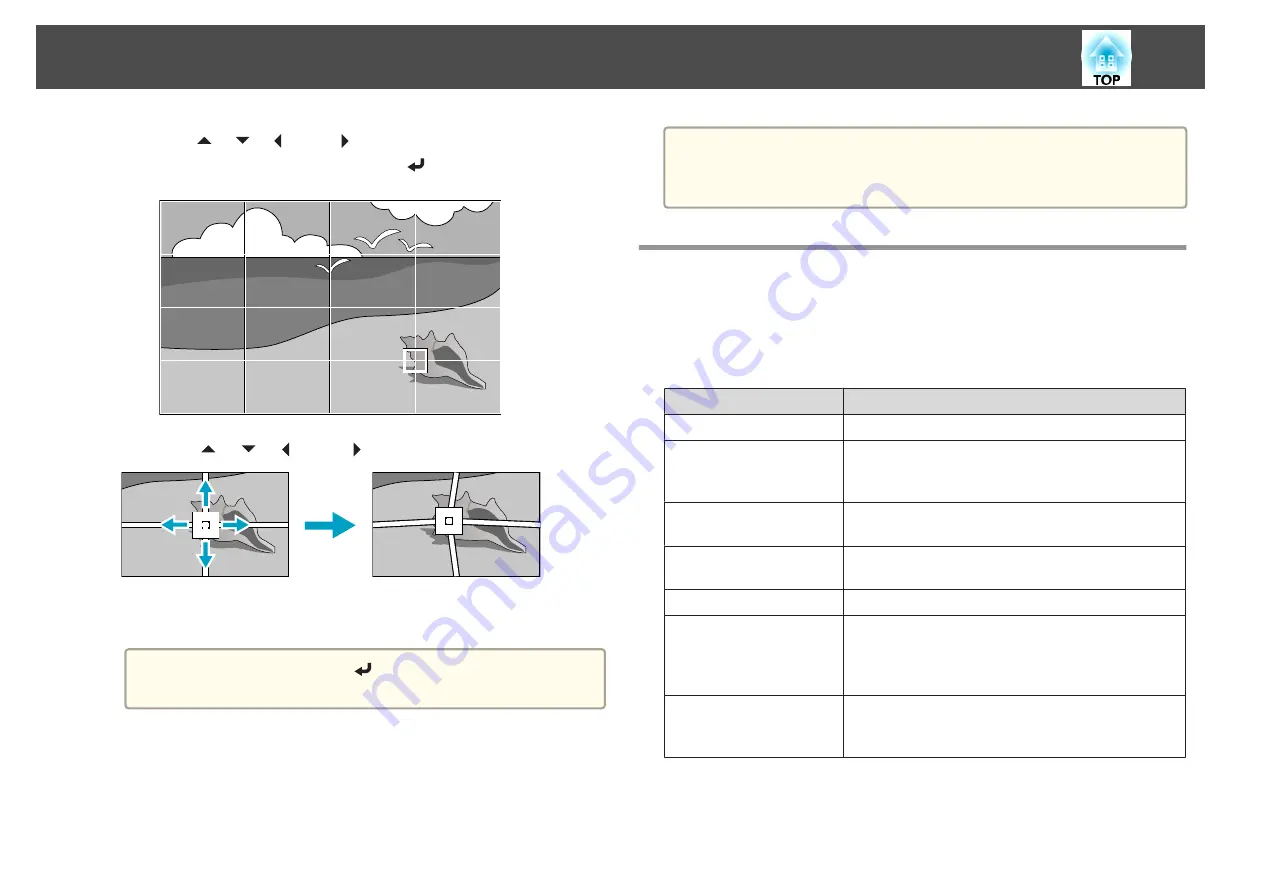
g
Use the [
], [
], [
], and [
] buttons to move to the point you
want to correct, and then press the [
] button.
h
Use the [
], [
], [
], and [
] buttons to correct distortion.
To continue to correct another point, press the [Esc] button to
return to the previous screen, then repeat the steps 7 and 8.
a
Each time you press the [
] button, you can show or hide the
image and the grid.
i
To complete the corrections, press the [Menu] button.
a
You can fine tune the corrected results. Select
Quick Corner
on the
screen from step 4 to adjust the tilt of the image.
s
Selecting the Projection Quality (Selecting Color
Mode)
You can easily obtain the optimum image quality simply by selecting the
setting that best corresponds to your surroundings when projecting. The
brightness of the image varies depending on the mode selected.
Mode
Application
Dynamic
This is the brightest mode. Ideal for use in a bright room.
Presentation
The images are vivid and brought to life. Ideal for
making presentations or watching a TV program in a
bright room.
Natural
Reproduces colors faithfully. Ideal for projecting still
pictures such as photos.
Cinema
Gives images a natural tone. Ideal for watching films in a
dark room.
BT.709
Produces images that conform to the ITU-R BT.709.
DICOM SIM
This produces images with clear shadows. Ideal for
projecting X-ray photographs and other medical
images. The projector is not a medical device and cannot
be used for medical diagnosis.
Multi-Projection
Minimize the color tone difference between each
projected image. Ideal for projecting from multiple
projectors.
Adjusting the Projected Images
76
Summary of Contents for EB-L1050U
Page 1: ...User s Guide ...
Page 14: ...Introduction This chapter explains the names for each part ...
Page 57: ...Basic Usage This chapter explains how to project and adjust images ...
Page 135: ...Configuration Menu This chapter explains how to use the Configuration menu and its functions ...
Page 207: ...Cleaning the Parts 207 ...
Page 214: ...Appendix ...


