150
7.
Select
Presets
to save your scan settings.
Note:
Presets can be locked by an administrator. If you cannot access or change this setting,
contact your administrator for assistance.
8.
Select
Upload
.
Your product scans your original and saves the scanned file to the selected destination.
Parent topic:
Starting a Scan Using the Product Control Panel
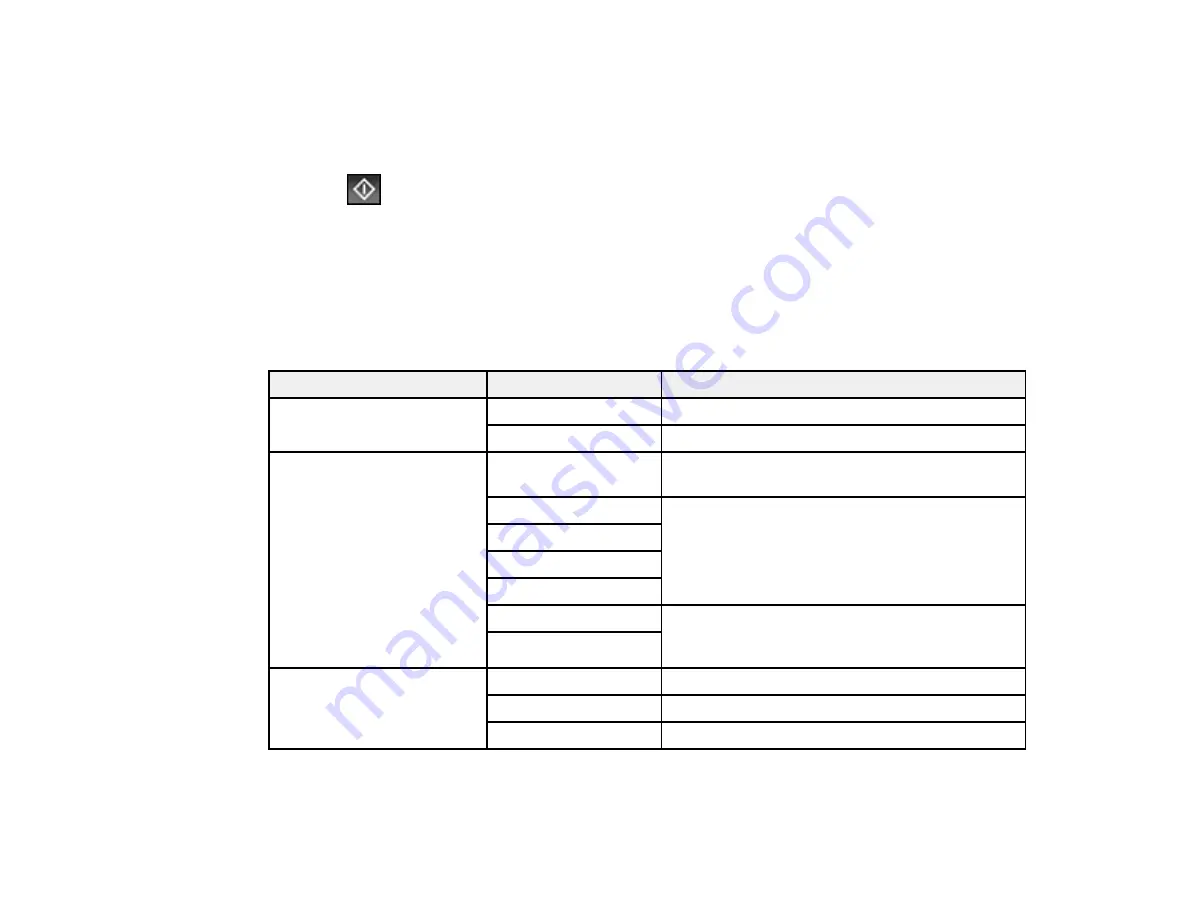
Control Panel Scanning Options
Select the options you want to use for scanning.
Note:
Not all options or settings may be available, depending on the
Scan to
option selected.
Scan Settings
Available options
Description
Color Mode
B&W
Select to scan images in black and white
Color
Select to scan images in color
File Format
JPEG
Select for photos. You can also select the
Compression Ratio
.
PDF (Single Page)
Select for documents. You can also select the
Compression Ratio
and
PDF Settings
.
PDF (Multi Page)
PDF/A (Single Page)
PDF/A (Multi Page)
TIFF (Single Page)
Select for scanned files that you can print from a
device. Multi Page TIFF documents are scanned
in black and white.
TIFF (Multi Page)
Resolution
200dpi
Select for documents
300dpi
Select for photos
600dpi
Select for highest quality printing
Summary of Contents for C11CH71202
Page 1: ...ST C8000 User s Guide ...
Page 2: ......
Page 160: ...160 You see an Epson Scan 2 window like this ...
Page 162: ...162 You see an Epson Scan 2 window like this ...
Page 178: ...178 You see a screen like this 2 Click the Save Settings tab ...
Page 183: ...183 You see this window ...
Page 278: ...278 Print Quality Adjustment ...


