20
Parent topic:
Installing the Optional Cabinet and Paper Cassettes
Installing the Optional Paper Cassette Units
You can install up to three optional paper cassette units to provide more paper capacity. If you are using
the optional cabinet, install the cabinet under the bottom optional cassette unit first.
1.
Turn off the product, and unplug the power cord and any connected cables.
Warning:
To avoid electric shock, make sure you unplug the power cord.
2.
Uninstall any optional cassette units already installed on the product.
Note:
To uninstall optional cassette units, turn off the product, unplug the power cord, disconnect
any cables, and follow the rest of these instructions in reverse.
3.
Remove the paper cassette unit from its packaging and remove any protective materials.
4.
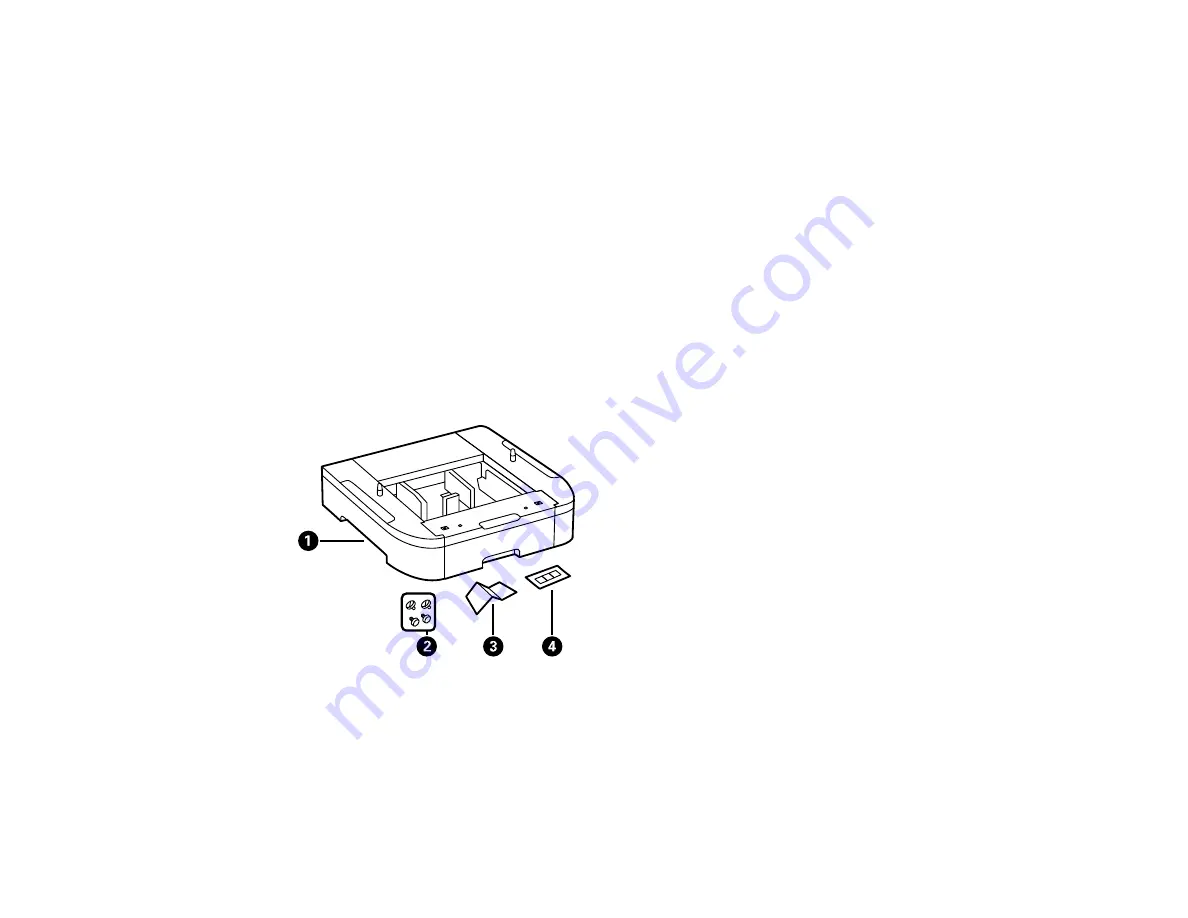
Make sure you have all the items shown here:
1
Optional cassette
2
Screws (×4)
3
Paper size label
4
Cassette number sticker
Summary of Contents for C11CG70201
Page 1: ...WF C8190 User s Guide ...
Page 2: ......
Page 16: ...16 8 Attach the front cover to the stands 9 Remove the output tray from the product ...
Page 21: ...21 5 Remove the output tray 6 Remove the paper cassette from the product ...
Page 39: ...39 3 Optional cabinet 1 Rear paper feed edge guides 2 Paper support and extension ...
Page 116: ...116 You see the maintenance options 4 Click the Extended Settings button ...
Page 194: ...194 4 Pull out paper cassette 1 5 Open rear cover 1 D1 ...
Page 195: ...195 6 Pull out rear cover 2 D2 7 Remove the roller cover inside the product ...
Page 200: ...200 4 Pull out the paper cassette ...
Page 201: ...201 5 Open the rear cover E that matches with the paper cassette you removed ...


