


Chapter 5
Installing
and
Removing Drives
This chapter describes how to install and remove optional
drives in your computer. You can use these instructions to
install a variety of devices, including hard disk drives, a
diskette drive, a tape drive, a CD-ROM, or an optical drive.
Although your drive may look different from the ones
illustrated here, you should be able to install it the same way.
Your computer can hold up to four mass storage devices. You
can install one or two hard disk drives in the internal hard disk
drive bays. In the upper externally accessible bay, you can
install a second diskette drive, a tape drive, or a CD-ROM
drive.
To install or remove a drive, first remove the computer’s cover
as described in Chapter 4. Then follow the appropriate
instructions in this chapter to install and remove drives:
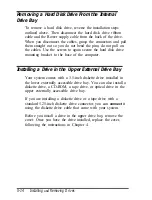
Installing a hard disk drive in the internal drive bay
Removing a hard disk drive from the internal drive bay
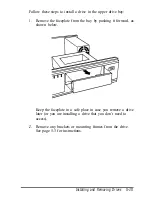
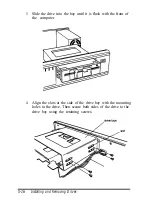
Installing a drive in the upper externally accessible drive
bay
Removing a drive from the upper drive bay
Reconnecting drive and power cables to the diskette drive
in the lower drive bay
Post-installation procedures.
Some of the steps in this chapter may not apply for the drive
you are installing. See the documentation that came with your
drive for more information.
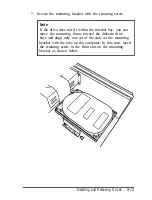
Installing and Removing Drives
5-1
Summary of Contents for ActionDesk 4000
Page 1: ......
Page 128: ...Hard disk drive types continued Specifications A 9 ...
Page 130: ...DMA Assignments Specifications A 11 ...
Page 131: ...A 12 Specifications ...
Page 132: ...System I O Address Map Specifications A 13 ...
Page 133: ...A 14 Specification ...
Page 134: ...Specifications A 15 ...
Page 135: ...A 16 Specifications ...
Page 136: ...Speaker connector pin assignments J21 Specifications A 17 ...
Page 137: ...A 18 Specification ...
Page 138: ...Specifications A 19 ...


