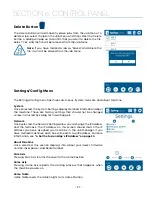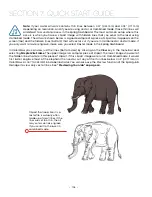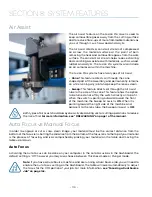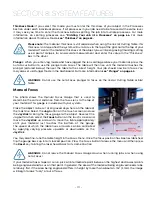
Delete Button
The Delete Button will permanently erase jobs from the Job Menu. To
delete a job, select the job in the Job Menu, and then select the Delete
Button. A dialog will pop up to confirm that you want to delete the file.
Select “Yes” and the file will be removed from the Job Menu.
Note:
If you have marked a job as “Saved” and delete the
file, it will still be erased from the Job Menu.
Settings/Config Menu
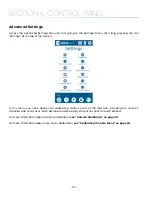
The Settings/Config menu has three sub-menus, System, Network, and About Machine.
System
Once selected, the System Settings display detailed information about
the machine. These are factory settings that should not be changed
unless instructed by Epilog Technical Support.
Network
Once selected, the Network Settings allow you to change the IP Address
and the Netmask. The IP Address on this screen should match the IP
Address you have assigned your machine in the Job Manager. If you
have multiple machines, each one will need its own IP Address. For more
information, see
“6. Set the Fusion Edge’s IP Address” on page 20.
About Machine
Once selected, this section displays info about your laser’s firmware
version, laser power, and Serial Number.
Park Axis
Pressing Park Axis returns the Laser to the Home Position.
Home Axis
Pressing Home Axis repeats the Homing process that happens when
the machine powers on.
Home Table
Home Table resets the table height to its Home Position.
• After the job starts, the job’s settings and a timer will be activated and will be shown at the bottom
of the display.
• Saved jobs will always be visible at the bottom of the list with a save icon next to the job name.
•
Pressing and holding down your finger on a job will pull up the job’s settings, allowing
you to view the Speed, Power, and Resolution or Frequency. A save button will also be
visible in the upper right corner that allows you to save the job permanently to the
laser.
Editing Job Settings at the Machine
1. Print a job to the Edge
2. Long press on the job and the Speed and Power values will come up.
3. Press the job again and the Speed and Power boxes will come up at the
bottom of the screen
4. Highlight the one you want to change and another dialog box will come
up at the bottom of the screen.
5. Delete the number in the box and then insert the new value(s).
6. Press the Save icon to save the change. If you exit this screen without
pressing the Save icon, your changes will not be saved.
Speed
This icon indicates the speed settings on the selected job. It ranges from 1-100%.
Power
This icon indicates the power settings on the selected job. It ranges from 1-100%.
DPI
This icon indicates the resolution settings on the selected job. It ranges from 75-1200.
Frequency
This icon indicates the frequency settings on the selected job. It ranges from 1-100%.
- 97 -
SECTION 6: CONTROL PANEL
Summary of Contents for Fusion Pro 32
Page 2: ......
Page 6: ......
Page 14: ...Fusion Pro 48 8 SECTION 1 SAFETY ...
Page 15: ... 9 SECTION 1 SAFETY ...
Page 18: ......
Page 28: ......
Page 60: ......
Page 98: ......
Page 108: ......
Page 132: ......
Page 162: ......
Page 184: ......
Page 202: ......
Page 214: ......
Page 216: ......
Page 242: ......

