33
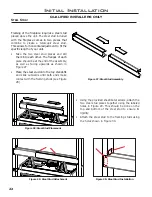
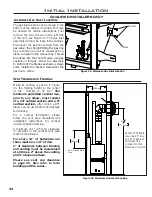
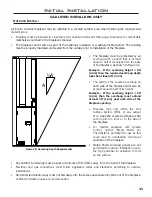
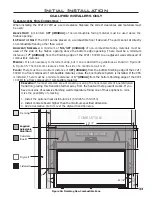
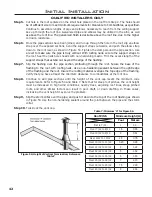
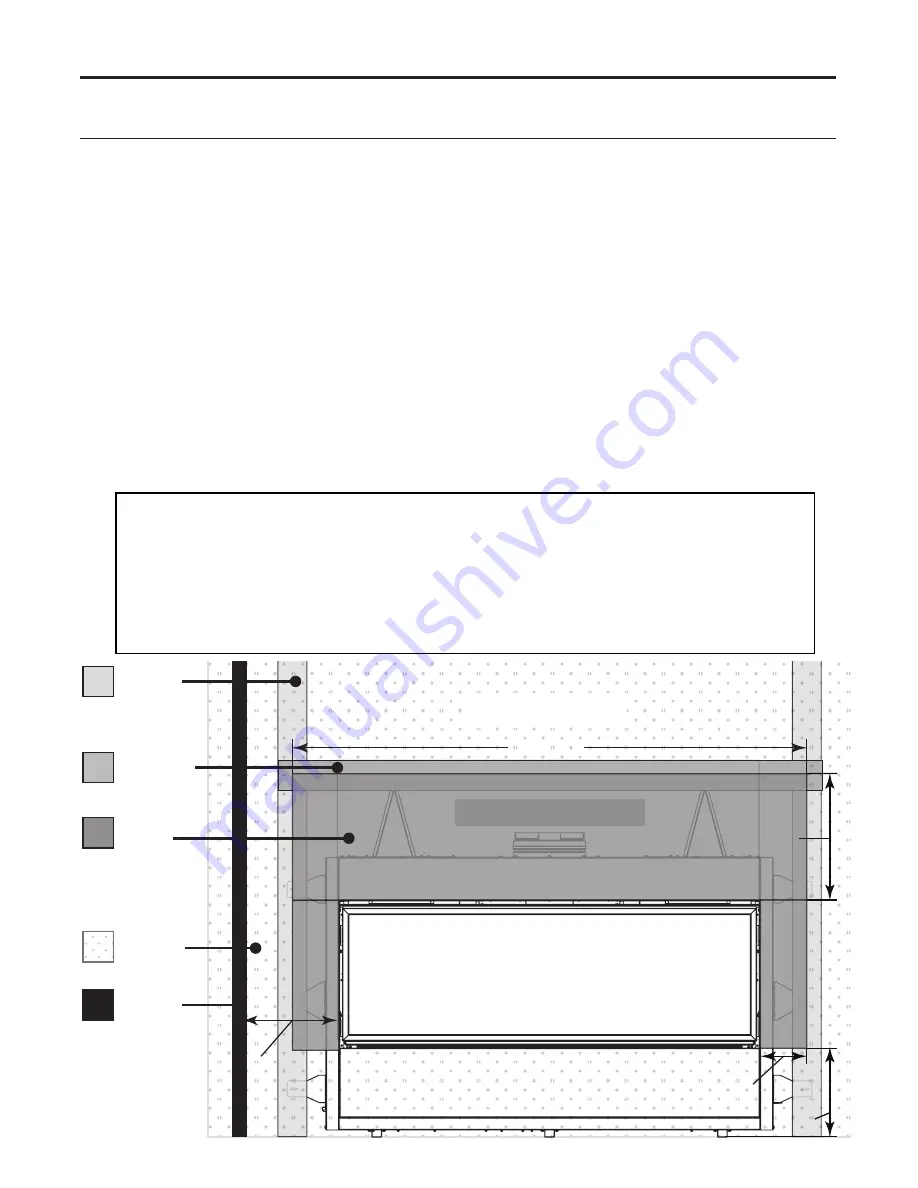
Figure 44: Finishing Non-Combustible Zone
c
LeaRances
& n
on
-c
ombustibLe
:
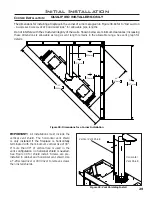
When installing the C72I /C72ID as a zero clearance fireplace the correct clearances and materials must
be used:
a
boVe
u
nit
:
A minimum 19” (483mm) of non-combustible facing material must be used above the
firebox opening.
i
n
F
Ront
oF
u
nit
:
The C72I can be placed on a combustible floor if desired. The unit cannot sit directly
on combustible flooring other than wood.
a
Djacent
/s
iDewaLL
:
A minimum of 5 3/16” (132mm) of non-combustible facing materials must be
used of the side of the firebox opening above the bottom edge openeing. There must be a minimum
distance of 7” (229mm)
from the finishing edge of the C72I / C72ID to an adjacent wall composed of
combustible material.
m
antLe
:
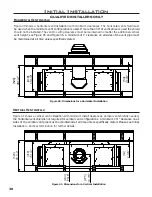
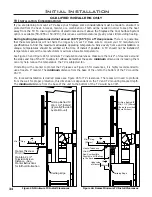
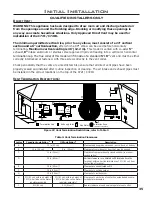
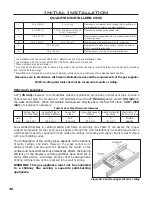
It is not necessary to install a mantle, but if one is desired the guidelines as shown in Figure 34
& Figure 35. The minimum clearance from the side of a mantle to wall is 4”.
F
LooR
:
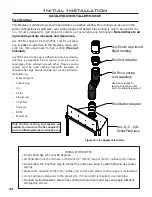
There must be a minimum distance of 10” (254mm)
from the bottom finishing edge of the C72I /
C72ID to a floor composed of combustible material, unless the Cool Surface System is installed. If the CSS
is installed, There must be a minimum distance of 1” (25mm)
from the bottom finishing edge of the C72I
/ C72ID to a floor composed of combustible material
Initial Installation
QUALIFIED INSTALLERS ONLY
56 1/2”
19”
10”
COMBUSTIBLE
NON COMBUSTIBLE
Framing
MetalStud
Drywall
Concrete
Board
Sidewall
7”
5 3/16
84
c
Racking
:
The most common area of cracking is along the horizontal cement board/drywall
transition; placing this transition further away from the heat will help prevent cracks. If you
have concerns of excessive finishing wall temperature follow one of these options to mini
-
mize the possibility of cracking:
1. Install the optional heat distribution kit (50-3455 or 50-3713).
2. Install concrete board higher than the minimum specified dimension.
3. Add a decorative tile trim over the drywall transition area.
Supplied
Adjustable
Steel Stud
Summary of Contents for C72I
Page 55: ...55 Parts Diagram 1 2 3 4 5 6 9 7 8 12 13 14 10 15 15 ...
Page 57: ...57 Notes ...
Page 58: ...58 Notes ...

