


Jupiter
EVM
Getting
Started
Rev
C01
:
05/17/2007
Copyright
Elevate Semiconductor 2012
Page 6 of 22
1.3 Software
Installation
There are 2 steps to install the Jupiter EVM demonstration program.
1. Install the Jupiter EVM UIP from the CD-ROM.
2. Install the parallel port driver (ParPort2k).
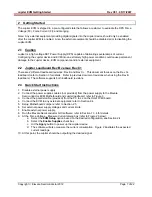
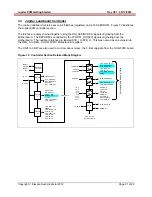
Figure 1 illustrates the default directory structure. The user may change the <root dir> during the
installation.
Figure 1: Installation Directory Structure
<Root Dir>\Planet ATE\EVM\
Documents (several folders)
EVM GUI
ParPort2k
1.3.1 Jupiter EVM UIP Installation
To install the Jupiter EVM software package, run the SETUP program on the distribution CD and follow
the prompts. The
PlanetATE.exe
executable will be installed in the
EVM GUI
sub-directory. In addition,
a short cut will be installed onto the desktop and in the
Start->Programs
folder. The
Start->Programs
folder also contains links to the different product datasheets, EVM User’s Guide, and documentation
folder.
1.3.2 Parallel Port (ParPort2K) Installation
To install the ParPort2K parallel port driver, run the
setup.exe
from the
ParPort2k
sub-directory after the
main installation is complete and click the
Install
button. For WinNT users, the user must have
administration rights.
Note: ParPort2k is a copyright of Zeecube Software.
1.3.3 Reboot
Machine
After the Jupiter EVM and Parallel Port software is installed, it is recommended to re-boot the machine.
1.3.4 Launching the Elevate Semiconductor Program
The user can launch the Elevate Semiconductor GUI from the
Desktop
,
Start->Programs
folder, or
EVM GUI
sub-directory.
1.3.5 Software
Un-Installation
The Elevate Semiconductor demonstration program may be un-installed using the
Add/Remove
Program
from the Windows Control Panel.