


Jupiter
EVM
Getting
Started
Rev
C01
:
05/17/2007
Copyright
Elevate Semiconductor 2012
Page 4 of 22
1 Introduction
Congratulations on your purchase of a Elevate Semiconductor Jupiter EVM evaluation system. You will
find that it serves as an invaluable development platform to help get your product to market in the shortest
possible time. The Jupiter EVM and Graphical User Interface (GUI) allow the customer to demonstrate
and evaluate the Jupiter performance and functionality.
This document provides the instructions to install, setup, and operate the Jupiter EVM. Refer to the
Elevate Semiconductor EVM User’s Guide
for a detailed description of the EVM system.
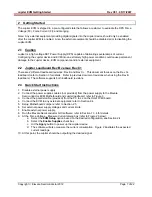
1.1 Unpacking - Jupiter EVM Contents
Please check the contents of the Jupiter EVM shipping carton to make sure you have received all of the
items listed in Table 1. The system is already configured for the best setup, except for connections to the
power supply, PC controller, and test equipment.
Table 1: Jupiter EVM Contents
Qty
Description
1 ea.
Jupiter EVM System (3 boards)
1 ea.
Jupiter EVM Getting Started (this document)
1 ea.
CD Contents List
1 ea.
Elevate Semiconductor User Interface Program Installation CD
1 ea.
DB25M-DB25M, 6 Foot Parallel Port Cable