9. THE SEQUENCER
38
5. Press
[FUNC]
+
[TRK]
to toggle the KEYBOARD mode keyboard on
6. Press and hold
[FUNC]
and then press any lit
[TRIG]
key to add a note trig with the corresponding
note value to the selected step. The active step then automatically advances to the next step.
7. To remove a trig or to add a rest (no trig), position the active step on the trig that you want to
remove or add a rest to, and then press
[NO]
. The active step then automatically advances to the
next step.
8. To add a parameter lock to a trig, press and hold a
[TRIG]
key, and then turn the
DATA ENTRY
knob that controls the parameter you want to lock and set it to the desired value. The graphics
become inverted for the locked parameter, and the locked parameter value is displayed. The
[TRIG]
key of the locked trig blinks red (for note trigs) or yellow (for lock trigs) to indicate that the trig now
contains a parameter lock.
9. Press
[RECORD]
to exit STEP RECORDING mode.
JUMP mode
In JUMP mode, the
LEN
parameter setting on the TRIG PARAMETER page controls the note length of
the trigs you place, and advances the active step the same length. A
LEN
value of 1/16 adds a sixteenth
note and advances the sequencer one step. 1/8 adds an eighth note and advances the sequencer two
steps. 1/4 adds a quarter note and advances the sequencer four steps and so on. The
LEN
parameter is
also parameter locked on every trig you place.
•
Press [PLAY] to listen to the sequence while you are programming it. Press [STOP] to
stop the sequencer and stay in STEP RECORDING mode.
•
If you use an external MIDI controller, you must set it to send MIDI data on the Syntakt’s
defined AUTO CHANNEL. For more information, please see “14.4.3 CHANNELS” on
•
If you use an external MIDI controller, the trig’s VEL (velocity) value is determined by the
velocity sent from these and is parameter locked.
•
If you press and hold [FUNC] while inputting notes from an external MIDI controller, the
velocity is fixed and determined by the VEL parameter setting.
•
If you press and hold [YES] while you place a trig with [TRIG] keys or an external MIDI
controller, the trig length is locked to the time you press the [TRIG] keys or the external
MIDI controller.
•
If you add a new note trig on a previously placed note trig, any parameter locks previ-
ously placed on that trig remain as they were.
•
In STEP RECORDING mode, to avoid accidental key presses, [FUNC] + [NO] does not
reload the pattern. [FUNC] + [YES] does not save the pattern. Instead they work as
described above.
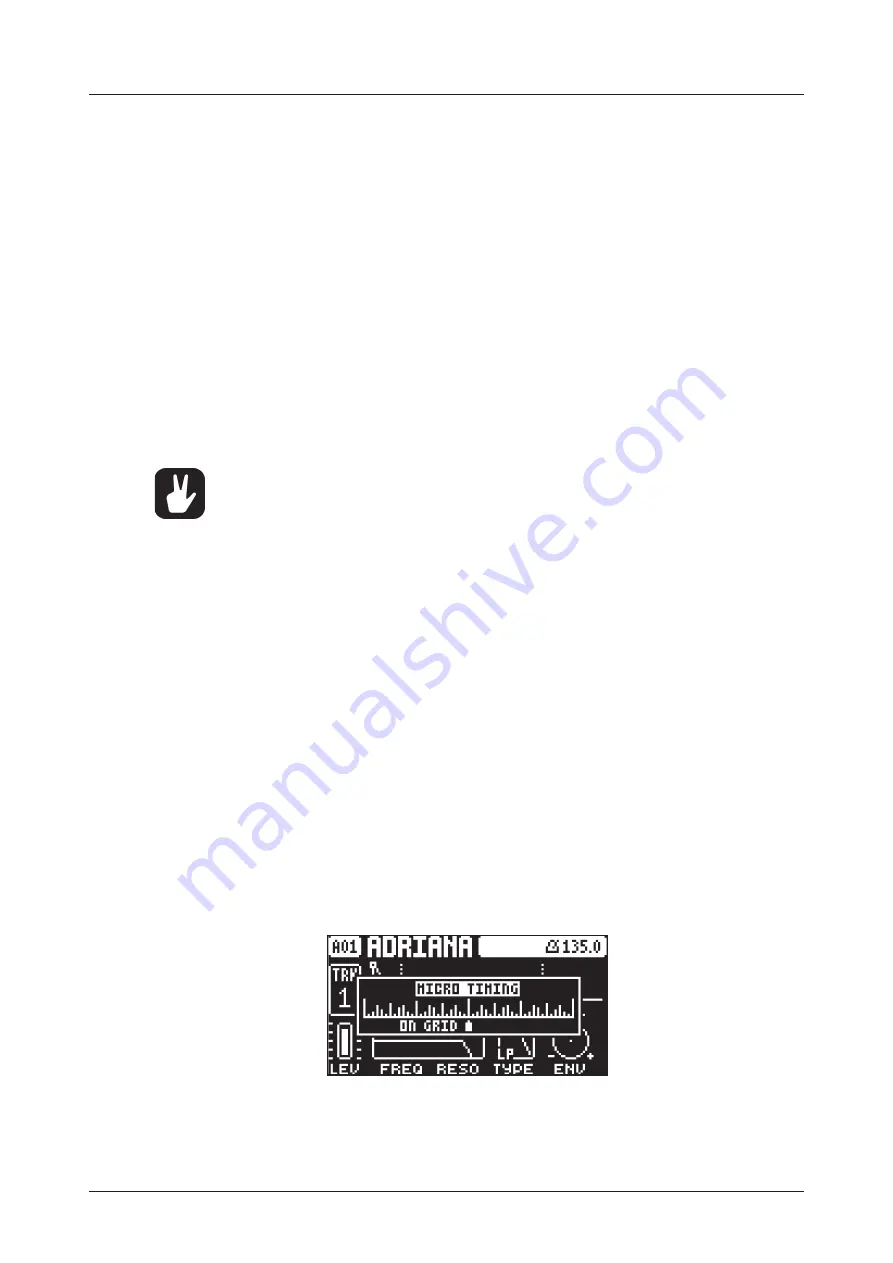
9.4 MICRO TIMING MENU
Here you can add micro timing to a note trig, moving it ahead or behind the beat. Micro timing can be cus-
tomized on any of the sequencer steps on both audio and MIDI tracks. In GRID RECORDING mode, press
and hold one or several
[TRIG]
keys and then press
[LEFT]
/
[RIGHT]
to access the pop-up Micro timing
menu that shows the time offset for the chosen sequencer step(s) on the active track. Then press
[LEFT]
/
[RIGHT
keys to adjust the time offset. To exit the micro timing menu, release the
[TRIG]
key(s). The micro
timing settings are stored in the active pattern
9.5 RETRIG MENU
Retrigs can be customized on any of the sequencer steps on the audio tracks (the retrig function is not
available on the MIDI tracks). In GRID RECORDING mode, press and hold one or several
[TRIG]
keys and


