background image

15. SETTINGS MENU 

67

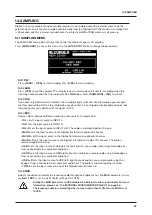
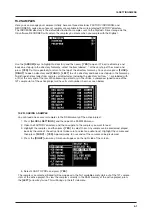
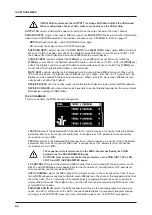
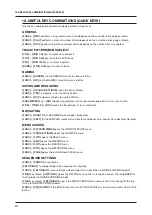
PROGRAM CHG OUT CH

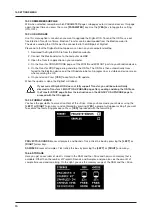
 selects the MIDI channel that will send program change messages when 

changing patterns. An AUTO setting will use the AUTO channel. Enable Digitakt to send program 

change messages in the MIDI SYNC. For more information, please see “15.3.1 SYNC” on page 64.

15.4 SYSEX DUMP

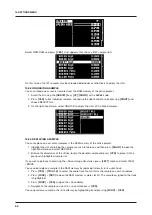
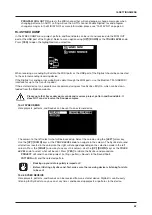
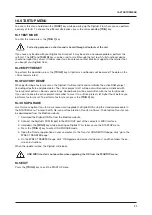
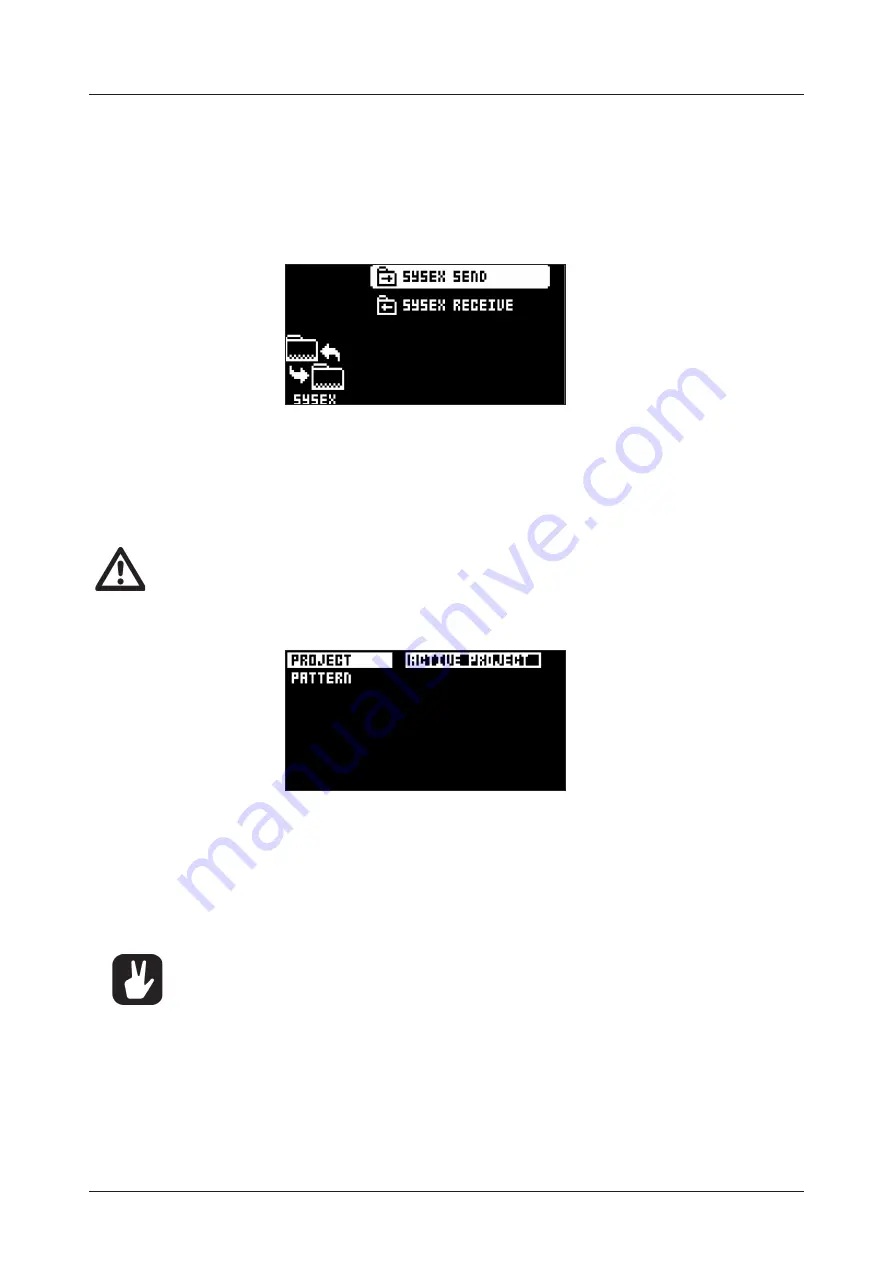
In the SYSEX DUMP menu, project, pattern, and Sound data can be sent and received via the MIDI OUT 

port or the USB port of the Digitakt. Select a menu option using 

[UP]

/

[DOWN]

 or the 

TRACK LEVEL

 knob. 

Press 

[YES]

 to open the highlighted menu selection.

When receiving or sending SysEx data, the MIDI ports or the USB port of the Digitakt should be connected 

to the external sending/receiving device.
If the Digitakt is sending or receiving SysEx data through the MIDI ports, use the Elektron TM-1 USB MIDI 

interface for up to 10x transfer speeds.
If the external device is a computer, we recommend using our free SysEx utility C6, which can be down-

loaded from the Elektron website.

Please note that Sysex dump only sends and receives project, pattern and Sound data. It 

does NOT send or receive the Sounds samples.

15.4.1 SYSEX SEND

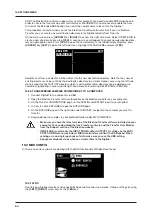
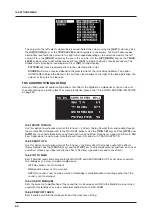
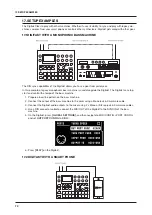
Here projects, patterns, and Sounds can be sent to an external device.

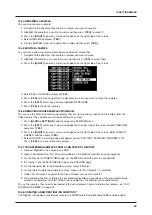
The column to the left selects what will be backed up. Select the column using the 

[LEFT]

 arrow key. 

Use the 

[UP]

/

[DOWN]

 keys or the 

TRACK LEVEL

 knob to navigate in the column. The SysEx data send 

alternatives located in the column to the right will change depending on the selection made in the left 

column. Press the 

[RIGHT]

 arrow key to access this column. Use the 

[UP]

/

[DOWN]

 keys or the 

TRACK 

LEVEL

 knob to select what will be sent. Press 

[YES]

 to initiate the SysEx send procedure.

PROJECT

 will send the active project (settings, patterns, Sounds in the Sound Pool).

PATTERN

 will send the selected pattern.

• 

Backing up your data regularly is important!

• 

Before initiating a SysEx send, first, make sure the receiving device is listening for data 

to be sent.

15.4.2 SYSEX RECEIVE

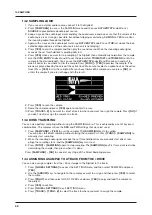
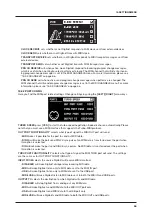
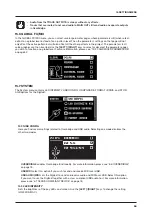
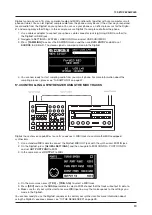
Here projects, patterns, and Sounds can be received from an external device. Digitakt is continuously 

listening for SysEx data so you can at any time send backed up projects or patterns to the device.

Summary of Contents for Digitakt

Page 1: ...Digitakt User Manual...

Page 2: ...the receiver is connected Consult the dealer or an experienced radio TV technician for help European Union regulation compliance statement This product has been tested to comply with the Low Voltage...

Page 3: ...been damaged in any way liquid has been spilled or objects have fallen into the unit the unit has been exposed to rain or moisture does not operate normally or has been dropped WARNING To reduce the...

Page 4: ...3 3 EDITING THE TRACKS 15 6 INTERACTING WITH THE DIGITAKT 16 6 1 SCREEN NAVIGATION 16 6 2 PARAMETER EDITING 16 6 2 1 PARAMETER VALUE JUMP 16 6 2 2 CONTROL ALL 17 6 2 3 FUNC KEY PRESS COMBINATIONS 17 6...

Page 5: ...PATTERN TEMPO 28 10 2 EDITING A PATTERN 28 10 2 1 TRIG TYPES 29 10 2 2 GRID RECORDING MODE 29 10 2 3 LIVE RECORDING MODE 29 10 2 4 STEP RECORDING MODE 30 10 3 MICRO TIMING MENU 31 10 4 RETRIG MENU 31...

Page 6: ...RESSOR MASTER PAGE 1 54 13 5 INTERNAL MIXER MASTER PAGE 2 55 13 6 EXTERNAL MIXER MASTER PAGE 3 56 14 SAMPLING 57 14 1 SAMPLING MENU 57 14 1 1 REC 57 14 1 2 ARM 57 14 1 3 THR 57 14 1 4 SRC 57 14 1 5 MO...

Page 7: ...5 7 5 FORMAT DRIVE 70 15 6 6 STORAGE 70 16 STARTUP MENU 71 16 1 TEST MODE 71 16 2 EMPTY RESET 71 16 3 FACTORY RESET 71 16 4 OS UPGRADE 71 16 5 EXIT 71 17 SETUP EXAMPLES 72 17 1 DIGITAKT WITH A MONOPHO...

Page 8: ...l is written as FUNC Knobs are written in upper case bold italic letters For instance the knob Level Data is called LEVEL DATA Menu names are written in upper case letters The SETTINGS menu is an exam...

Page 9: ...ocess and sequence Digitakt is a sound exploration tool The workflow The streamlined approach makes beat making a focused activity Nothing will distract you This clarity is one of the core features of...

Page 10: ...orm the sampling The secondary function starts Direct Sampling 6 TEMPO opens the TEMPO menu where you can adjust the global pattern tempo and also adjust the swing The secondary function makes it poss...

Page 11: ...hts indicate trigs on the sequencer by lit red keys while flashing red or yellow keys indicates parameter locks in GRID RECORDING and STEP RECORDING mode When a pattern is play ing or when LIVE RECORD...

Page 12: ...on 9 HEADPHONES Audio output for stereo headphones Use 1 4 Tip Ring Sleeve phone plug 3 3 SETTING UP AND STARTING THE DIGITAKT Make sure you place the Digitakt on a stable support such as a sturdy tab...

Page 13: ...ER COMPRESSOR FROM EFFECT SENDS DELAY RETURNS FROM AUDIO VOICES OUTPUTS L R TO MIXER FADE ENVELOPE LFO DESTINATION TO MIXER OR OUTPUTS L R PAN DELAY SEND REVERB SEND TO MIXER REVERB RETURNS PRE COMP P...

Page 14: ...are available for each project A pattern contains up to eight Sounds one for each audio track sequencer data like trigs and parameter locks It also contains the settings on the TRIG page and BPM lengt...

Page 15: ...ck length and time signature settings The main difference is that the MIDI tracks do not generate any sound and the sequencer data is instead transmitted through the MIDI OUT or USB ports To select a...

Page 16: ...irm select enter sub menus and tick untick boxes NO is used to negate deselect or go back one or more steps When in a menu or sub menu the NO key can be used to go back one step at a time all the way...

Page 17: ...s is undone by repeating the key press combination Please see the different sections in the manual for more information on when these commands are available The copy clipboard can only hold one item a...

Page 18: ...ds and samples from your Elektron device to a computer Here is the general procedure for how to back up your device 1 Connect the Elektron device to the computer via USB 2 Open the Transfer applicatio...

Page 19: ...1 CHROMATIC MODE on page 21 CHROMATIC mode is an effective way to add musical variety to your beats The timbre tonality and impact of playing a Sound chromatically depend on the character of the sourc...

Page 20: ...o sample audio internally from the Digitakt itself 1 Connect your audio source to the INPUT L R inputs of the Digitakt 2 Press SAMPLING to access the SAMPLING menu and then use DATA ENTRY knob G to se...

Page 21: ...k 1 through track 8 respectively provided they are set to their default channels 1 8 These notes values map to each of the eight tracks regardless of which track is active MIDI note numbers 12 84 that...

Page 22: ...re two different versions of MUTE mode on the Digitakt GLOBAL MUTE MODE In GLOBAL MUTE mode the muted tracks are muted in all patterns and the trig TRIG keys are lit green Press FUNC BANK to enter GLO...

Page 23: ...the pattern If you delete a sample from the Drive it will not be included in any Sounds or patterns anymore A Pattern contains A kit All parameter settings for the eight MIDI tracks Sequencer data su...

Page 24: ...of the active project SORT ABC sorts the Sounds in alphabetical order The command is only available when Sounds are being sorted by slot number SORT 123 sorts the Sounds by slot number The command is...

Page 25: ...h names matching or including the text input For more information please see 6 5 THE NAMING SCREEN on page 17 on how to enter text Press RIGHT to access the SOUND OPERATIONS menu The available operati...

Page 26: ...ed PLAYING A SOUND WITH AN EXTERNAL MIDI UNIT The Sounds can also be played using an external MIDI device connected to Digitakt The MIDI channels for of each of the audio tracks can be assigned in the...

Page 27: ...clockwise to scroll up the list clockwise to scroll down the list Press the TRIG key of the active track while browsing to listen to the sample currently outlined 5 Press YES to select a sample Press...

Page 28: ...the screen Once the last step of the pattern has played the new pattern will start and the pattern position will cease to flash Patterns can be changed while the sequencer is running Patterns can be c...

Page 29: ...or DOWN Similarly a pop up menu will appear on the screen where various retrig settings are made For more information please see 10 4 RETRIG MENU on page 31 If the pattern contains more than 16 steps...

Page 30: ...blinks If positioned on an earlier placed trig it inherits the light pattern of that trig You can also use LEFT RIGHT to select the active step or skip steps 3 Press and hold FUNC and then press TRIG...

Page 31: ...r behind the beat Micro timing can be cus tomized on any of the sequencer steps on both audio and MIDI tracks In GRID RECORDING mode press and hold one or several TRIG keys and then press LEFT RIGHT t...

Page 32: ...ly lost until the pattern is saved to the same pattern slot that it was loaded from SEQUENCE DATA Clears the active pattern s sequence data All Sounds will remain unchanged A prompt appears when you s...

Page 33: ...Green keys signal send to main Red keys signal do not send to main Note that each track still sends to its TRACK OUTPUTS SEND TO FX Use this option to customize which of the 8 tracks the Delay effect...

Page 34: ...share the same length and time signature LENGTH controls the step length of the pattern The leftmost number displays the number of steps in the pattern The total length displayed by the second number...

Page 35: ...controls the number of steps the pattern plays before all tracks restart An INF setting makes the tracks of the pattern loop infinitely without ever being restarted Note that this setting also affect...

Page 36: ...ig and then release the TRIG key The TRIG key starts to flash to indicate that it contains a Sound lock Press and hold the TRIG key of the note trig to show the assigned Sound For more information ple...

Page 37: ...are a great way to add variety to a pattern To set up a grid of mutually exclusive or conclusive note trigs across any of the audio tracks and adding some probability locks in there as well perhaps i...

Page 38: ...ttern you wish to copy Then press RECORD Let go of the TRIG key and then press and hold the TRIG key s to where you want to paste the pattern Finally press and hold STOP until the count down finishes...

Page 39: ...a pattern from another bank press BANK TRIG 9 16 to select bank and then press TRIG 1 16 to select pattern 4 Press PLAY to start the sequencer and play the chain The chain will be looped once the fina...

Page 40: ...PARAMETERS PAGE Set the actions for when a note is trigged Change settings using the DATA ENTRY knobs These general settings affect note trigs placed in the sequencer Press TRIG PARAMETERS to access t...

Page 41: ...age envelope parameters HLD and DEC FORWARD LOOP The sample starts at the STRT position and will loop continuously between Loop Position and Length How long it will loop for is set with the LEN parame...

Page 42: ...can see the name of the currently loaded sample The STA LEN and LOP parameters Start Length Loop Position FORWARD LOOP play mode Start Length Loop Position Start Length Loop Position Length Start Loop...

Page 43: ...00 11 5 7 TYPE Filter EQ Type selects the type of filter and EQ OFF 2 pole Lowpass 2 pole Highpass EQ 1 5 The parametric EQ is used to boost desired frequencies or to remove unwanted fre quencies of t...

Page 44: ...6 1 DEL Envelope delay sets the time before the attack phase of the filter envelope starts This parameter is part of the filter envelope that controls the multimode filter You can also press and hold...

Page 45: ...information please see 13 FX AND MIXER PARAMETERS on page 52 OFF 0 01 127 00 11 7 6 REV Reverb Send sets the amount of the sound that is sent through to the Reverb effect For more informa tion please...

Page 46: ...form The Triangle Sine Square Sawtooth and Random waveforms are bipolar The Exponential and Ramp are unipolar 11 8 6 PHAS Start Phase sets the point within the wave cycle where the LFO will start when...

Page 47: ...o a BPM value settings that generate a value of 1 in the table gives that the LFO will do one full cycle in the time it takes the sequencer to advance 16 steps MULT S P D 1 2 4 8 16 32 64 128 256 512...

Page 48: ...ossible for a MIDI track to send out chords that consists of up to 4 notes If the root note is changed the offset notes will transpose accordingly A value of 0 will remove the offset note 64 63 12 2 3...

Page 49: ...sends a bank change message on CC 0 MSB OFF 1 128 12 3 3 SBNK Sub Bank sends a bank change message on CC 32 LSB OFF 1 128 12 3 4 PROG Program Change sends a Program Change message OFF 1 128 12 3 5 PB...

Page 50: ...frequency oscillator behavior orientation and depth on this page Press LFO to access this parameter page 12 6 1 SPD Speed sets the speed of the LFO Try settings of 8 16 or 32 to sync the LFO to straig...

Page 51: ...starting or stopping even if notes are trigged TRG makes the LFO restart when a note is trigged HLD makes the LFO run free in the background but when a note is trigged the LFO output level is latched...

Page 52: ...n their respective PARAMETER page but their incoming signals are set by the DEL and REV send parameters on the AMP page of each audio track Press FUNC FLTR to edit the Delay Press FUNC AMP to edit the...

Page 53: ...or swelling delays are possible Please be aware that high feedback can lead to a very loud signal 0 198 13 2 5 HPF Feedback HPF sets the cutoff frequency of the delay highpass filter 0 00 127 00 13 2...

Page 54: ...rb output signal 0 00 127 00 13 4 COMPRESSOR MASTER PAGE 1 The Compressor master effect compresses the dynamic range of the signal by reducing the volume of loud sounds relative to the quiet sounds Th...

Page 55: ...efore the compressor analyzes it The parameter ranges from a low pass filter to a high pass filter Negative parameter values sets a low pass filer Positive parameter values sets a high pass filter 64...

Page 56: ...oth audio channels The PAN parameters changes to a BAL Balance parameter Use LEVEL DATA to adjust this parameter OFF ON 13 6 6 LDEL Input L Delay Send sets the amount of sound from the INPUT L audio i...

Page 57: ...rce to INPUT L IN R sets the input source to INPUT R IN L R sets the input source to INPUT L R The audio is summed together to mono MAIN L sets the input source to the Digitakt internal main audio lef...

Page 58: ...ith the result 8 Press YES to save the sample 9 Name the sample and press YES again to confirm the save 10 Press TRACK 1 8 if you want to select a track to where you want to assign the sample Press NO...

Page 59: ...ARD LOOP The sample will loop continuously between Loop Position and Length How long it will loop for is set with the LEN parameter on the TRIG page The loop time is also constrained by the AMP page e...

Page 60: ...also press FUNC GLOBAL SETTINGS to access this screen 15 1 3 MANAGE PROJECTS Manage Projects launches the PROJECT MANAGER menu Selecting a project in this menu and pressing the RIGHT arrow key will b...

Page 61: ...row are labeled with a D at the very end of the row When browsing a directory in the Drive a sample assigned to one of the 127 sample slots of the active project will have its slot number shown as se...

Page 62: ...roject 1 Highlight the slot containing the sample you wish to replace and then press RIGHT to open the right hand menu and select REPLACE 2 Browse the directories of the Drive locate the desired sampl...

Page 63: ...nu 2 Press the LEFT arrow key A menu will appear on the right side of the screen Select VIEW RAM and press YES 3 Press the RIGHT arrow key A menu will appear on the right side of the screen Select SEL...

Page 64: ...e named by highlighting it accessing the right hand menu and selecting DELETE DIR or RENAME 15 2 9 TRANSFERRING SAMPLES FROM DIGITAKT TO A COMPUTER 1 Connect Digitakt to the computer via USB 2 Open th...

Page 65: ...atically Please note that you must use a MIDI interface that supports the Turbo MIDI protocol OUT PORT FUNCTIONALITY selects what type of signal the MIDI OUT port will send MIDI makes it possible for...

Page 66: ...CEIVE CC NRPN will when active make it possible to control Digitakt parameters from an external MIDI device sending CC NRPN data 15 3 3 CHANNELS This menu handles the MIDI channel configuration TRACK...

Page 67: ...e Please note that Sysex dump only sends and receives project pattern and Sound data It does NOT send or receive the Sounds samples 15 4 1 SYSEX SEND Here projects patterns and Sounds can be sent to a...

Page 68: ...MAIN Use this option to customize which of the 8 tracks 2 effects Delay Reverb that sends audio through the master effect Compressor to the MAIN OUT outputs Use the TRIG 1 8 keys and the FLTR and AMP...

Page 69: ...information please see 13 FX AND MIXER PARAMETERS on page 52 15 7 SYSTEM The System menu contains LED INTENSITY USB CONFIG OS UPGRADE FORMAT DRIVE and STOR AGE options for the Digitakt 15 7 1 USB CONF...

Page 70: ...bar is visible on device screen when receiving the OS 6 On your device Press YES to confirm the OS update When the update is done the Digitakt will reboot If your current Digitakt OS does not fully su...

Page 71: ...itialized with factory preset patterns Sounds and settings Sound bank A will be overwritten with the factory Sounds If you wish to keep the active project remember to save it to a Drive project slot h...

Page 72: ...e is used alongside the Digitakt The Digitakt can stop start and control the tempo of the bass machine 1 Prepare a bassline pattern on the bass machine 2 Connect the output of the bass machine to the...

Page 73: ...sampling audio from your smart phone For more information about the sampling process please see 14 SAMPLING on page 57 17 3 CONTROLLING A SYNTHESIZER USING THE MIDI TRACKS Digitakt has extensive capa...

Page 74: ...ll parameters on that parameter page from its last saved state TRK TRIG1 8 NO reloads the Sound from its last saved state NAVIGATING FUNC RIGHT In the SAMPLES menu opens a directory FUNC LEFT In the S...

Page 75: ...in to unlatch FILL mode CLEAR TRACK CLEAR PATTERN FUNC PLAY while in GRID RECORDING mode clears active track FUNC PLAY while in no mode or LIVE RECORDING mode clears pattern RESET PARAMETERS Press DAT...

Page 76: ...5 2 5 mm barrel jack 12 V DC 1 A PHYSICAL SPECIFICATIONS Sturdy steel casing Dimensions W215 D176 H63 mm 8 5 6 9 2 5 including knobs and feet Weight approximately 1 45 kg 3 2 lbs 100 100 mm VESA mount...

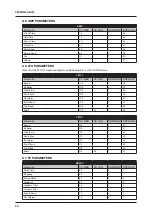
Page 77: ...3 2 Filter Trig 13 LFO Trig 14 A 3 SOURCE PARAMETERS SOURCE Parameter CC MSB CC LSB NRPN MSB NRPN LSB Tune 16 1 0 Play mode 17 1 1 Bit reduction 18 1 2 Sample slot 19 1 3 Start 20 1 4 Length 21 1 5 L...

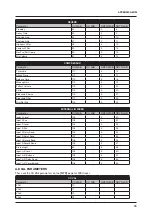
Page 78: ...peed 102 1 32 Multiplier 103 1 33 Fade In Out 104 1 34 Destination 105 1 35 Waveform 106 1 36 Start Phase 107 1 37 Trig Mode 108 1 38 Depth 109 61 1 39 LFO 2 Parameter CC MSB CC LSB NRPN MSB NRPN LSB...

Page 79: ...Source 116 2 21 Sidechain Filter 117 2 22 Dry Wet Mix 118 2 23 EXTERNAL IN MIXER Parameter CC MSB CC LSB NRPN MSB NRPN LSB Input L Level 102 2 30 Input L Pan 103 2 31 Input R Level 104 2 32 Input R Pa...

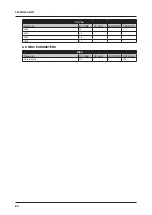
Page 80: ...APPENDIX A MIDI 80 CC VAL Parameter CC MSB CC LSB NRPN MSB NRPN LSB VAL5 74 VAL6 75 VAL7 76 VAL8 77 A 9 MISC PARAMETERS MISC Parameter CC MSB CC LSB NRPN MSB NRPN LSB Pattern Mute 110 1 104...

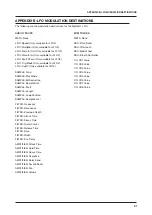
Page 81: ...ne SAMPLE Play Mode SAMPLE Bit Reduction SAMPLE Sample Slot SAMPLE Start SAMPLE Length SAMPLE Loop Position SAMPLE Sample Level FILTER Frequency FILTER Resonance FILTER Envelope Depth FILTER Attack Ti...

Page 82: ...OMBINATIONS 74 KITS 23 L LED INTENSITY 69 70 LFO 46 50 Modulation destinations 81 M MICRO TIMING 31 MIDI CC NRPN 77 MIDI CONFIG 64 MIDI TRACK PARAMETERS 48 Amp CC select 50 Filter CC value 49 LFO 50 S...

Page 83: ...locks 35 Pattern control 28 Retrig Menu 31 Scale Menu 34 Selecting a pattern 28 Swing 37 Trig parameters page 33 SEQUENCER RECORDING MODES Grid recording mode 29 Live recording mode 29 Step recording...

Page 84: ...4116ENG O...
Reviews: