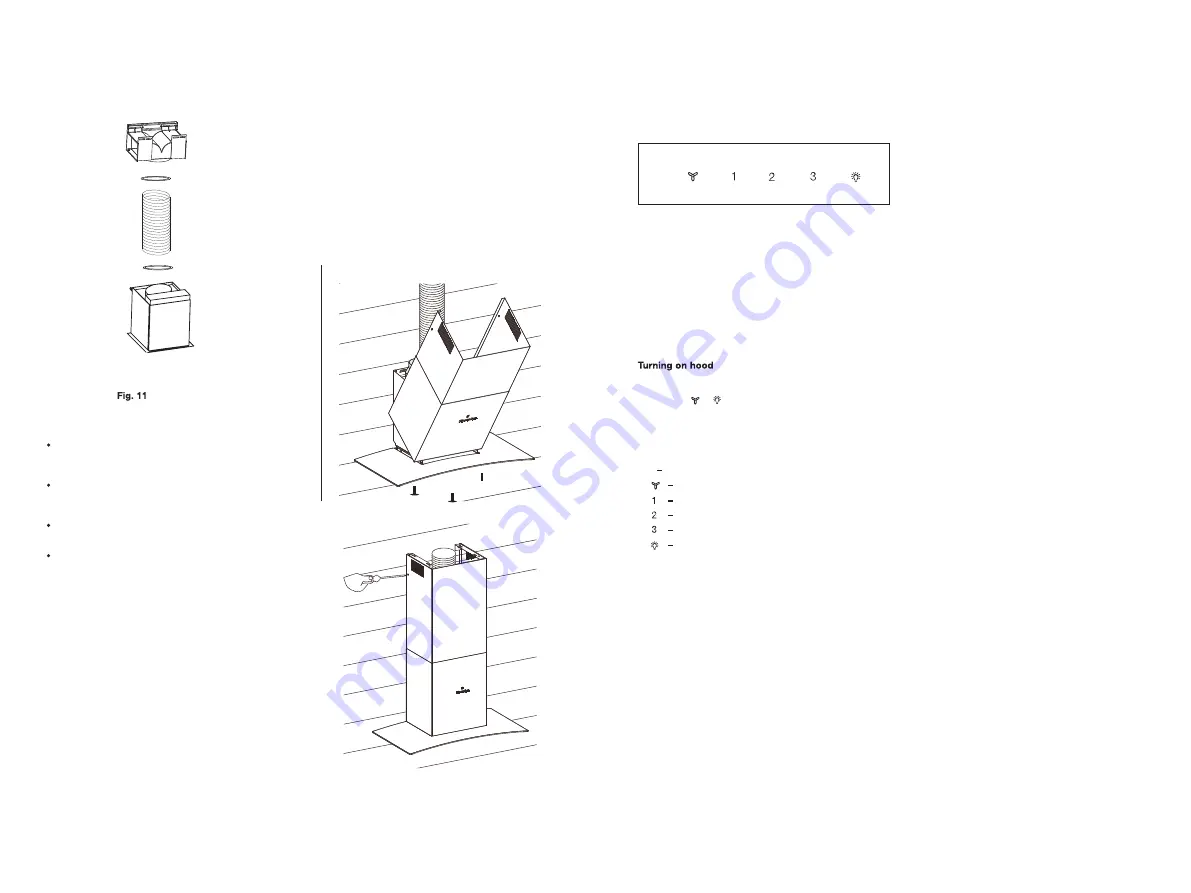
Separate the flue covers section. Carefully
reassemble the upper and lower flue covers sections
by sliding the inner into the outer flue cover. Fix the
outer flue cover with screws(Fig12.) Carefully lower
the assembled upper and lower flue covers onto the
top of cooker hood body. Fix upper flue cover to the
mounting bracket with screws supplied.
Ensure that the upper section is extended.
Fig.12
RANGEHOOD INSATLLATION(CONT)
6. Electrical connection
Electrical wring must be done by a qualified person(s) in
accordance with all applicable codes and standards.
Turn off electrical power at service entrance before wiring.
If the power cord is damaged, it must be replaced by
manufacturer, its agent or similarly qualified persons in
order to avoid hazard.
Do not use the plug and an extension cord other than the
ones initially supplied with the hoods.
The earthing of this hood is compulsory. Do not remove the
ground prong of the plug.
7
. Installation of telescopic flue covers
NOTE: Carefully remove the plastic protective coating,
if present, from the flue covers. Pay particular attention
when removing protective plastic coating from decals.
USING THE RANGEHOOD
Standby mode
When connecting the rangehood to the power supply
for the first time or after power is returned after power
outage all symbols on the control panel will light up
and a “beep” will sound once. Following this, the
control panel goes to standby mode and the rangehood
will be ready for use.
When the rangehood is in standby mode, user can
either
press the
or
button to turn on the fan or light
individually.
The default factory level is
2
, following that,
the rangehood
remembers the last used setting and will
start at that level
when the user presses the fan or light button.
Fan select speed to suit cooking conditions
Your Electrolux rangehood is now ready to use
light frying/boiling
frying/work cooking/heavy boiling
grilling, intensive frying and work cooking
8
Fan on/off
Light
9
Summary of Contents for EFC635SAR
Page 7: ...12 13 ...
Page 13: ...24 25 ...


