14
Chapter2SettingUp
2-2. Connecting Cables
Attention
• Check that the monitor and the PC are powered off.
• When replacing the current monitor with this monitor, be sure to change the PC settings for resolution and vertical scan
frequency to those that are available for this monitor. Refer to the compatible resolution table before connecting the PC.
Note
• When connecting multiple PCs to this product, refer to the Installation Manual (on the CD-ROM).
1.
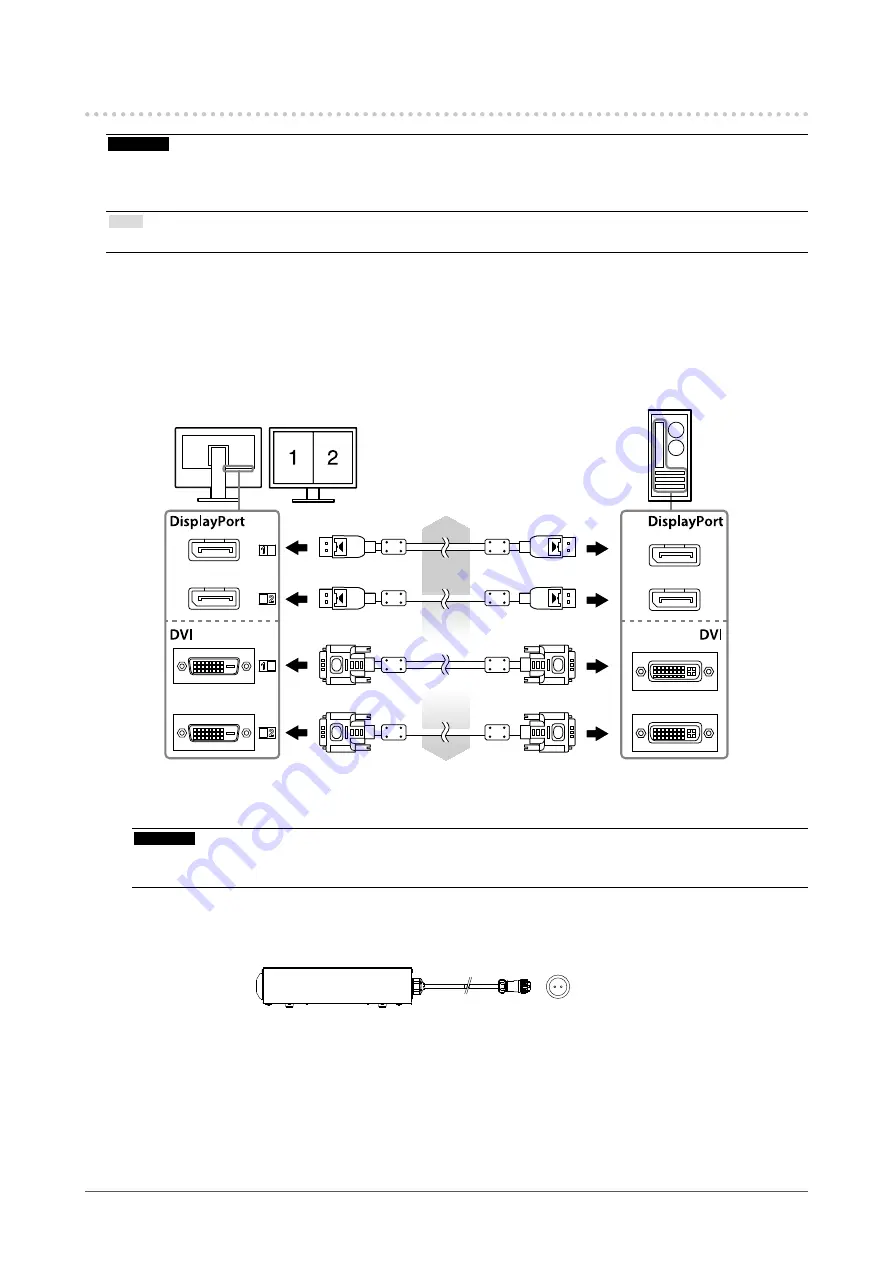
Connect the signal cables to the input signal connectors and PC.
Check the shape of the connectors, and connect the cables.
After connecting the signal cable, tighten the screws of the connectors to secure the coupling.
Connection examples :
DisplayPort 1 - DisplayPort 2 / DisplayPort 1 - DVI 2 / DVI 1 - DisplayPort 2 / DVI 1 - DVI 2
Digitalconnection
(DisplayPort)
Signalcable:DisplayPort-DisplayPort
(supplied)
Digitalconnection
(DVI)
Signalcable:DVI-D-DVI-D(DualLink)
(supplied)
2.
Connect the AC adapter power cable to the power connector on the monitor.
Attention
• Do not connect or disconnect the cable while the AC adapter main power is on.
• Do not install the AC adapter in the wrong orientation. The side with the EIZO logo should face up.
Check the shape of the monitor connector, and connect the power cable.
Tighten the screw for fixing the power cable to secure the power cable.
ConnectingtotheMonitor
3.
Attach the power cord holder (See “2-4. Attaching a Power Cord Holder” (page
16)).
4.
Plug the power cord into a power outlet and the power connector on the AC
adapter.


