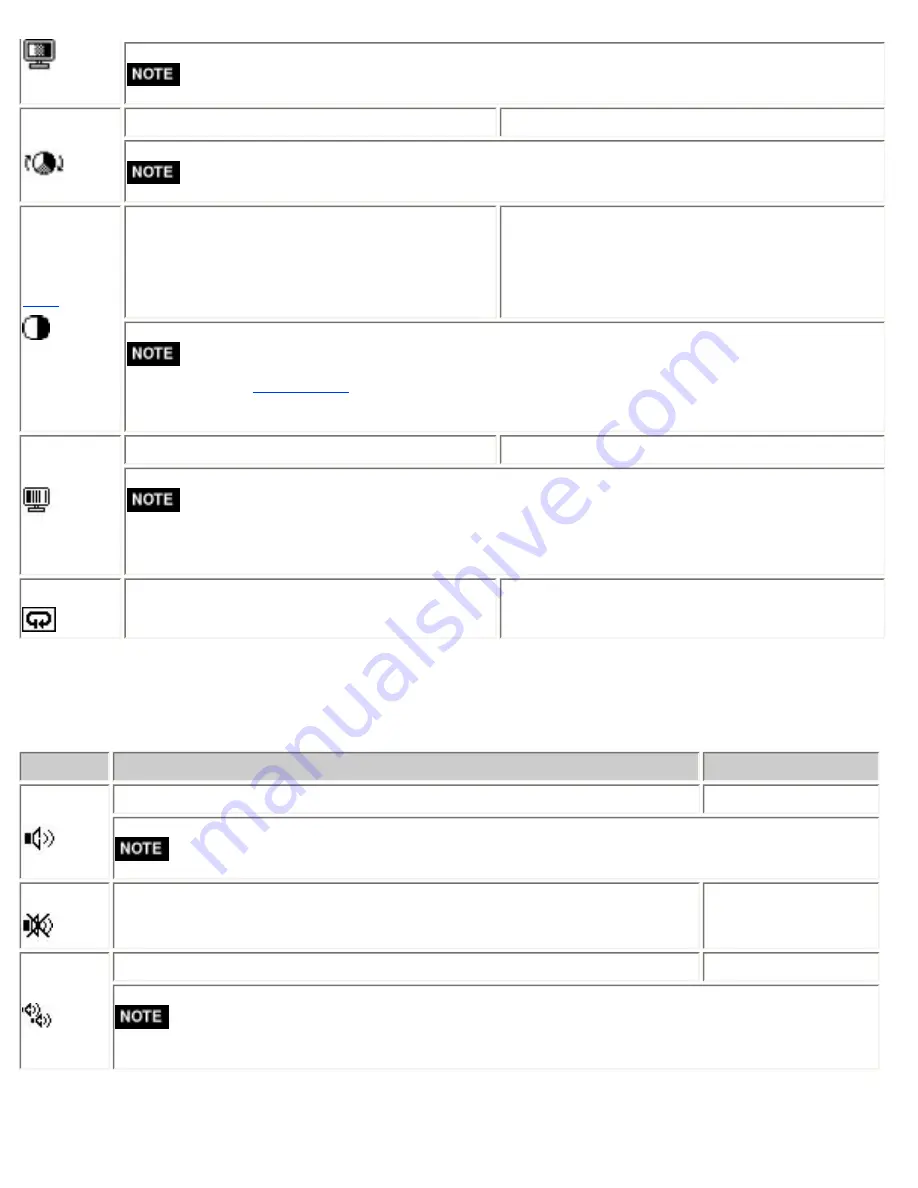
background image


Using <Saturation> adjustment may not obtain proper tone reproduction.

Hue


To change the flesh color, etc.

-32 ~ 32


Using <Hue> adjustment may not obtain proper tone reproduction.

Gain


To change each color 
(red, green and blue) 

0 ~ 100%
By adjusting the red, green and blue color tones 
for each mode, custom colors can be defined. 
Display a white or gray background image and 
adjust the <Gain>.


The values shown in the percentage are available only as a reference tool.


Setting the <

Temperature

> invalidates the <Gain> adjustment. <Gain> setting returns to the 

defaul.

C-Booster


To emphasize the displayed image.

Off/Mode1/Mode2


To detect the brightness or darkness of the displayed image and raise the contrast of the 
frequent gradation area.


Mode1 is soft effect and mode 2 is hard effect.

Reset


To return the color settings of the selected 
mode to the default settings

Select the <Reset>.

4-3. Sound Setting

The sound from the speaker can be adjusted by using the <Sound> menu of the ScreenManager.


Menu

Function Descriptions

Adjustable range

Volume


To adjust the volume

0 ~ 30


Directly pressing the right and left button also displays the volume menu.

Mute


To mute the sound

On/Off

Surrond


To add surrounding effect (SRS WOW) like acoustic sound or cleared sound. Off/Mode1/Mode2


Mode 1 is soft effect and mode 2 is hard effect.


When selecting mode 2, the volume may be raised due to the surround effect.

Summary of Contents for FlexScan L578

Page 1: ...2 ScreenManager Adjustments and Settings 3 3 FineContrast 3 4 Useful Functions 4 ADJUSTMENT 4 1 Screen Adjustment 4 2 Color Adjustment 4 3 Sound Setting 4 4 Power save Setup 5 MAKING USE OF USB Universal Serial Bus 6 ATTACHING AN ARM 7 TROUBLESHOOTING 8 CLEANING 9 SPECIFICATIONS 10 GLOSSARY This manual is checked under the browser settings shown below Text size can change for another one through b...

Page 2: ...NG ANNEXE About TCO 03 Applicable white About TCO 99 Applicable black and silver FCC Declaration of Conformity Hinweis zur Ergonomie Recycle Auskunft Hinweise zur Auswahl des richtigen Schwenkarms für Ihren Monitor ...

Page 3: ...l unless prior arrangements are made pursuant to EIZO NANAO CORPORATION s receipt of said information Although every effort has been made to ensure that this manual provides up to date information please note that EIZO monitor specifications are subject to change without notice ENERGY STAR is a U S registered mark Apple and Macintosh are registered trademarks of Apple Computer Inc VGA is a registe...

Page 4: ...of the Caution Statements If the unit begins to emit smoke smells like something is burning or makes strange noises disconnect all power connections immediately and contact your dealer for advice Attempting to use a malfunctioning unit may result in fire electric shock or equipment damage Do not open the cabinet or modify the unit Opening the cabinet or modifying the unit may result in fire electr...

Page 5: ...it in an appropriate location Not doing so may result in fire electric shock or equipment damage Do not place outdoors Do not place in the transportation system ship aircraft trains automobiles etc Do not place in a dusty or humid environment Do not place in a location where the steam comes directly on the screen Do not place near heat generating devices or a humidifier To avoid danger of suffocat...

Page 6: ... the enclosed screws Not doing so may cause the unit to come unattached which may result in injury or equipment damage When the unit is dropped please ask your dealer for advice Do not continue using a damaged unit Using a damaged unit may result in fire or electric shock When reattaching the tilt stand please use the same screws and tighten them securely Do not touch a damaged LCD panel directly ...

Page 7: ...ll ensure that you can disconnect the power quickly in case of a problem Periodically clean the area around the plug Dust water or oil on the plug may result in fire Unplug the unit before cleaning it Cleaning the unit while it is plugged into a power outlet may result in electric shock If you plan to leave the unit unused for an extended period disconnect the power cord from the wall socket after...

Page 8: ...en image is changed after displaying the same image for extended periods of time an afterimage may appear Use the screen saver or timer to avoid displaying the same image for extended periods of time When the monitor is cold and brought into a room or the room temperature goes up quickly dew condensation may occur inside and outside the monitor In that case do not turn the monitor on and wait unti...

Page 9: ...D Utility Disk enclosed See readme txt in the CD ROM for details The utility software ScreenManager Pro for LCD for Windows to control a monitor form a PC with a mouse and a keyboard Build in speaker system The ArcSwing Stand enables to adjust the monitor height and monitor angle freely USB supported BrightRegulator function incorporated 1 2 Package Contents Please contact your local dealer for as...

Page 10: ...1 3 Controls Connectors Front 1 Sensor 1 2 Speaker 3 ScreenManager 4 Input Signal Selection Button 5 Mode Button 2 6 Auto Adjustment Button 7 Enter Button 8 Control Buttons Left Down Up Right 9 BrightRegulator Button 1 2 10 Power Button 11 Power Indicator 3 Blue Operation Yellow Power saving ...

Page 11: ...nu and the FineContrast BrightRegulator Menu cannot be displayed at the same time 3 Regarding the power indicator for the Off Timer see Off Timer function Rear and Side 12 USB Downstream port 13 Security Lock Slot 4 14 ArcSwing Stand 5 15 Head Phone jack 16 Power Connector 17 DVI D connector DVI 18 External line in stereo mini jack 19 D Sub mini 15 pin Input Connector D SUB 20 External line in ste...

Page 12: ...tem For further information please consult Kensington Technology Group 2855 Campus Drive San Mateo CA 94403 USA Tel 800 650 4242 x3348 Intl 650 572 2700 x3348 Fax 650 572 9675 http www kensington com 5 The LCD monitor can be used with an optional arm stand by removing the stand See 6 ATTACHING AN ARM ...

Page 13: ...ny manual settings Analog Input Resolution Frequency Dot Clock Remarks 640 480 67 Hz 135 MHz Max Apple Macintosh 640 480 75 Hz VGA VESA 720 400 70 Hz VGA TEXT 800 600 75 Hz VESA 832 624 75 Hz Apple Macintosh 1024 768 75 Hz VESA 1152 864 75 Hz VESA 1152 870 75 Hz Apple Macintosh 1280 960 60 Hz VESA 1280 960 75 Hz Apple Macintosh 1280 1024 75 Hz VESA Digital Input Resolution Frequency Dot Clock Rema...

Page 14: ...onnection with the screw in fasteners Analog Input Signal Cable Connector of the PC PC Signal Cable MD C87 enclosed Video Output Connector D Sub mini 15 pin Input Connector monitor D Sub mini 15 pin Standard graphics card Power Macintosh G3 Blue White Power Mac G4 VGA Signal Cable MD C87 enclosed Adapter Video Output Connector D Sub 15 pin Input Connector monitor D Sub mini 15 pin Macintosh Macint...

Page 15: ... a grounded main outlet Not doing so may result in fire or electric shock 3 Adjust the height front and back position and angle of the monitor Grip both side of the center part of the monitor and move slowly refer to the right figure 1 Adjust the height of the monitor To heighten push the monitor backward To lower pull the monitor forward 2 Adjust the position and angle of the monitor 3 If necessa...

Page 16: ... is set Disable How to switch the setting 1 Push the BrightRegulator Button on the contol panel 2 The current setting will be appear on the left corner of the screen During the appearance pushing the BrightRegulator button allows you to change the setting Do not block the sensor when using this function ScreenManager Pro for LCD When using the software ScreenManager Pro for LCD for Windows connect...

Page 17: ...e input signal 2 4 Sound Connections Always switch the monitor and audio devices or computers off whenever connecting or disconnecting any audio devices computer or CD player to the monitor Use the enclosed stereo mini jack cable for connecting audio devices or computers to the monitor 1 Connect the stereo mini jack cable to the external line in of the monitor 2 Connect the other side of stereo mi...

Page 18: ... About the sound control please refer to Sound Setting ...

Page 19: ...red setting icon and press the Enter button The setting menu appears 3 Use the Control buttons to make all required adjustments and press the Enter button to save the settings 3 Exiting the ScreenManager 1 To return to the main menu select the Return icon or press the Down button twice followed by the Enter button 2 To exit the ScreenManager select Exit icon or press the Down button twice followed...

Page 20: ...ure Gamma Saturation Hue Gain C Booster Reset Sound Volume 4 3 Sound Setting Mute Surround Tone Balance PowerSave Reset Others Input Signal Set the input signal selection of automatic or manual Off Timer Set the monitor s Off Timer to on or off Menu Position Adjust the menu position Translucent Set the transparency of the background Menu Off Timer Set the menu displaying time 2 Reset Return to the...

Page 21: ...o select the Mode Directly pressing the left or right button allows you to select the best suited mode for screen display from 5 FineContrast modes Custom Movies Picture Text and sRGB Exit Press the Enter button to exit the menu FineContrast Mode Selectable FineContrast modes are as follows Custom To adjust the color settings according to your preference Movie Animated images Picture Photo or pict...

Page 22: ...es the monitor to automatically enter a power off state after a predetermined amount of time has lapsed This function was created to reduce Afterimage characteristics that are particular to LCD monitors when the monitor screen is left on for a long period without use Procedure 1 Select Off Timer in the ScreenManager Others menu 2 Select Enable and press the Right and Left buttons to adjust the On ...

Page 23: ... then hold down the Enter button once again and turn the power back on To display Turn off the monitor s power by the Power button then hold down the Enter button once again and turn the power back on Automatically Selecting the Input Signal Function The monitor will automatically detect the inputted signal of either the connection for display Default this function is set Auto Connecting Two PCs t...

Page 24: ...o Adjustment button again to automatically adjust the clock phase and screen position If you do not wish to do adjust the screen do not press the Auto Adjustment button again The Auto adjustment function is intended for use on the Macintosh and on AT compatible PC running Windows It may not work properly in either of the following cases When running an AT compatible PC on MS DOS Not windows The ba...

Page 25: ...Phase and eliminate the horizontal flickering blurring or bars by using the Right and Left buttons Horizontal bars may not completely disappear from the screen depending on the PC 3 The screen position is incorrect Use the Position adjustment The correct displayed position of the monitor is decided because the number and the position of the pixels are fixed The Position adjustment moves the image ...

Page 26: ...resolutions Switch the Smoothing setting Select the suitable level from 1 5 Soft Sharp Select Smoothing in the Screen menu and adjust by using the Right and Left buttons Since the displayed image is enlarged the blurred texts may not be necessarily lost completely 4 2 Color Adjustment Color settings of each FineContrast mode can be adjusted and saved by using the Color menu of the ScreenManager In...

Page 27: ...ess of the screen 0 100 When BrightRegulator is set Enable brightness of the screen automatically adjusted depending on the surrounding brightness based on the manual brightness adjustment Directly pressing the up and down control buttons also can adjust the brightness Temperature To set the color temperature 4 000 10 000 K in 500 K increments including 9 300 K Default setting is off normal white ...

Page 28: ...ge Off Mode1 Mode2 To detect the brightness or darkness of the displayed image and raise the contrast of the frequent gradation area Mode1 is soft effect and mode 2 is hard effect Reset To return the color settings of the selected mode to the default settings Select the Reset 4 3 Sound Setting The sound from the speaker can be adjusted by using the Sound menu of the ScreenManager Menu Function Des...

Page 29: ...or is in a power saving mode USB compliant devices function when they are connected to the monitor s USB both the upstream and the downstream ports Therefore power consumption of the monitor will change according to the connected devices even if the monitor is in a power saving mode Analog Input This monitor complies with the VESA DPMS standard and adopts a power saving method Procedure 1 Set the ...

Page 30: ...er Indicator On Operation Blue Power saving Power saving Yellow Off mode Power saving Yellow Power Resumption Procedure Operate the mouse or keyboard to return to a normal screen from the Power save mode of the PC Power on the PC to return a normal screen from the Off mode of the PC ...

Page 31: ...cturer of each device about the USB support Using the USB Rev 2 0 compatible PC or peripherals is recommended When the monitor is not on the peripherals connected to the downstream ports will not operate Even if the monitor is in a power saving mode the devices connected to the monitor s USB ports both the upstream and the downstream will function The followings are procedures for the Windows 98 M...

Page 32: ...ailable for connecting USB compliant peripherals to the downstream ports of the monitor Connecting Examples ScreenManager Pro for LCD for Windows For further details about the ScreenManager Pro for LCD for Windows refer to the EIZO LCD Utility Disk ...

Page 33: ... 100 mm x 100 mm VESA compliant Supportable Weight Total weight of the monitor without stand and attaching equipment such as a cable TÜV GS approved arm or stand Please connect cables after attaching an arm stand The portrait display is not recommended because it may not exploit the monitor s ability Setup Procedure 1 Lay the LCD monitor down Do not scratch the panel 2 Remove the tilt stand by loo...

Page 34: ...puter Indicator status Blue Check the Brightness setting Indicator status Yellow Switch the signal input by pressing the Input Signal Selection Button on the front control panel Try pressing a key on the keyboard or clicking the mouse 2 Error messages shown below will remain on the screen for 40 seconds These messages appear when the signal is not inputted correctly even if the monitor functions p...

Page 35: ...tal bars using the Phase 6 Letters and lines appear blurred Adjust the blurred lines using Smoothing 7 The screen is too bright or too dark Adjust the Brightness The backlight of the LCD monitor has a fixed life span When the screen becomes dark or begins to flicker please contact your dealer 8 Afterimages appear Do you use the screen saver or timer when displaying the same image for extended peri...

Page 36: ...s board s utility software to change the input signal frequency 15 PC is hung up The peripherals connected to the downstream ports do not operate Check that the USB cable is correctly connected Check the downstream ports by connecting the peripherals to other downstream ports If the problem is solved by doing this contact an EIZO dealer For details refer to the manual of the PC Try executing the f...

Page 37: ...y cause damage to the cabinet or LCD panel Cabinet To remove stains wipe the cabinet with a soft lightly moistened cloth using a mild detergent Do not spray wax or cleaner directly into the cabinet For details refer to the manual of the PC LCD Panel The LCD surface can be cleaned with a soft cloth such as cotton or lens paper If necessary stubborn stains can be removed by moistening part of a clot...

Page 38: ... USB hub Power Saving Mode Less than 2 W for single signal input without USB Input Connector DVI D D Sub mini 15 pin Analog Input Signal Sync Separate TTL Positive Negative Analog Input Signal Video 0 7 Vp p 75 Ω Positive Input Signal Digital TMDS Single Link Signal registration 26 Factory preset analog 21 Plug Play VESA DDC 2B Amplifier Output max 2 W 2 W Line input Input impeadance 47 k Ω typ He...

Page 39: ... Angle H 178 V 178 CR 10 Dot Pitch 0 294 mm Horizontal Scan Frequency Analog 24 8 80 kHz Automatic Digital 31 64 kHz Vertical Scan Frequency Analog 50 75 Hz Automatic Digital 59 61 Hz VGA TEXT 69 71 Hz Resolution 1280 dots x 1024 lines Dot Clock max Analog 135 MHz Digital 108 MHz Display Colors 16 million colors max Display Area 376 mm H x 301 mm V 14 8 H x 11 9 V Power Supply 100 120 200 240 VAC ...

Page 40: ...ach max Temperature Operating 0 C 35 C 32 F 95 F Storage 20 C 60 C 4 F 140 F Humidity 30 to 80 R H Non condensing Certifications and Standards 100 120 VAC NRTL C TÜV FCC B TCO 03 1 TCO 99 2 EPA ENERGY STAR Program TÜV Rheinland Ergonomics Approved 200 240 VAC CE CB TÜV Rheinland GS TCO 03 1 TCO 99 2 EPA ENERGY STAR Program TÜV Rheinland Ergonomics Approved 1 Applicable to white color version only ...

Page 41: ...21 NC 2 TMDS Data 2 12 NC 22 TMDS Clock shield 3 TMDS Data 2 4 Shield 13 NC 23 TMDS Clock 4 NC 14 5V Power 24 TMDS Clock 5 NC 15 Ground return for 5V Hsync and Vsync C1 Analog Red 6 DDC Clock SCL 16 Hot Plug Detect C2 Analog Green 7 DDC Data SDA 17 TMDS Data 0 C3 Analog Blue 8 Analog Vertical Sync 18 TMDS Dat 0 C4 Analog Horizontal Sync ...

Page 42: ...in No Signal Pin No Signal 1 Red video 6 Red ground 11 Ground Shorted 2 Green video 7 Green ground 12 Data SDA 3 Blue video 8 Blue ground 13 H Sync 4 Ground 9 No pin 14 V Sync 5 No pin 10 Ground Shorted 15 Clock SCL USB Port Series B Series A Upstream Downstream No Signal Signal 1 VCC Cable power 2 Data Serial data 3 Data Serial data 4 Ground Cable Ground ...

Page 43: ...Adjustment Adjusts each color parameter for red green and blue The color of the LCD monitor is displayed through the color filter of the LCD panel Red green and blue are the three primary colors The colors on the monitor are displayed by combining these three colors The color tone can change by adjusting the illumination amount passed through each color s filter Gamma Generally the relationship th...

Page 44: ...temperatures the white tone appears somewhat blue while at lower temperatures it appears somewhat red Computer monitors generally give best performance at high temperature settings 5 000 K Slightly reddish white 6 500 K Warm white tone similar to white paper or daylight 9 300 K Slightly bluish white TMDS Transition Minimized Differential Signaling A signal transition method for the digital interfa...

Page 45: ...strés en usine dans le microprocesseur du moniteur conformément au diagramme de synchronisation ci dessous Mode Dot Clock MHz Sync Polarity Frequencies H V fH kHz fV Hz VGA Graphic 320 200 25 2 Nega Posi 31 5 70 1 VGA 640 480 25 2 Nega Posi 31 5 60 0 VGA Text 720 400 28 3 Nega Posi 31 5 70 1 Macintosh 640 480 30 2 Posi Posi 35 0 66 7 Macintosh 832 624 57 3 Posi Posi 49 7 74 6 Macintosh 1152 870 10...

Page 46: ...VESA 1024 768 65 0 Nega Nega 48 4 60 0 VESA 1024 768 75 0 Nega Nega 56 5 70 1 VESA 1024 768 78 8 Posi Posi 60 0 75 0 VESA 1152 864 108 0 Posi Posi 67 5 75 0 VESA 1280 960 108 0 Posi Posi 60 0 60 0 VESA 1280 1024 108 0 Posi Posi 64 0 60 0 VESA 1280 1024 135 0 Posi Posi 80 0 75 0 ...

Page 47: ...e stability Energy Energy saving mode after a certain time beneficial both for the user and environment Electrical safety Emissions Electromagnetic fields Noise emissions Ecology The products must be prepared for recycling and the manufacturer must have a certified environmental management system such as EMAS or ISO 14000 Restrictions on chlorinated and brominated flame retardants and polymers hea...

Page 48: ... does labelling involve This product meets the requirements for the TCO 99 scheme which provides for international and environmental labelling of personal computers The labelling scheme was developed as a joint effort by the TCO The Swedish Confederation of Professional Employees Svenska Naturskyddsforeningen The Swedish Society for Nature Conservation and Statens Energimyndighet The Swedish Natio...

Page 49: ...grams must not contain flame retardants with organically bound bromine or chlorine Flame retardants are allowed in the printed circuit boards since no substitutes are available Cadmium Cadmium is present in rechargeable batteries and in the colour generating layers of certain computer displays Cadmium damages the nervous system and is toxic in high doses The relevant TCO 99 requirement states that...

Page 50: ...system and in higher doses causes lead poisoning The relevant TCO 99 requirement permits the inclusion of lead since no replacement has yet been developed Bio accumulative is defined as substances which accumulate within living organisms Lead Cadmium and Mercury are haevy metals which are Bio accumulative ...

Page 51: ......

Page 52: ...ie Augenhöhe eines Benutzers in sitzender Position ist c Im Fall eines stehenden Benutzers muß die Befestigung des Bildschirmgerätes derart erfolgen daß die Höhe der Bildschirmmitte über dem Boden zwischen 135 150 cm beträgt d Der Standfuß muß die Möglichkeit zur Neigung des Bildschirmgerätes besitzen max vorwärts 5 min nach hinten 5 e Der Standfuß muß die Möglichkeit zur Drehung des Bildschirmger...

Page 53: ...es renseignements pour le sujet de recyclage sur la page WEB de I UNION DE BRAN CHE SWICO http www swico ch Recycling Information for customers in USA All recycling information is placed in the EIZO Nanao Technologies Inc s website http www eizo com contact index html Återvinnings information för kunder i Sverige All information om återvinning finns på Eizo Nordics hemsida www eizo se ...

Reviews: