


17
Chapter 3 Settings and Adjustment
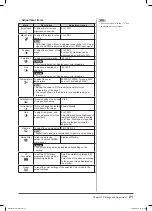
●
Advanced Screen Adjustment
4
Run the Screen Adjustment Program.
Load the EIZO LCD Utility Disk on the PC, and start the Screen
Adjustment Program compatible with the PC in use.
After the program starts up, perform the adjustment in step 5 following the
instructions of the program.
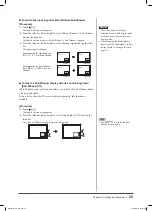
5
Perform the advanced adjustment using the <Screen> menu in
the Setting menu.
●
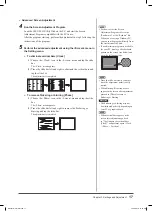
To eliminate vertical bars [Clock]
(1) Choose the <Clock> icon in the <Screen> menu and tap the slide
bar.
The <Clock> menu appears.
(2) Trace the slide bar left and right to eliminate the vertical bars and
tap the slide bar.
The adjustment is completed.
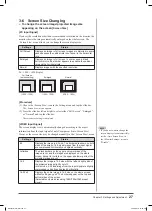
●
To remove fl ickering or blurring [Phase]
(1) Choose the <Phase> icon in the <Screen> menu and tap the slide
bar.
The <Phase> menu appears.
(2) Trace the slide bar left and right to remove the fl ickering or
blurring and tap the slide bar.
The adjustment is completed.
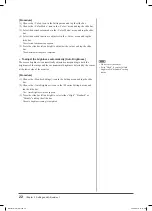
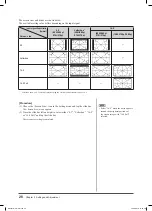
NOTE
• Trace the slide bar slowly to adjust
since the adjustment point is easily
missed.
• When blurring, fl ickering or bars
appear on the screen after adjustment,
proceed to [Phase] to remove
fl ickering or blurring.
Attention
• The fl ickering or blurring may not
be eliminated perfectly depending on
your PC or graphics board.
NOTE
• When vertical bars appear on the
screen after adjustment, go back
to “To eliminate the vertical bars
[Clock]” and perform again. (Clock
→
Phase
→
Position)
NOTE
• For how to start the Screen
Adjustment Program, refer to the
“Readme.txt” or the “Readme” fi le.
When you are using a Windows PC,
you can run the program directly from
the start menu of the disk.
• If no adjustment program is available
for your PC, display a checkerboard
pattern on the screen (see below) and
go to the following steps.
HD2441W_UM_EN.indd 17
HD2441W_UM_EN.indd 17
4/14/2007 6:21:55 PM
4/14/2007 6:21:55 PM