background image


WARNING: To reduce the risk of injury, the user must read and understand the  

Operator’s Manual before using this product. Save these instructions for future reference.

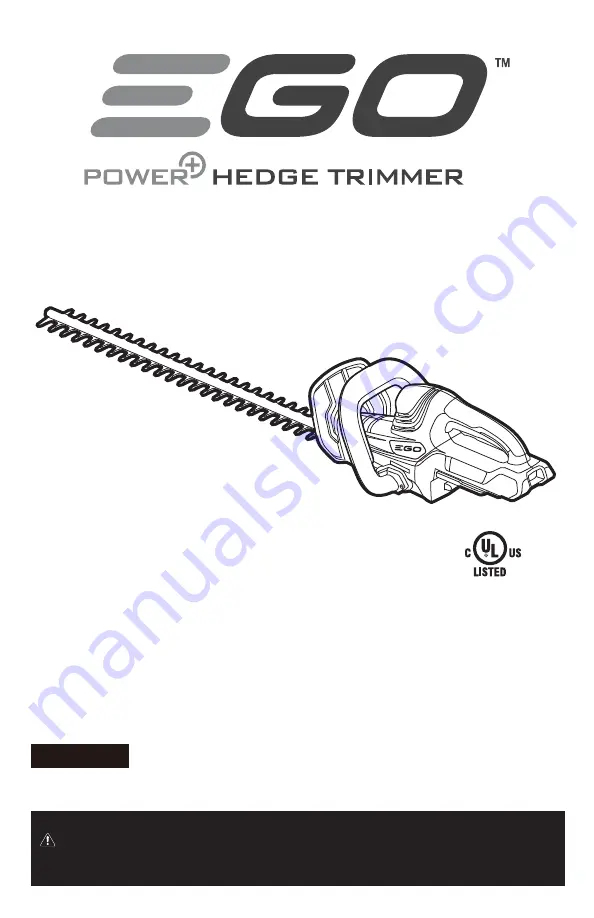
OPERATing MAnUAL

56-Volt  

lithium-ion  

cordless  

hedge trimmer

model number ht2400

español p. 33

Summary of Contents for Power+ HT2400

Page 1: ...of injury the user must read and understand the Operator s Manual before using this product Save these instructions for future reference OPERATing MANUAL 56 Volt lithium ion cordless hedge trimmer Model Number HT2400 Español p 33 ...

Page 2: ...tents Read These Instructions 3 FCC Statement 4 Safety Symbols 5 Safety Instructions 6 13 Introduction 14 Specifications 14 Assembly 15 Packing List 15 Description 16 17 Operation 18 23 Maintenance 24 26 Troubleshooting 27 28 Warranty 29 30 Parts List 31 ...

Page 3: ...ls are Lead from lead based paints Crystalline silica from bricks and cement and other masonry products and Arsenic and chromium from chemically treated lumber Your risk from these exposures varies depending on how often you do this type of work To reduce your exposure to these chemical work in a well ventilated area and work with approved safety equipment such as those dust masks that are special...

Page 4: ...ction against harmful interference in a residential installation This equipment generates uses and can radiate radio frequency energy and if not installed and used in accordance with the instructions may cause harmful interference to radio communications However there is no guarantee that interference will not occur in a particular installation If this equipment does cause harmful interference to ...

Page 5: ...ARNING and CAUTION before using this tool Failure to following all instructions listed below may result in electric shock fire and or serious personal injury SYMBOL MEANING SAFETY ALERT SYMBOL Indicates DANGER WARNING OR CAUTION May be used in conjunction with other symbols or pictographs WARNING The operation of any power tools can result in foreign objects being thrown into your eyes which can r...

Page 6: ...ety goggles or safety glasses with side shields and a full face shield when operating this product Danger Keep Hands Away from Blades Contact with blade will result in serious personal injury WARNING Electrical Shock Do not expose power tools to rain or wet conditions Water entering a power tool will increase the risk of electric shock Recycle Symbols This product uses lithium ion Li ion batteries...

Page 7: ... of current n0 No Load Speed Rotational speed at no load min Per Minute Revolutions per minute SPM Strokes Per Minute Stroke speed at no load DANGER People with electronic devices such as pacemakers should consult their physician s before using this product Operation of electrical equipment in close proximity to a heart pacemaker could cause interference or failure of the pacemaker ...

Page 8: ...match the outlet Never modify the plug in any way Do not use any adapter plugs with earthed grounded power tools Unmodified plugs and matching outlets will reduce risk of electric shock Avoid body contact with earthed or grounded surfaces such as pipes radiators ranges and refrigerators There is an increased risk of electric shock if your body is earthed or grounded Do not expose power tools to ra...

Page 9: ...er source and or battery pack picking up or carrying the tool Carrying power tools with your finger on the switch or energizing power tools that have the switch on invites accidents Remove any adjusting key or wrench before turning the power tool on A wrench or a key left attached to a rotating part of the power tool may result in personal injury Do not overreach Keep proper footing and balance at...

Page 10: ... tools out of the reach of children and do not allow persons unfamiliar with the power tool or these instructions to operate the power tool Power tools are dangerous in the hands of untrained users Maintain power tools Check for misalignment or binding of moving parts breakage of parts and any other condition that may affect the power tools operation If damaged have the power tool repaired before ...

Page 11: ...act accidentally occurs flush with water If liquid contact eyes additionally seek medical help Liquid ejected from the battery may cause irritation or burns SERVICE Have your power tool serviced by a qualified repair person using only identical replacement parts This will ensure that the safety of the power tool is maintained HEDGE TRIMMER SAFETY WARNINGS DANGER Keep hands away from blade Contact ...

Page 12: ...e or other unstable support Stable footing on a solid surface enables better control of the hedge trimmer in unexpected situations Never allow children to operate the hedge trimmer Never remove or tamper with safety devices Check their proper operation regularly Never do anything to interfere with the intended function of a safety device or to reduce the protection provided by a safety device Neve...

Page 13: ...n 3 4 19mm thick Trim only in daylight or in good artificial light Remove or disconnect battery before servicing cleaning or removing material from the hedge trimmer Do not wash with a hose avoid getting water in motor and electrical connections When servicing use only identical replacement parts listed in this manual Use of parts which do not meet the original equipment specifications may lead to...

Page 14: ...e center 1 855 EGO 5656 This manual contains important information on to the safe assembly operation and maintainance of your hedge trimmer Read it carefully before using the hedge trimmer Keep this manual handy so you can refer to it at any time SERIAL NUMBER______________________ DATE OF PURCHASE__________________ YOU SHOULD RECORD BOTH SERIAL NUMBER AND DATE OF PURCHASE AND KEEP IN A SAFE PLACE...

Page 15: ...NING To prevent accidental starting that could cause serious personal injury always remove the battery pack from the tool when assembling parts UNPACKING This product has been shipped completely assembled Carefully remove the product and any accessories from the box Make sure that all items listed in the packing list are included Inspect the tool carefully to make sure no breakage or damage occurr...

Page 16: ...lps protect hand from cutting and deflect chips or other debris away from the operator s hands Front Handle For easy control of the tool during cutting work Rear Handle Ergonomic handle with overmold improves comfort and grip Front Switch Lever Rear Switch Lever The hedge trimmer can be started only if both of the switch levers in rear and front of the handle are depressed simultaneously 1 Blade B...

Page 17: ...ct with the sharp blades when the tool is not in use It also helps keep the blades from being nicked or damaged when the tool is in storage Battery Release Button Press to release the battery pack from the tool Latch Locks the battery pack in place when installed on the tool Ejection Mechanism Aids in removing the battery Mounting Slot Guides the battery pack ...

Page 18: ...ble serious injuries WARNING Do not use any attachments or accessories not recommended by the manufacturer of this product The use of attachments or accessories not recommended can result in serious personal injury Before each use inspect the entire product for damaged missing or loose parts such as screws nuts bolts caps etc Tighten securely all fasteners and caps and do not operate this product ...

Page 19: ...ing slots in the hedge trimmer s battery port Press the battery pack down until it snaps into position NOTE Make sure that the latch on the hedge trimmer snaps into place and the battery pack is secured to the tool before beginning operation To remove Fig 3 WARNING Always be aware for the location of your feet children or pets when pressing the battery release button Serious injury could result if...

Page 20: ...ways keep both hands on the hedge trimmer handles Never hold shrubs with one hand and operate the hedge trimmer with the other Failure to heed this warning may result in serious injury STARTING STOPPING THE HEDGE TRIMMER Before starting the hedge trimmer Make sure you have a secure and balance footing Stand upright and hold the hedge trimmer in a relaxed position Remove the blade guard Make sure t...

Page 21: ... the damaged line or cord before attempting to free the blade from the line or cord Failure to heed this warning will result in serious personal injury or possible death WARNING If any parts are missing damaged or broken do not operate your trimmer until they have been replaced Failure to do so could result in possibly serious personal injury WARNING To prevent serious personal injury always use b...

Page 22: ... slow down reduce the pace of your work When trimming new growth use a wide sweeping action so that the stems are fed directly into the cutting blade Older growth will have thicker stems and will be trimmed most easily by using a sawing movement Always cut stems or twigs that are less than 3 4 in thick Use a non powered hand saw or pruning saw to trim large stems TOP CUTTING Use a wide sweeping mo...

Page 23: ...SIDE CUTTING When trimming the sides of the hedge begin at the bottom and cut upwards see Fig 8 Trim the side of a hedge so that it will be slight narrower at the top This shape will expose more of the hedge resulting in a more uniform growth 8 ...

Page 24: ...ttery pack from the product when cleaning or performing any maintenance Use a soft brush to remove debris from all air intakes and cutting blade To remove pitch and other sticky residue spray the blades with resin solvent Run the motor briefly so that the solvent is event distributed Wipe the surface with a dry cloth WARNING Never use water for cleaning your trimmer Avoid using solvents when clean...

Page 25: ... unsharpened edges of the blade teeth 5 Remove the battery pack and repeat the sharpening procedure above NOTE Do not operate your hedge trimmer with dull or damaged cutting blades This may cause overload and will give unsatisfactory cutting results LUBRICATING THE BLADE Fig 10 For best operation and longer blade life lubricate the hedge trimmer blade with light weight machine oil before and after...

Page 26: ...y before storing Store the hedge trimmer indoors in a dry place that is inaccessible to children Keep away from corrosive agents such as garden chemicals and deicing salts WARNING Blades are sharp When handling the blade assembly wear non slip heavy duty protective gloves Do not place your hand or fingers between blades or in any position where they could get pinched or cut NEVER touch blades or s...

Page 27: ...Charge the battery pack 4 The battery pack is too hot 4 Remove the battery pack from the tool and allow it to cool until the tempera ture drops below 152 F 67 C 5 The hedge trimmer is too hot 5 Release both switch levers allow the trimmer to cool until the tempera ture drops below 170 6 F 77 C 6 The two switch levers are not depressed simultaneously 6 Depress the switch levers on the front and rea...

Page 28: ...25 in this manual 2 Blades or blade support is bent 2 Replace with a new blade or support Contact EGO service center for blade or support replacement service found on page 30 3 Bent or damaged teeth 3 Replace with a new blade Contact EGO service cen ter for blade replacement service found on page 30 4 Loose blade bolts 4 Tighten the blade bolts Using a 5 16 wrench turn the bolt clockwise to tighte...

Page 29: ...consumables that can wear out from normal use within the warranty period a This warranty applies only to the original purchaser at retail and may not be transferred b The warranty period for any EGO product or part used for industrial professional or commercial purpose is one year c This warranty is void if the product has been used for rental purpose d This warranty does not cover the damage resu...

Page 30: ...ness for a particular purpose that cannot be disclaimed under state law are limited to five years from the date of purchase for outdoor power equipment and three years from date of purchase for battery pack and charger Chervon North America is not responsible for direct indirect incidental or consequential damages Some states do not allow limitations on how long an implied warranty lasts and or do...

Page 31: ... The Model Number will be found on the Nameplate attached to the housing of the hedge trimmer Always mention the Model Number when ordering parts for this tool Index Number Part No Description QTY 1 3124359000 Blade Guard 1 2 2823715000 Nut and Washer Set for blade 8 3 2823057000 Guard and Screw Set 1 1 2 3 11 ...

Page 32: ......

Page 33: ...nes el usuario debe leer y comprender el Manual del usuario antes de usar este producto Guarde estas instrucciones para consultarlas en el futuro MANUAL DE FUNCIONAMIENTO ORILLADORA INALÁMBRICA DE ION DE LITIO DE 56 VOLTIOS MODELO NÚMERO HT2400 ...

Page 34: ...misión Federal de Comunicaciones FCC por sus siglas en inglés 36 Símbolos de seguridad 37 Instrucciones de seguridad 38 45 Introducción 46 Especificaciones 46 Ensamblaje 47 Lista del paquete 47 Descripción 48 Funcionamiento 49 54 Mantenimiento 55 57 Solución de problemas 58 59 Garantía 60 61 Lista de piezas 62 ...

Page 35: ...órganos reproductivos Algunos ejemplos de estos químicos son los siguientes Plomo de pinturas a base de plomo Sílice cristalina de ladrillos y cemento y de otros productos de mampostería Arsénico y cromo de madera tratada químicamente El riesgo por estas exposiciones varía según la frecuencia con la que realice este tipo de trabajo Medidas para reducir la exposición a estos químicos trabaje en un ...

Page 36: ...de la FCC Estos límites están diseñados para ofrecer una protección razonable contra las interferencias dañinas en una instalación doméstica Este equipo genera usa y puede irradiar energía de radiofrecuencia y si no se instala y se usa de acuerdo con las instrucciones podría ocasionar interferencias dañinas para las comunicaciones por radio Sin embargo no se puede garantizar que no se vaya a produ...

Page 37: ...RECAUCIÓN Si no se siguen todas las instrucciones que se indican a continuación se pueden producir descargas eléctricas incendios o lesiones personales graves SIGNIFICADO DE LOS SÍMBOLOS SÍMBOLO DE ALERTA DE SEGURIDAD indica PELIGRO ADVERTENCIA O PRECAUCIÓN Puede emplearse junto con otros símbolos o pictografías ADVERTENCIA El funcionamiento de cualquier herramienta eléctrica puede causar que se d...

Page 38: ... anteojos con protección lateral y un protector facial al operar este producto Peligro mantenga las manos alejadas de las cuchillas El contacto con una cuchilla provoca lesiones personales graves ADVERTENCIA descarga eléctrica No exponga las herramientas eléctricas a la lluvia ni a condiciones de humedad Si entra agua en una herramienta eléctrica aumentará el riesgo de descarga eléctrica Símbolos ...

Page 39: ... Tipo o característica de la corriente n0 Velocidad sin carga Velocidad de rotación sin carga min Por minuto Revoluciones por minuto SPM Golpes por minuto Velocidad de golpe sin carga PELIGRO las personas con dispositivos electrónicos como marcapasos deben consultar a su médico antes de usar este producto Operar un equipo eléctrico cerca de un marcapasos puede causar interferencia o falla en el ma...

Page 40: ...la presencia de líquidos gases o polvo inflamables Las herramientas eléctricas crean chispas que pueden encender el polvo o los vapores Mantenga alejados a los niños y los transeúntes mientras opera la herramienta eléctrica Las distracciones pueden hacer que pierda el control SEGURIDAD ELÉCTRICA Los enchufes de las herramientas eléctricas deben coincidir con el tomacorriente Nunca modifique el enc...

Page 41: ... de las drogas el alcohol o algún medicamento Un momento de falta de atención mientras opera una herramienta eléctrica puede provocar lesiones personales graves Use un equipo de protección personal Use siempre lentes de protección El equipo de protección como mascarillas antipolvo zapatos de seguridad antideslizantes cascos duros o protección auditiva usado para las condiciones adecuadas reducirá ...

Page 42: ...ufe de la fuente de alimentación y o paquete de baterías de la herramienta eléctrica antes de hacer cualquier ajuste cambiar accesorios o almacenar la herramienta eléctrica Estas medidas preventivas de seguridad reducen el riesgo de arrancar accidentalmente la herramienta eléctrica Almacene las herramientas eléctricas inactivas fuera del alcance de los niños y no permita que personas no familiariz...

Page 43: ... de baterías puede generar un riesgo de lesiones e incendio Cuando el paquete de baterías no esté en uso manténgalo alejado de otros objetos de metal como sujetadores de papeles monedas llaves clavos tornillos u otros objetos de metal pequeños que pueden crear una conexión entre un terminal y otro Un cortocircuito en los terminales de la batería puede provocar quemaduras o un incendio Bajo condici...

Page 44: ...mienta eléctricas solo por las superficies de agarre aisladas ya que la cuchilla de corte pueda entrar en contacto con cableado oculto Si las cuchillas de corte entran en contacto con un cable con corriente puede provocar que las piezas metálicas expuestas de la herramienta eléctrica conduzcan corriente lo que podría provocar una descarga eléctrica al operador Use ambas manos al operar la orillado...

Page 45: ...o en este manual Revise los pernos de montaje de la cuchilla y del motor con frecuencia para verificar que estén bien ajustados Además inspeccione visualmente la cuchilla para controlar que no haya daños por ejemplo dobladuras grietas y desgaste Reemplace la cuchilla solo con una cuchilla del fabricante original del equipo OEM por sus siglas en inglés Reemplace la cuchilla si está doblada o agriet...

Page 46: ...ñada y fabricada para brindarle el mejor rendimiento y confiabilidad posibles En caso de que tuviera algún problema que no pudiera resolver fácilmente comuníquese con el Centro de Servicio al Cliente de EGO al 1 855 EGO 5656 Este manual contiene información importante para el ensamblaje la operación y el mantenimiento seguro de su orilladora Léalo atentamente antes de usar la orilladora Mantenga e...

Page 47: ...ental el que podría provocar lesiones personales graves retire siempre el paquete de baterías de la herramienta antes de ensamblar las piezas DESEMBALAJE Este producto se ha enviado completamente ensamblado Retire con cuidado el producto y cualquier accesorio de la caja Asegúrese de que todos los elementos que aparecen en la lista del paquete estén incluidos Inspeccione la herramienta con cuidado ...

Page 48: ...ura frontal Facilita el control de la herramienta durante el trabajo de corte Empuñadura posterior Empuñadura ergonómica que mejora la comodidad y el agarre Palanca de seguridad frontal Palanca de seguridad posterior La orilladora puede arrancarse solo si ambas palancas de seguridad en las empuñaduras frontal y posterior se presionan simultáneamente 1 Cuchilla Protector de la cuchilla Protector de...

Page 49: ...iento de este producto lo vuelva imprudente Recuerde que un descuido de una fracción de segundo es suficiente para ocasionar lesiones graves ADVERTENCIA siempre use protección ocular con protección lateral que cumpla con la norma ANSI Z87 1 junto con protección auditiva De lo contrario podría provocar que se disparen objetos hacia sus ojos y otras posibles lesiones graves ADVERTENCIA no use ningún...

Page 50: ...n el puerto de la batería de la orilladora Presione el paquete de baterías hasta que calce a presión en su posición NOTA Asegúrese de que las aletas de la orilladora encajen en su lugar y que el paquete de baterías esté bien colocado en la herramienta antes de comenzar a operar PARA RETIRAR Figura 3 ADVERTENCIA siempre tenga cuidado con la ubicación de sus pies los niños o las mascotas cuando pres...

Page 51: ...ras de la orilladora Nunca sostenga los arbustos con una mano y opere la orilladora con la otra Si no se respeta esta advertencia se podrían producir lesiones graves PARA ENCENDER Y APAGAR LA ORILLADORA Antes de arrancar la orilladora Asegúrese de estar bien parado con los pies firmes y en equilibrio Párese derecho y sostenga la orilladora en una posición relajada Retire el protector de la cuchill...

Page 52: ...anera segura Desconecte el servicio eléctrico que va hacia la línea o el cable dañado antes de intentar liberar la cuchilla de la línea o el cable Si no se respeta esta advertencia se podrían producir lesiones graves o la muerte ADVERTENCIA si faltan piezas o estas están dañadas o rotas no opere la orilladora hasta reemplazar dichas piezas De lo contrario se pueden producir lesiones personales gra...

Page 53: ...pre la orilladora de manera adecuada Evite cortar demasiado de una sola vez Esto podría hacer que las cuchillas se doblen reduciendo la eficacia de corte No fuerce la orilladora para cortar arbustos frondosos Esto podría causar que las cuchillas se doblen y que se pierda velocidad Si las cuchillas pierden velocidad reduzca el ritmo de su trabajo Cuando corte vegetación nueva use un movimiento de b...

Page 54: ...a para marcar el nivel en que desea cortar la orilla Decida el alto que desea que tenga la orilla Luego coloque un trozo de cuerda a lo largo de la orilla en este alto Corte la orilla justo por debajo de esta línea de guía CORTE LATERAL Al cortar los lados de la orilla comience por el fondo y corte hacia arriba consulte la figura 8 Corte el costado de una orilla para que quede ligeramente más estr...

Page 55: ...ice limpieza o cualquier tipo de mantenimiento Use un cepillo suave para eliminar desechos de las entradas de aire y las cuchillas de corte Para eliminar la resina y otros residuos pegajosos rocíe las cuchillas con solvente de resina Haga funcionar el motor brevemente de manera que el solvente se distribuya uniformemente Limpie la superficie con un paño seco ADVERTENCIA nunca utilice agua para lim...

Page 56: ...filar de los dientes de la cuchilla 5 Retire el paquete de baterías y repita el procedimiento de afilado anterior NOTA no opere su orilladora si las cuchillas de corte están desgastadas o dañadas ya que podría provocar una sobrecarga y originar resultados de corte insatisfactorios PARA LUBRICAR LA CUCHILLA Figura 10 Para obtener un mejor funcionamiento y prolongar la vida útil de la cuchilla lubri...

Page 57: ...n interiores en un lugar seco que no sea accesible para los niños Mantenga alejada de agentes corrosivos como productos químicos para jardín y sales para derretir hielo ADVERTENCIA las cuchillas son afiladas Cuando manipule el ensamble de la cuchilla utilice guantes de protección antideslizantes para trabajo pesado No coloque su mano ni los dedos entre las cuchillas o en alguna posición donde pued...

Page 58: ...e de baterías está demasiado caliente 4 Retire el paquete de baterías de la herramienta y déjelo enfriar hasta que la temperatura descienda por debajo de los 67 C 152 F 5 La orilladora está demasiado caliente 5 Suelte ambas palancas de seguridad y deje enfriar la cortadora hasta que la temperatura descienda por debajo de los 77 C 170 6 F 6 Las dos palancas de se guridad no se presionaron simultáne...

Page 59: ...doblado 2 Reemplace por una cuchilla o un soporte nuevo Póngase en contacto con el centro de servicio o servicio de ayuda para repuestos de EGO como se indica en la página 61 3 Dientes doblados o dañados 3 Reemplace por una cuchilla nueva Póngase en contacto con el servicio de repuestos para cuchil las de EGO como se indica en la página 61 4 Los pernos de la cuchilla están sueltos 4 Apriete los pe...

Page 60: ...iginal El producto defectuoso se reparará de manera gratuita Esta garantía no cubre piezas de mantenimiento de rutina o piezas fungibles que puedan desgastarse durante el uso normal dentro del periodo de garantía a Esta garantía se aplica solo al comprador original en el distribuidor minorista y podría no ser transferible b El periodo de garantía para cualquier pieza o producto EGO para propósitos...

Page 61: ... FIN en particular Cualquier garantía implícita incluidas las garantías de comerciabilidad o idoneidad para cualquier fin en particular que no pueda ser rechazada según la ley estatal está limitada a cinco años desde la fecha de compra para el equipo electromecánico para exteriores y tres años desde la fecha de compra para el cargador y las baterías Chervon North America no se hará responsable por...

Page 62: ...odelo puede consultarse en la placa de nombre adjunta a la carcasa de la orilladora Cuando pida una pieza para esta herramienta mencione siempre el número de modelo Número de índice Pieza No Descripción Cantidad 1 3124359000 Protector de la cuchilla 1 2 2823715000 Juego de tuerca y arandela para la cuchilla 8 3 2823057000 Juego de protector y tornillo 1 1 2 3 11 ...

Page 63: ......

Page 64: ......

Reviews: