background image

6

• System environments

A system environment consists of a workflow and an output device. You created your first 
system environment in the setup wizard when you started Fiery XF for the first time. The 
workflow is configured with the default settings from the workflow template you selected. 
For example, all jobs will be output in their original size and orientation. However, you 
can customize the workflow to suit your own specific requirements.

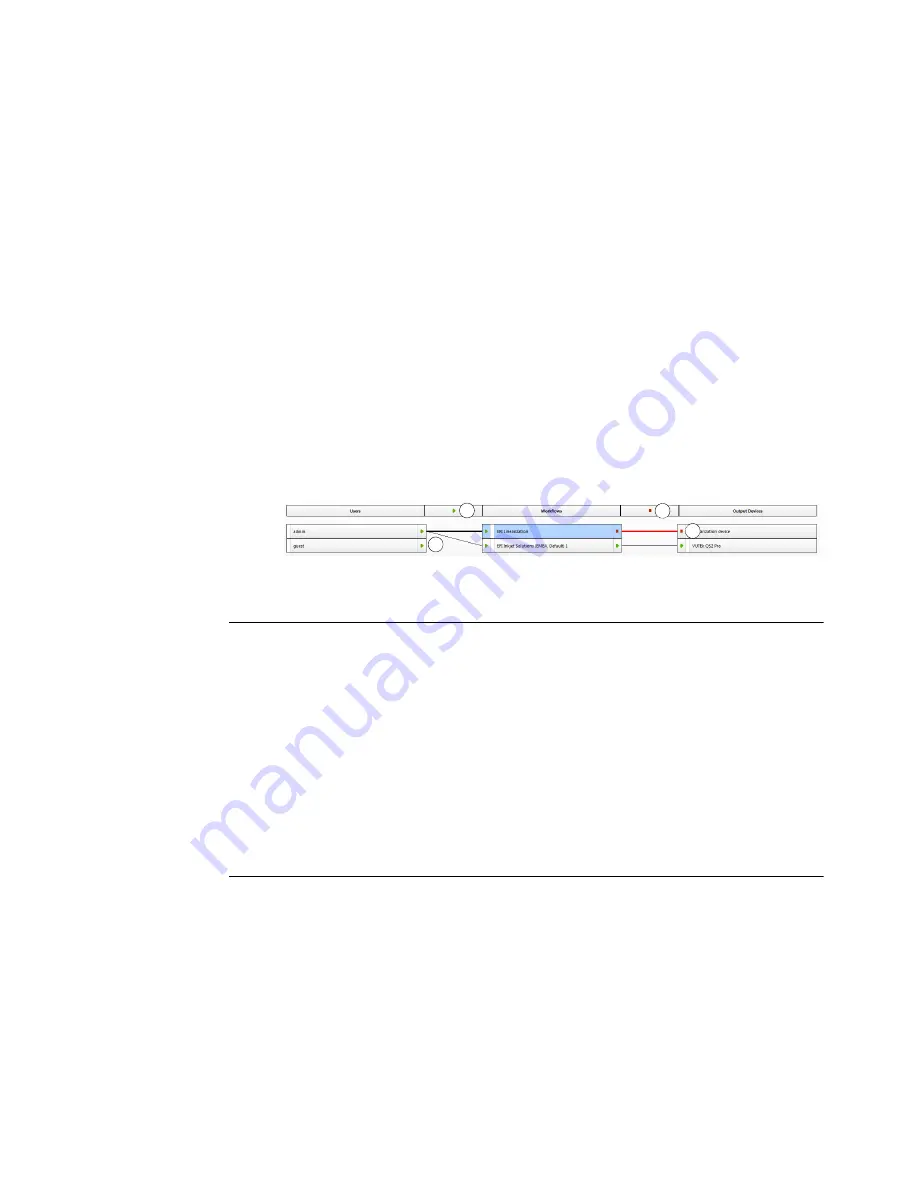
In System Manager, workflow and output device must be visibly connected by a black line. To 
connect one object with another, in the layout area, drag the mouse from the margin area of 
one object (e.g. workflow) across to the second object (e.g. output device). Make sure to drag 
from the margin area. If you drag from the center, it rearranges the order in which the objects 
are displayed.

Make sure that the system configuration is fully online. A fully online system configuration is 
indicated by green arrows from user through to output device. A red box means that that stage 
of the system configuration is offline. To set a system configuration fully online, click all the 
red boxes.

You can copy a workflow and modify workflow settings without losing the current workflow.

T

O


COPY


A


WORKFLOW

1 In System Manager, click the workflow.

2 Press Ctrl + C to copy the workflow to the clipboard.

3 Press Ctrl + V to insert a copy of the workflow.

4 Set up the workflow as required.

Managing print files

The following procedures are intended to help you to manage your print files as efficiently as 
possible.

T

O


SET


UP


A


HOTFOLDER

Hotfolders enable users, who do not have the Fiery XF client installed on their computers, to 
copy jobs to a centrally located folder. The hotfolder is routinely monitored by Fiery XF, and 
jobs that are placed in the hotfolder are loaded automatically into the Fiery XF workflow and 
processed according to the workflow settings.

Setting a system configuration 
online

1

Online

2

Offline

1

1

2

2

Summary of Contents for Fiery proServer Premium

Page 1: ...purchase additional licenses to connect to any other printer Fiery proServer Premium allows you to connect to any one EFI printer from the following series EFI VUTEk EFI Matan EFI Quantum EFI Reggian...

Page 2: ...back panel The upper network connector is used to connect the Fiery proServer to your network The lower network connector is used to connect the Fiery proServer to the printer TO CONNECT THE NETWORK A...

Page 3: ...files Online Update The Profile Update Service dialog box appears 2 Click Next 3 In the Manufacturer Model column click EFI VUTEk Fiery XF 6 1 linearization EFI VUTEk Fiery XF 6 3 linearization EFI VU...

Page 4: ...der The default folder is D Export Fiery proServer SE or E Export Fiery proServer Premium EFI VUTEk When you print to file print files are saved in RTL and GIF format to the specified export folder Th...

Page 5: ...Continue 12 Select your media size 13 Finish the setup wizard Your system environment is shown in System Manager For more information on customizing workflow settings see the Fiery XF online help Pro...

Page 6: ...online A fully online system configuration is indicated by green arrows from user through to output device A red box means that that stage of the system configuration is offline To set a system confi...

Page 7: ...ation on how to set up the hotfolder for sharing see the Fiery XF online help TO TRANSFER PRINT FILES TO THE IMPORT FOLDER You can transfer print files from the Export folder to the VUTEk printer soft...

Page 8: ...ur job and click Open 4 In the Import to dialog box click Hold Job Held jobs are not immediately processed in Fiery XF After you have made job settings you can start job processing manually 5 To rotat...

Page 9: ...ng Tiling Preview Displayed tiles are overlaid with the tile number The tile numbers of the surrounding tiles are also displayed You can save the preview as a PDF file and use it as a guide to help yo...

Page 10: ...the name that will appear in Fiery XF 6 Under Connect to profiles select Media profile Then click Select browse to the third party media profile and click Open 7 Click OK You can now select the profil...

Page 11: ...server is running on the Fiery proServer 2 On the remote computer start Fiery XF 3 On the File menu click Login 4 In the Login dialog box enter a user name and password The default login information...

Page 12: ...1 In System Manager on the File menu click Backup The Fiery XF Backup dialog box opens 2 Select the check boxes of the items you want to back up The server configuration is saved by default 3 Define a...

Page 13: ...ave as Environment dialog box opens 3 Define a backup location Environment backups are saved to two destinations the Environments folder and the desktop To change the second destination click Choose a...

Page 14: ...y proServer system enables you to restore the system to an earlier state without having to return it to its factory settings It is recommended that you regularly create backups of your Fiery XF system...

Reviews: