background image

TP-00347-01

61

Operations

Operations

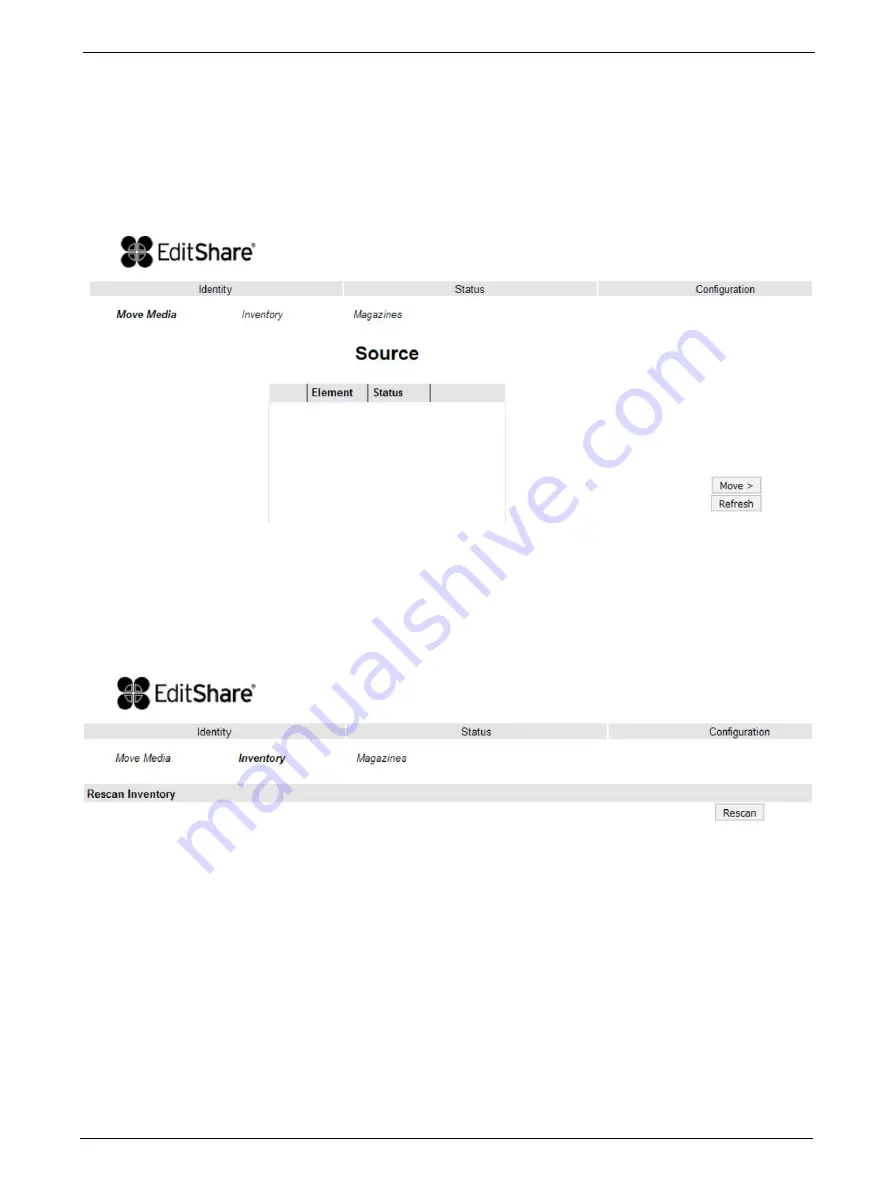
Move Media within the Library

This page allows the user to move tape cartridges within the library. 

 Select the source and destination and then click the <Move> button to move a tape cartridge. 

Determining Current Media Inventory

This page allows the user to rescan the library to determine the current media inventory. 

Changes are only applied after the <Rescan> button is selected. 

Summary of Contents for 24Q

Page 1: ...24Q Ark Tape Library 48Q Ark Tape Library Setup and User s Guide ...

Page 2: ...ited States Copyright Laws or the Copyright Laws of any applicable foreign jurisdiction is expressly prohibited EditShare is a registered trademark of EditShare in the US and other countries Universal Media File is a trademark of EditShare in the US and other countries Windows is a registered trademark of Microsoft Corporation All other brand and product names are trademarks or registered trademar...

Page 3: ...ight of the rack rests on the levelling jacks Install stabilizing feet on the rack Extend only one rack component at a time Caution Static Sensitive Devices Risk of damage to devices A discharge of static electricity damages static sensitivedevices ormicro circuitry Proper packaging and grounding techniques are necessary precautions to prevent damage Caution Working Environment Risk of damage to d...

Page 4: ...consistent with the operating instructions or product specification defined by the manufacturer The tape library fails because ofaccident misuse abuse neglect mishandling misapplication alteration faulty installation modification or service by anyone other than the factory service center or its approved agent The tape library is repaired by anyone including an approved agent in a manner that is co...

Page 5: ...STALLATION 17 Preparation 18 Location Requirements 18 Serial Attached SCSI SAS Requirements 18 Fibre Channel Requirements 19 Unpacking 20 Unpacking the Library 20 Identifying Product Components 20 Removing the Shipping Lock 21 Installing the Library 22 Tools Required 22 Rack Mounting the Library 22 Installing Tape Drives 23 Tools Required 23 Installation Procedure 23 Installing the Library Control...

Page 6: ...te Compatibility 32 Magazines 32 Slot Usage 32 CHAPTER 4 OPERATION 33 Powering the Library Up or Down 33 Operator Control Panel OCP 33 Operating Modes 33 OCP Rules 34 Power Up Display 34 LEDs 34 Input Modes 35 Power Down 36 Menu Flow Charts OCP 36 Remote Management Unit RMU 44 Overview 44 Operation Modes 44 Login 45 RMU Screen Layout 45 Identity 46 Status 49 Configuration 52 Operations 61 Move Med...

Page 7: ...e 75 Base Chassis 75 Preparing to Remove the Base Chassis 75 Removing the Base Chassis from the Rack 76 Packaging the Unit for Transportation 76 24Q Ark Tape Library 77 48Q Ark Tape Library 78 CHAPTER 6 TROUBLESHOOTING 79 Installation Issues 79 Cabling 79 Compatibility 79 Backup Application Installation 79 Device Driver Installation 80 Troubleshooting Checks 80 Performance 80 Cleaning Cartridge 80...

Page 8: ...n Error Codes 89 Sub Error Codes Related to Media Changer 99 Sub Error Codes Related to Library 102 CHAPTER 7 SPECIFICATIONS 103 Physical Specifications 103 Operating Environment 104 Maximum Storage Capacity and Data Transfer Rate 104 CHAPTER 8 REGULATORY INFORMATION 107 Recycling and Disposal 107 Device Standards 108 CE Mark 108 ETL Mark 108 GS Mark 108 FCC United States 109 Canadian Verification...

Page 9: ...tem administrators and trained users who need physical and functional knowledge of these 24Q 48Q products This document uses the reference 24Q 48Q to refer to either the 24Q or the 48Q Tape Library See the following sections General Information on page 10 Hardware Configuration on page 11 Supported Tape Drives on page 11 Controls and Indicators on page 12 Library Controller on page 15 Technical Su...

Page 10: ...Serial Attached SCSI SAS depending upon installed tape drives Expandability additional half height tape drives may be field installed in a library that has unused drive slot locations Technology upgrade tape drive technologies can be upgraded in the field i e LTO 5 to LTO 6 etc Service friendly design easy access to magazines tape drives library controller and power supply for field replacement Ma...

Page 11: ... 1 to 4 half height drives Power supply 1 1 Library controller 1 1 Supported Tape Drives EditShare 24Q 4Q Ark Tape Libraries were developed to integrate industry standard IBM LTO Ultrium tape drives Mixed drive generations and mixed interfaces are supported The tape drives that have been implemented and qualified for use in EditShare 24Q 4Q Ark Tape Libraries are as follows LTO 5 Half Height FC LT...

Page 12: ...d when the library has detected a condition that requires attention by the operator 6 LED ERROR amber is illuminated when an unrecoverable tape drive or library error occurs A corresponding error message is shown on the LCD screen 7 UP button is used to navigate backward through menu items 8 CANCEL button X is used to cancel a user action and return to the last menu item 9 DOWN button is used to n...

Page 13: ...al and USB ports and the magazine release holes The power supply is on the left side tape drives are in the middle and the library controller is on the right side of these libraries 1 Power supply lower left A Storage location for shipping lock 2 Tape drive s B USB port firmware upgrades key storage 3 Pull out tab containing the product information Serial Number Model Customer 4 Library controller...

Page 14: ...7 01 Chapter 1 Introduction Power Supplies 24Q Library 1 Fan Vent 2 Power connector 110 220 V AC 48Q Library 1 Fan Vent 2 Power connector 110 220 V AC 3 LED blue AC power 4 LED amber Fan Failure 5 LED green Power ...

Page 15: ...when backing up highly compressible data to a higher throughput tape drive In a SAN installation all switches between the host and the library must be of the appropriate type A lower throughput switch in the path may result in performance degradation Configure zoning so only the backup servers may access the library IBM LTO 5 6 7 8 HH SAS FC Half Height Drive Library Controller ...

Page 16: ... user documentation for your system Click on the link corresponding to the document you wish to read These documents are also included on the Support USB stick included with the server If you cannot find or access your manuals please contact EditShare Technical Support Technical Support For questions not addressed in our documentation contact EditShare Technical Support Have the exact version numb...

Page 17: ... and 48Q Ark Tape Libraries See the following sections Preparation on page 18 Serial Attached SCSI SAS Requirements on page 18 Fibre Channel Requirements on page 19 Unpacking on page 20 Installing the Library on page 22 Installing Tape Drives on page 23 Installing the Library Controller on page 24 Power Supply Installation on page 25 Cable Connections on page 26 ...

Page 18: ...drives Humidity 20 80 relative humidity non condensing Clearance Back Minimum of 15 4 cm 6 inches Front Minimum of 30 8 cm 12 inches for mailslot Minimum of 60 cm to remove magazines 24 in Sides Minimum of 5 08 cm 2 in For further information see Chapter 7 Specifications on page 103 Serial Attached SCSI SAS Requirements High quality SAS cables rated at the transfer rate of the SAS drives are requi...

Page 19: ...the same channel to retain the association between the HBA channel and WWID Fibre Channel Requirements For best performance use the appropriate HBA for your tape drive A lower throughput HBA might result in performance degradation when backing up highly compressible data to a higher throughput tape drive In a SAN installation all switches between the host and the library must be of the appropriate...

Page 20: ...tice any damage report itto the shipping company immediately 2 Open the box 3 Carefully remove the shipping materials from the top of the library 4 Remove the accessory package and set aside if included 5 Remove the two rack rails and set aside if included 6 Lift the library out of the carton and remove the bag from the loader Save the packaging materials for future use Identifying Product Compone...

Page 21: ...ed on To remove and store the shipping lock STEPS 1 Remove the yellow label that is securing the shipping lock on the top of the 24Q 48Q library 2 Remove the shipping lock 3 Store the shipping lock in the slot provided on the rear panel The Lock is required if the library is to be returned or transported to a new location at some future time 4 Replace the yellow label on the top of the library ...

Page 22: ...he library rack is to be installed 2 Use a pencil to mark the location on each vertical rail in the rack 3 In the rack mount kit are two sets of eight M6 screws Determine the type of rack then choose the appropriate type of M6 screws 4 Secure one rail to each side of the rack in your chosen rack location with a 3 Phillips screwdriver Insure the rails are mounted level and at the same rack height o...

Page 23: ...ng tool is required No 2 Phillips screwdriver Installation Procedure To install tape drives STEPS 1 The 24Q has space for two half height tape drives and the 48Q has space for four half height tape drives Always install the first tape drive in the bottom of the drive bay A drive bay cover must be installed over any empty drive positions 2 If a drive cover is present loosen the screws and remove th...

Page 24: ...back of the library If extended push the tab for the product ID label back into the library 7 Tighten the blue captive screws with your fingers to secure the tape drive to the library Installing the Library Controller The library controller is installed from the rear of the library If the library does not already have a library controller installed install it now Tools Required The following tool ...

Page 25: ...tact free of any foreign objects and have no cracks or deformed or bent contacts 4 Insert the library controller on the alignment rails and push it into the bay until it seats itself against the back of the library 5 Tighten the blue captive screws with your fingers to secure the library controller Power Supply Installation The power supply is installed from the rear of the library If the library ...

Page 26: ...acts 4 Insert the power supply on the alignment rails and push it into the bay until it seats itself against the back of the library 5 Tighten the blue captive screws with your fingers to secure the power supply to the library Cable Connections Power Cord Connections Mains voltages are present on this equipment Before connecting a power cord to the library Ensure that the power cord meets safety s...

Page 27: ... one end of the FC cable to port A on the tape drive 2 Attach the other end of the FC cable to the HBA installed in your EditShare Ark Tape server Refer to the EditShare Ark Setup and User s Guide for additional information Connecting SAS Cables SAS signal rates require clean connections between the HBA and tape drive Do not use adapters or converters between the HBA and the tape drive For reliabl...

Page 28: ...bles and connectors Connecting an Ethernet Cable The connection to the Ethernet network is via an industry standard RJ45 copper interface on the rear panel of the library The Ethernet connection is used to access the library RMU over a network To connect the library to the Ethernet network insert the Ethernet cable into the Ethernet port of the library When the plug is in the correct position a cl...

Page 29: ...ic fields can destroy data and the embedded servo code written on the media by the cartridge manufacturer which can render the cartridge unusable Clean drives with Ultrium Universal cleaning cartridges only To ensure the longest possible life for your data cartridges follow these guidelines Use only the data cartridges designated for your device Clean the tape drive when the Clean drive LED is ill...

Page 30: ...arcode reading issues The device contains a bar code reader that reads the tape labels and stores the inventory data in memory The device then provides the inventory information to the host application OCP and RMI LTO tape cartridges must have barcode labels in order for the EditShare Ark Tape application to work as designed A proper bar code label includes the media ID in the last two characters ...

Page 31: ...idge to jam in a tape drive Write Protecting Tape Cartridges All rewriteable data cartridges have a write protect switch to prevent accidental erasure or overwriting of data Before loading a cartridge into the device make sure the write protect switch on the front of the cartridge is in the desired position 1 Insertion Arrow 2 Barcode Label 3 Write Protect Switch 4 Write Protected 5 Write Enabled ...

Page 32: ...magazines Tape cartridges are stored in the magazines Each magazine can be individually removed or inserted Each magazine inserted in the library is locked into position to prevent unauthorized removal Access to unlock the magazines can be password protected For safety reasons removal of a tape magazine disables media changer motion The magazines can be unlocked via the Operator Control Panel OCP ...

Page 33: ...oyed when a user is pushing buttons on the operating panel System driven mode This is the normal mode of operation In this mode the OCP displays status associated with the actions that were caused from commands issued from the EditShare Ark Tape application Actions like loading rewinding or moving tape cartridges will be displayed Whenever an operating button is pressed and released the operating ...

Page 34: ...cesses that initialize and prepare the unit for normal operation These processes are called Power On Self Test POST While the POST is in process the OCP will display appropriate information to keep the user informed When the library finishes POST it displays the current library status for a defined time or until a front panel key is pressed After this initial status screen the home screen will be ...

Page 35: ...ious predefined values can be selected with the DOWN and UP buttons As soon as the display shows the desired value it may be confirmed by pressing the ENTER button Toggle Values Toggle values are used to switch between two different states like on and off After navigating to the menu item the display shows its current state Pressing the ENTER button will select the item whose value may then be tog...

Page 36: ... before the unit shuts down completely The display indicates with an appropriate message that the shutdown is in progress The library controller finishes all ongoing loader and drive activities The media changer is moved to its home position The library controller switches off the power supply s secondary side Menu Flow Charts OCP See the following sections Main Menu on page 37 Information Menu on...

Page 37: ...TP 00347 01 37 Operator Control Panel OCP Main Menu Main Menu ...

Page 38: ...38 TP 00347 01 Chapter 4 Operation Information Menu Information Menu 1 of 2 ...

Page 39: ...TP 00347 01 39 Operator Control Panel OCP Information Menu 2 of 2 ...

Page 40: ...40 TP 00347 01 Chapter 4 Operation Commands Menu Commands Menu ...

Page 41: ...TP 00347 01 41 Operator Control Panel OCP Configuration Menu Configuration Menu ...

Page 42: ...42 TP 00347 01 Chapter 4 Operation Service Menu Service Menu 1 of 2 ...

Page 43: ...TP 00347 01 43 Operator Control Panel OCP Service Menu 2 of 2 ...

Page 44: ...et the desired static IP address at the OCP or configure to use DHCP Operation Modes The following operations are available through the remote management unit as explained below 1 Identity Viewing the static library identity Viewing the static drive identity Viewing the network identity 2 Status Viewing the dynamic library status Viewing the dynamic drive status Viewing the tape cartridge inventor...

Page 45: ...er level default password std001 Admin administrator user level default password adm001 Service service user level for access by service personnel only default password ser001 Each level affects the areas to which you have access and what actions you can initiate in those areas RMU Screen Layout Once logged in the general layout of all RMU screens is similar Menu items in the Action bar and Object...

Page 46: ...tatic Library Identity This page provides access to the static information about the system No changes can be made from this page Date Time Status Overall library status Drive Status Individual drive status there will be one entry for each installed drive Slots Free Total Total library slot capacity Mailslot Open Closed Library Time Time stamp displayed in 24 hour format Auto Clean Status If Auto ...

Page 47: ...shown by selecting the appropriate drive from the pull down menu The following information is displayed 1 Drive information Vendor ID Drive manufacturer Product ID Model identification of the drive Serial Number Serial number of the drive Firmware Revision Operating firmware level of the drive Physical Drive Number Number indicating drive s physical position within the library Element Address Numb...

Page 48: ...ll Qualified Domain Name IPv4 Addressing Enabled Disabled IPv4 DNS Server 1 IP address of domain name server 1 Pv4 DNS Server 2 IP address of domain name server 2 DHCPv4 Addressing Enabled Disabled IPv4 Address IP address assigned by DHCP Subnet Mask Default Gateway IP address of default gateway Ipv6 Addressing Enabled Disabled 2 SNMP Information SNMP Enabled Disabled Email Notification Enabled Di...

Page 49: ...pt commands Cartridge in Transport Indicates whether the media changer contains a cartridge Number Of Moves Odometer Indicates total number of moves made by the media changer Total Power On Time Indicates total library power on time Robotic Status Indicates whether the media changer is ready to accept commands Internal Temperature Indicates internal unit temperature in degrees centigrade Left Righ...

Page 50: ...wn by selecting it from the pull down menu The following information is displayed 1 Drive Status Status Indicates whether drive is ready for use Cartridge in Drive Indicates whether the drive contains a tape cartridge Drive Error Code Drive Temperature Cooling Fan Active Drive Activity Drive Port Information relevant to the specific drive interface FC or SAS 2 Additional drive information up to 4 ...

Page 51: ...des detailed information about the tape inventory in the library STEPS 1 A summary of each magazine displays 2 To show detailed information click on the button 3 The display expands for the specified magazine 4 Detailed cartridge information displays below the summary panel ...

Page 52: ... the library switches from sequential mode into random mode when it receives library SCSI commands through its unique LUN In sequential mode the user can set the Loop and Autoload options In the auto load mode the library automatically loads the tapes from the lowest numbered full slot into the tape drive In loop mode the original first tape in the sequence is reloaded after the library has cycled...

Page 53: ...on is selected After doing so a warning page will inform the user of the impact of the proposed change In some cases a pop up screen will ask the operator to confirm the change Many changes will also require a reboot Configuring Logical Libraries The logical libraries drop down allows the user to partition one library into smaller logical libraries Each logical library must contain at least one ta...

Page 54: ...e Power On check box through this page to activate the drive Changing the Network Configuration Changes in this menu may affect the ability to access the RMU interface unless the correct IP Address is resolved This page shows the current network configuration of the library related to the RMU access and allows modification to the configuration When a change is requested a pop up window will ask yo...

Page 55: ...ess if required Gateway address Used to set the Gateway Address contact your Network administrator to receive this address if required used when an IP address does not match any other routes in the routing table IPv4 DNS Server 1 This is the IP address of your name server DNS server A DNS server allows the library to communicate with other network clients via their host name If you have a DNS Serv...

Page 56: ...address changes then the name or a new address will have to be entered Changes that can be made are SNMP Enabled Disabled IPv4 SNMP Target Addresses IPv4 Target 1 IPv4 Target 2 IPv4 Target 3 IPv6 SNMP Target Addresses IPv6 Target 1 IPv6 Target 2 IPv6 Target 3 Community name Security User Name SNMP Trap Notification Filter Critical Events Critical and Warning Events Critical Warning and Configurati...

Page 57: ...ou would like the Operator Control Panel display to be password protected OCP Access PIN Code The password for accessing the OCP when the OCP Access PIN is enabled max 4 characters Repeat OCP Access PIN Code Enter the OCP Access PIN Code again Support Name The name of the individual within your company to contact for RMU or library support max 30 characters Support Phone The phone number of the in...

Page 58: ...ion If checked the unit will attempt to synchronize its clock with an external time source The following apply SNTP Server Address IPv4 This is the IP address of the network SNTP time server the address may be a maximum of 40 characters UTC Time Zone Offset This drop down menu allows the administrator to select the appro priate time zone offset so that the time will be displayed in the actual loca...

Page 59: ...ting is for continuous collection of logs with the most recent events overwriting the oldest events circular buffer Selections available are Error Log Trace Level Trace Filter Configuring Event Parameters for Email Notification This page allows the user to modify the event notification parameters Changes that can be made are Notification Level Critical Warning Configuration events none To Email Ad...

Page 60: ... defaults Save Restore Configuration Save Configuration to File The Save button will save the current library settings to a file which can later be uploaded back to the library to restore the settings library configuration files have a dbb file extension with a file name format structure consisting of the unique 10 character library unit serial number followed by a space followed by a date time st...

Page 61: ... cartridges within the library Select the source and destination and then click the Move button to move a tape cartridge Determining Current Media Inventory This page allows the user to rescan the library to determine the current media inventory Changes are only applied after the Rescan button is selected ...

Page 62: ... the right or left magazine from the library Select the magazine in the pull down menu and then click the Release button Service Performing General Library Diagnostics This page provides the system administrator with general tests to verify the usability and reliability of the library Selections available are System Test Slot To Slot Test Select the number of test cycles No Cycles before starting ...

Page 63: ...ic Select drive and Select the Drive Test to be performed Drive Support Ticket Select drive and choose last current unload Save Drive Dump Select drive once defined Determining and Updating Firmware This page displays the current versions of the library firmware and drive s firmware New firmware can be uploaded to the library or a drive by using this page After a firmware update the system restart...

Page 64: ...s because the RMU web page refreshes itself at intervals defined by a default time delay If the reboot completes successfully during this delay the connection will remain intact If not the user will have to restart the RMU login Viewing Library Logs This page allows the user to view the library logs The user can specify the following information Log Type Error Trace Informational Trace Warning Tra...

Page 65: ...iate the tape drive cleaning process if required Select the magazine slot number containing the cleaning cartridge and the tape drive to be cleaned in the appropriate pull down menu and then click the Clean button Cartridge Memory Provides details of the tapes stored in the library ...

Page 66: ...single partition may include multiple magazines and multiple drives The 48Q may be partitioned up to a maximum of four partitions each requiring a dedicated tape drive The SCSI element addresses shown below are default values which are valid in a new library or after a Reset to Default They can be changed by SCSI SMC command 24Q Tape Library 24Q Single Partition Configuration Tape Drive 1 half hei...

Page 67: ...e default element address 257 Magazines 1 and 2 Partition 2 Tape drive 3 half height drive default element address 256 Tape drive 4 half height drive default element address 257 Magazines 3 and 4 The mailslot if configured as MAIL is shared between the logical libraries 48Q Three Partition Configuration The mailslot if configured as MAIL is shared between the logical libraries Partition 1 Tape dri...

Page 68: ...2 Partition 3 Tape drive 3 half height drive default element address 256 Magazines 3 Partition 4 Tape drive 4 half height drive default element address 256 Magazines 4 Removed Drives If a drive is physically removed it is reported to the host application by reference to its SCSI element address It is reported as not accessible until it is inserted again in the drive slot and either A Reset to Defa...

Page 69: ...ailslot configuration Disabled Configure reserved slots Reserved slots 0 SCSI master drive The lowest physical drive is initially the LUN master drive OCP contrast setting 10 Library Mode Automatic Auto load Disabled Loop Disabled Drive power ON OFF All drives are powered ON Auto clean Disabled SNMP Disabled FC Tape Drives Automatic speed auto topology Log Tracing Configuration All selected Email ...

Page 70: ...70 TP 00347 01 Chapter 4 Operation ...

Page 71: ...71 Tape Drives on page 72 Library Controller on page 73 Power Supplies on page 74 Servicing a Magazine on page 75 Base Chassis on page 75 Packaging the Unit for Transportation on page 76 Tools Required The following tools are required to service the tape library No 2 and No 3 Phillips Screwdrivers Flat Blade Screwdrivers Large and Small Ground Strap Storing and Shipping Components When storing or ...

Page 72: ...tape drive cables on the rear panel 3 Loosen the blue thumbscrews located on the rear of the tape drive with your fingers 4 Slightly pull out and push down the tab containing the product ID label so it does not interfere with the tape drive as shown below 5 Pull the tape drive by the handle straight out of the library Replacing a Tape Drive To replace the tape drive with another tape drive STEPS 1...

Page 73: ...rary controller on the rear panel of the library 4 Loosen the blue thumbscrews located on the library controller with your fingers 5 Pull the library controller straight out of the library as shown in the diagram Replacing a Library Controller To replace the library controller with unit STEPS 1 Remove the library controller from the library as described in Removing a Library Controller on page 73 ...

Page 74: ...ar panel of the library 3 Loosen the blue thumbscrews located on the rear of the power supply with your fingers 4 Pull the power supply straight out of the library as shown in the diagram Replacing a Power Supply To replace a power supply STEPS 1 Remove the power supply from the library as described in Removing a Power Supply on page 74 2 To install the new power supply see Power Supply Installati...

Page 75: ...is Preparing to Remove the Base Chassis The Base Chassis is heavy observe the Safety Procedures described in page 3 STEPS 1 If the OCP or RMU is working Write down the system drive and network configuration settings You will need these settings to re configure the library after replacing the base chassis Remove all tape cartridges to reduce the weight see Removing Tape Cartridges from Tape Library...

Page 76: ...yellow label from the rear panel Insert the shipping lock into the slot on top of the library Stick the yellow label over the shipping lock to secure it in place Packaging the Unit for Transportation The Base Chassis is heavy observe the Safety Procedures described in page 3 Before packaging the library STEPS 1 Pull out the tab with the product ID label 1 2 Note the part and serial number 2 3 Pack...

Page 77: ...TP 00347 01 77 Packaging the Unit for Transportation 24Q Ark Tape Library 1 Packaging Box 2 Bottom Shell 3 Library 5 Top Shell ...

Page 78: ...78 TP 00347 01 Chapter 5 Servicing 48Q Ark Tape Library 1 Packaging Box 2 Bottom Shell 3 Library 4 Middle Shell Q48 only 5 Top Shell ...

Page 79: ...power SAS and or Fibre Channel as well as Ethernet and USB if present are properly seated in their respective sockets at both ends and that the tape library is powered on If so and the host is still not communicating successfully with the library then the cables themselves may need to be checked If spare cables are available this can be achieved by replacing one cable at a time and assessing wheth...

Page 80: ...presses poorly or is already compressed will lower performance Check the size of the files Small file size can impact performance Confirm that the backup application is utilizing block sizes of at least 32KB preferably 64KB Refer to the backup application documentation for details Check the network bandwidth from the host computer If you are backing up data over a network consider comparing to a l...

Page 81: ... displayed in the inventory display for the indicated slot number Export the media in order to clear the state Cannot write to or read from tape Make sure that the tape is write enabled move the write protect switch to the enabled position Make sure you have the appropriate data tape for your library model Make sure you are using an Ultrium tape that has not been degaussed Do not degauss Ultrium t...

Page 82: ...cases Clean the tape drive s as needed Non acclimated media A tape should be acclimated for at least 24 hours before being used particularly if it has been stored at a substantially different temperature or level of humidity than the library Tape cartridge is incompatible Use only tapes that are compatible with the tape drive type See Section 4 14 Expired cleaning cartridge Make sure you are using...

Page 83: ...tape drive Temporarily disconnecting the library from the host server and power cycling eliminates the host and its software as a problem source Contact your Service Representative Tape stuck in storage slot See Section 6 3 Removing Tape Cartridges from Tape Library Risk of Damage to Devices when tape cartridges are stuck in the tape library When the library is moved any tape cartridge can become ...

Page 84: ...l all stuck tape cartridges are removed 4 Push the mailslot or magazine back into the library Emergency Release If you cannot remove the magazines via the OCP or RMU do the following STEPS 1 Press the power button on the front bezel to power down the library 2 Unplug the power cord from the library 3 From the rear panel of the library find the access holes for the right and left magazines ...

Page 85: ...lease the magazines by any of the foregoing methods contact your Service Representative Upgrading the Library Firmware It is advisable to keep the library firmware updated to the latest version To update the library firmware STEPS 1 Use the RMU or OCP to navigate to the appropriate screen RMU screen Service Firmware Upgrade Library Firmware Upload OCP screen Main Menu Service Service Library Libra...

Page 86: ...lot to Slot Test Library Verify Test When running this test the library removes any tape from the tape drive s and goes offline Verify that any applications using the library have completed before starting the test The library verify test is a diagnostic routine called Library Health Check LHC It includes Functional testing of all library and drive hardware with the exception of external interface...

Page 87: ...The library moves each tape to the tape drive load point and then returns it to its slot If none of the top row corner slot positions contains a tape the test stops and the library displays an error message 9 If additional cycles remain to be run the test returns to step 7 if there is a tape in the mailslot or step 8 there is not 10 At the conclusion of the test the library opens the mailslot and ...

Page 88: ...e displays as shown in the following example General Error Display Select the Hint button to show the Hint display Hint Display Select the Detail button to show the Detail display Detail Display RMU Error Reporting In case of an error or a warning the following popup message appears on the RMU All information will be available in one message box as shown in the following example ...

Page 89: ...lem Reset the unit and retry operation After several occurrences contact technical support Media changer probably defective Media changer hardware not working cables distribution boards media changer controller 84 Setting of gripper motor parameters failed Reset the unit and retry operation After several occurrences contact technical support Media changer probably defective Elevator distribution b...

Page 90: ... Slider Motor not connected or defect Slider motor voltage too low Media changer controller or distribution boards defect Check slider mechanism according stiffness in movement 8B Elevator blocked Run Library Verify Test after several occurrences contact technical support Media changer probably defective Elevator motor not connected or defect Elevator motor voltage too low Media changer controller...

Page 91: ...bution board defect Cabling incorrect Check slider gears 90 Cannot find elevator block within the expected range Run Library Verify Test after several occurrences contact technical support Media changer probably defective Elevator distribution board defect Cabling incorrect Check elevator gears 91 Cannot find rotation block within the expected range Run Library Verify Test after several occurrence...

Page 92: ...led outside range Run Library Verify Test after several occurrences contact technical support Media changer probably defective Sled has reached a position beyond the expected range Cabling incorrect Check sled gears 98 Cartridge present sensor not found Run Library Verify Test after several occurrences contact technical support Media changer probably defective Media changer controller defect Cartr...

Page 93: ...defect Check slider mechanism according stiffness in movement 9E Elevator range out of specification Run Library Verify Test after several occurrences contact technical support Media changer probably defective Elevator motor not connected or defect Media changer controller or distribution boards defect Check elevator mechanism according stiffness in movement 9F Rotation range out of specification ...

Page 94: ...tact technical support Media changer probably defective Does not apply to 24Q and 48Q Ark Tape Libraries Cabling incorrect Check top sled mechanism gears sheet guide locking A5 Sled home sensor 2 not found Run Library Verify Test after several occurrences contact technical support Media changer probably defective Does not apply to 24Q and 48Q Ark Tape Libraries Media changer controller defect Sled...

Page 95: ...tribution boards media changer controller Download media changer firmware fails B2 Media changer controller communication failed Reset the unit and retry operation After several occurrences contact technical support Media changer probably defective No communication from library controller to media changer controller Media changer hardware not working cables distribution boards media changer contro...

Page 96: ...controller C6 Ping command did not reached target Check network cable and network configuration If the error recurs contact technical support Library controller probably defective Probably a hardware problem check library controller C7 Cannot Upgrade from USB Retry of firmware upgrade if not successful contact technical support Library controller probably defective Probably a hardware problem chec...

Page 97: ...rror Retry operation after several occurrences contact technical support Library controller probably defective Probably a hardware problem check library controller D8 Data base error Retry operation Library controller probably defective After several occurrences contact technical support Probably a hardware problem check library controller D9 No SCSI IC detected Retry operation after several occur...

Page 98: ...cal support Communication cable between drive and drive sled controller defective The sub code indicates which drive is affected Drive sled controller defective Example Check cabling drive sled controller backplane Sub code 01 drive 1 Check cabling backplane library controller Drive defect check drive F2 Drive sled not present Retry operation if not successful contact technical support Drive proba...

Page 99: ... Retry operation if not successful contact technical support Drive probably defective FD Internal SCSI command timeout Retry operation if not successful contact technical support Drive probably defective Error Code Description User Action Critical Component Status Code Description 01 Mechanical initialization failure 02 Connection to slave media changer failed 03 Error motor initialization 04 Erro...

Page 100: ...MoveRotation function 35 Error during elevator movement in FLMoveSled function 36 Error during sled movement in FLMoveSled function 37 Error during sled positioning to sensor in FLMoveSled function 38 Error during sled positioning to mailslot in FLMoveSled function 39 Error during sled positioning without sensor 3A Error during elevator movement without sensor 3B Error slot position sensor not fou...

Page 101: ...ition 94 Sled movement to home sensor position failed 95 Sled movement to transport position failed 99 Error during rotation movement to rotation min position A0 Movement to mailslot failed A1 Sled movement to sensor failed A2 Sled movement to rotation position failed A3 Elevator movement to home position failed A4 Error during rotation to far position A5 Sled movement to mailslot position failed ...

Page 102: ...ssing slot status 90 Media changer load not reached tape present sensor 91 No activity after Load command 92 Timeout while loading tape 93 No activity after Load command 94 Timeout drive unload 95 Tape drive terminated unsuccessfully 96 Tape not ejected at robot unload 97 Slot not free at robot unload 98 Tape not seated in Load phase 1 ...

Page 103: ... cm Packaged 9 8 in 24 8 cm Packaged 13 0 in 33 0 cm Width Product alone 17 6 in 44 8 cm Product alone 17 6 in 44 8 cm Packaged 23 5 in 59 8 cm Packaged 23 1 in 58 5cm Depth Product alone 29 2 in 74 0 cm Packaged 39 1 in 99 3 cm Product alone 29 2 in 74 0 cm Packaged 39 0 in 99 0 cm Weight without media 2 HH drive unit 34 lb 15 6 kg 2 HH drive unit 53 6 lb 24 3kg 4 HH drive unit 57 6lb 26 1kg Weig...

Page 104: ... C to 60 C Max temperature rise 20 C hour Humidity 5 RH to 90 RH non condensing Altitude 7 m to 10 668 m 22 to 35 000 feet Maximum Storage Capacity and Data Transfer Rate 24Q Tape Library with LTO 6 drive s Characteristics Specification Maximum storage capacity 24 data cartridges Native 60 TB Compressed 150 TB assuming 2 5 1 compression Maximum data transfer rate single drive Native 210 MB sec 756...

Page 105: ...teristics Specification Maximum storage capacity 48 data cartridges Native 120 TB Compressed 300 TB assuming 2 5 1 compression Maximum data transfer rate single drive Native 210 MB sec 756 GB hour Compressed 525 MB sec 1 9 TB hour assuming 2 5 1 compression Interface 6 GB sec SAS drive dependent 8 GB sec FC ...

Page 106: ...106 TP 00347 01 Chapter 7 Specifications ...

Page 107: ... the European Union and Norway This symbol on the product or on its packaging indicates that this product must not be disposed of with your other household waste Instead it is your responsibility to dispose of your equipment by handling it over to a designated collection point for the recycling of waste electrical and electronic equipment The separate collection and recycling of your waste equipme...

Page 108: ...y products placed on the single market in the European Economic Area EEA The CE marking certifies that a product has met EU consumer safety health or environment l requirements ETL Mark The ETL mark is alternative to the UL and CSA marks in the USA This mark is issued by Intertek This mark shows that your product meets all the appropriate safety and performance specifications for your market of sa...

Page 109: ...on Although the equipment has been tested and found to comply with the allowed RF emission limits as specified in the above cited Rules there is no guarantee that interference will not occur in a particular installation Interference can be determined by turning the equipment off and on while monitoring radio or television reception The user may be able to eliminate any interference by implementing...

Page 110: ...110 TP 00347 01 Chapter 8 Regulatory Information ...

Page 111: ......

Page 112: ...TP 00347 01 ...

Reviews: