50
Creating a movie
fig.editor09.eps
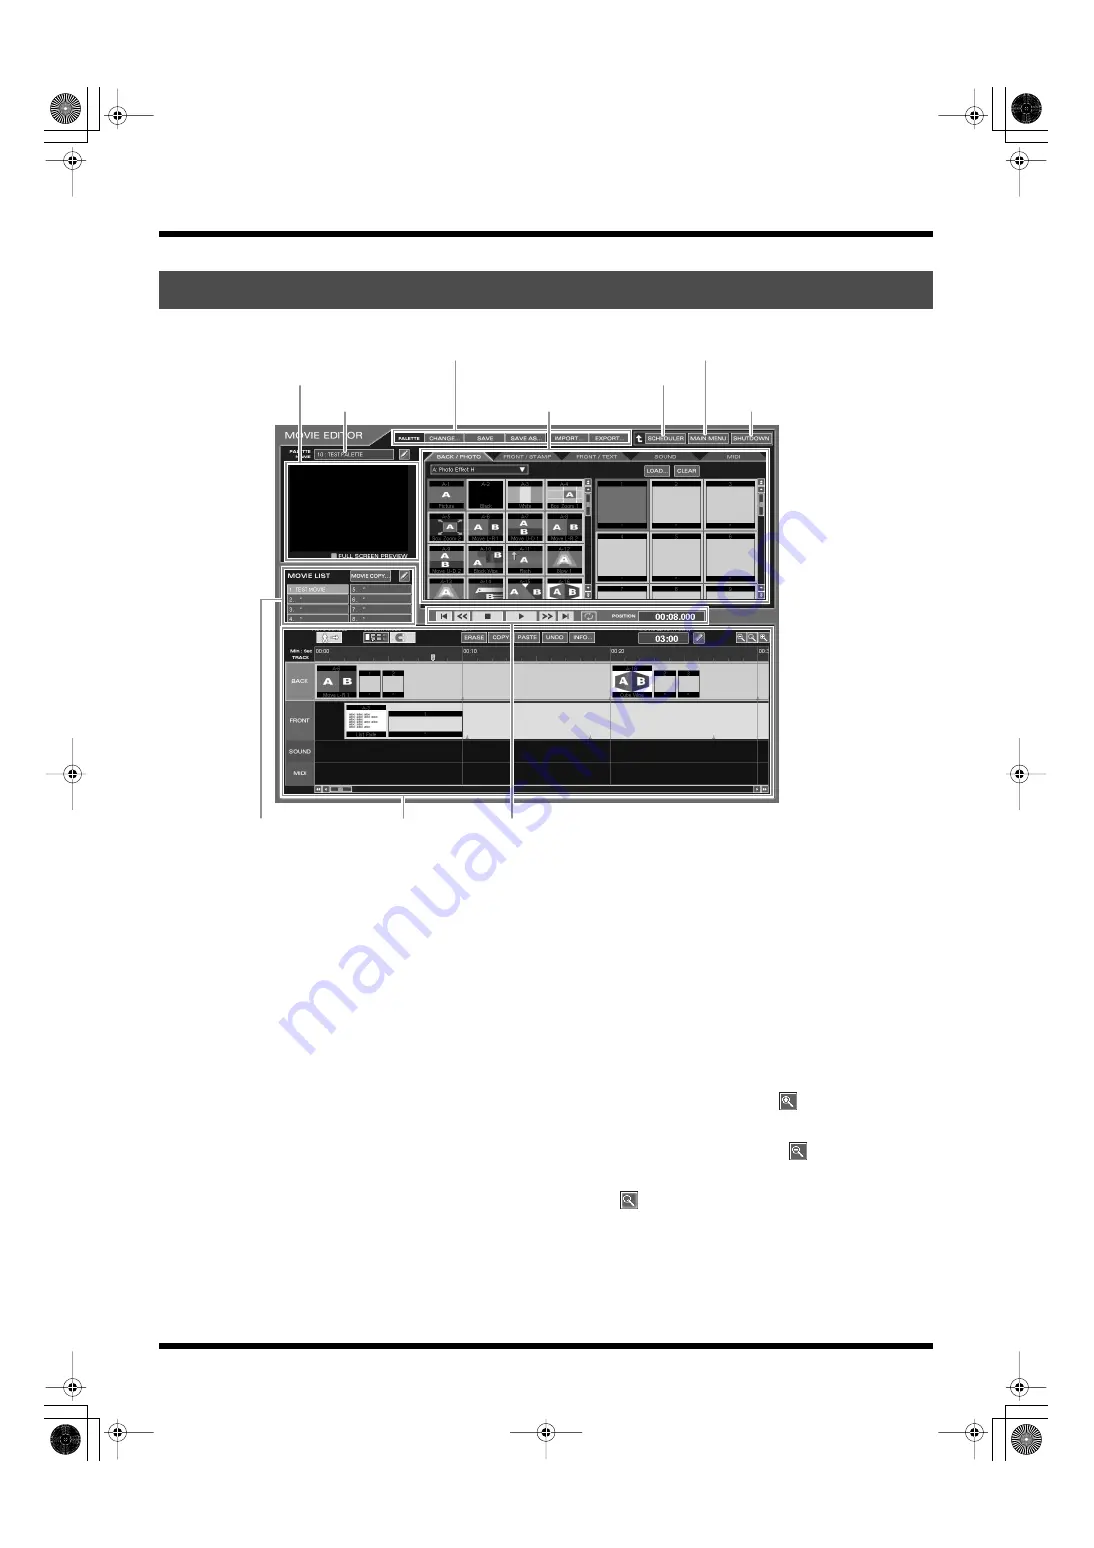
• PREVIEW area
Here you can monitor the movie.
• PALETTE NAME
The palette being edited.
• PALETTE editing area
Here you can edit the palette, such as saving it under a
different name or exchanging a palette with other projects.
• Material area
Here you can select the effects and material for each
category to create the movie.
Click to select the category tabs to show the list of contents.
– “BACK/PHOTO”: Background effects, photo material
– “FRONT/STAMP”: Front effects, stamp material
– “FRONT/TEXT”: Front effects, text material
– “SOUND”: Sound material
– “MIDI”: MIDI material
Move the scroll bar at the right side of the list to scroll down
for other materials.
• MOVIE LIST
Shows the movies saved to the palette.
• Control area
Click to play or stop the movie. You can also monitor the
elapsed time.
• Timeline
This is where you place the clips and data on the various
tracks to create the movie.
The clips and data are shown on the time track.
The time is shown on the upper level of the track. The left
end of the clip or data icon indicates their starting point.
Move the scroll bar at the bottom of the timeline to scroll
forward or backward in time.
To zoom in on the timeline, click
. Here you can edit the
material more precisely.
To zoom out on the timeline, click
. Here you can edit a
long movie, or get an overall view of the entire movie.
Click
to return to the default size of the timeline.
Features of the MOVIE EDITOR screen
Control area
Timeline
MOVIE LIST
Click to shut down the
system (Standby mode).
PALETTE NAME
Material area
Displays the SCHEDULER screen.
PREVIEW area
PALETTE editing area
Displays the MAIN MENU screen.
000RG-100.book 50 ページ 2004年8月6日 金曜日 午後5時37分


