


87
Practical Use of the PR-50
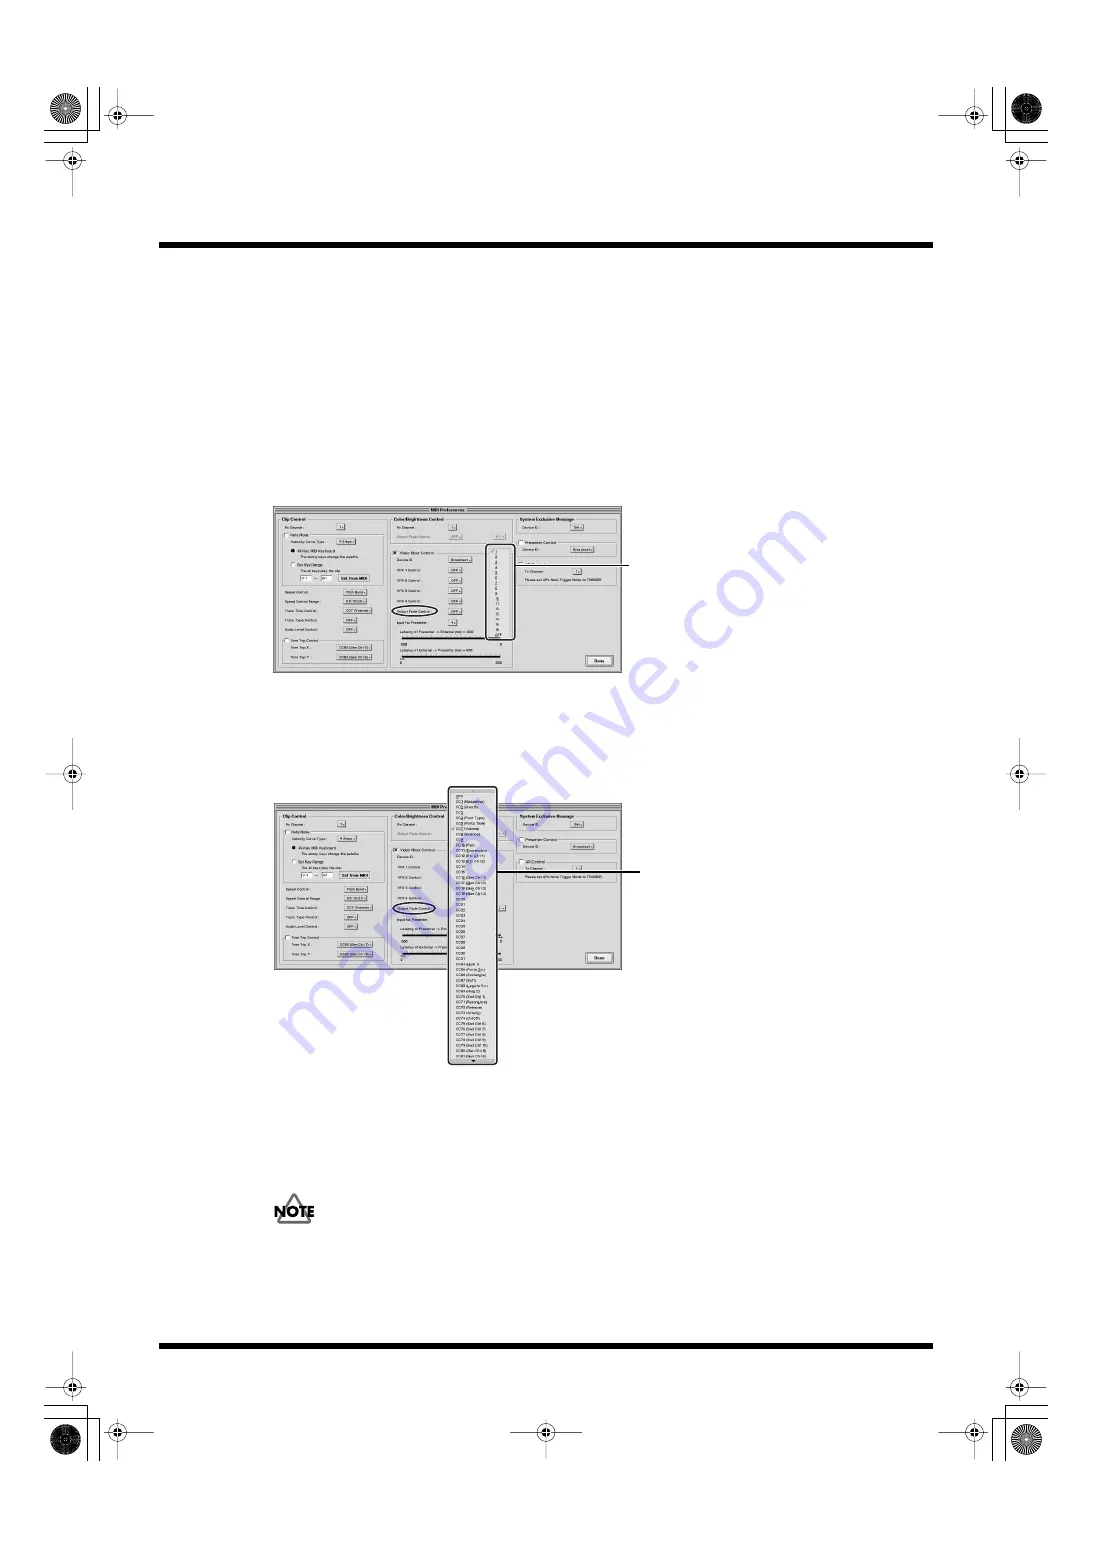
Controlling Fades
Set the MIDI preferences.
These settings are saved without regard to the project.
With these settings made, you can use a MIDI device for the following operations.
Controlling Fades
This controls fading applied to the final output video (output fade). This is set in Step 7.
1.
Click the [MIDI Preferences] button in Play mode or Edit mode.
2.
Set the MIDI channel to be used for the fade control with the “Rx Channel” setting in “Color/
Brightness Control.”
fig.midi07.eps
3.
The MIDI message that sets the fade applied to the final video output is set by means of
“Output Fade” in “Color/Brightness Control” (controls are not accepted via MIDI when this is
set to [OFF]).
The fade applied to the final video output is set with the selected MIDI message.
fig.midi08.eps
The range of MIDI values, 0–64–127, corresponds to the minimum to maximum values for the
parameter.
You can select the polarity of the control with the box on the right side. Select “+” to set the
parameters targeted for MIDI control to [0: normal playback–64: 50% white fade–127: 100% white
fade], “-” for [-127: 100% black fade—64: 50% black fade–0: normal playback], and “+/-” for [-127:
100% black fade–0: normal playback–127: 100% white fade].
Presenter’s output fade cannot be controlled with MIDI while the V-4 control function (p. 93) is on.
4.
Click the [Done] button
Select the Rx Channel
Select a MIDI message
PR-50_e.book 87 ページ 2006年11月2日 木曜日 午後6時29分


